
The hardest part in cleaning a 1911 for most people is disassembling it. That’s more a comment on how easy they are to clean than how difficult they are to take apart. But since a 1911 isn’t as simple to take down as, say, a GLOCK, I will be covering proper disassembly and reassembly in this cleaning guide as well.
What’s covered in this article in terms of cleaning can be applied to pretty much any semi-auto pistol. The overall concept is simple. Wipe off all the dirt and dirty lubricant and apply some fresh gun oil.
There isn’t really a right or wrong way to clean a gun. As long as you clean it to your personal standard and don’t damage it in the process, you’ve succeeded. Gloves and eye protection are recommended when dealing with solvents and filthy gun gunk.
I run my 1911’s basically the same way I run my striker-fired pistols. Before I start shooting, I put a light coat of oil on the rails. After shooting, it goes back in the bag or back on my belt. When the gun has become so caked with carbon and dirty oil that I don’t really wanna hold it, I’ll clean it.
The Quick Clean
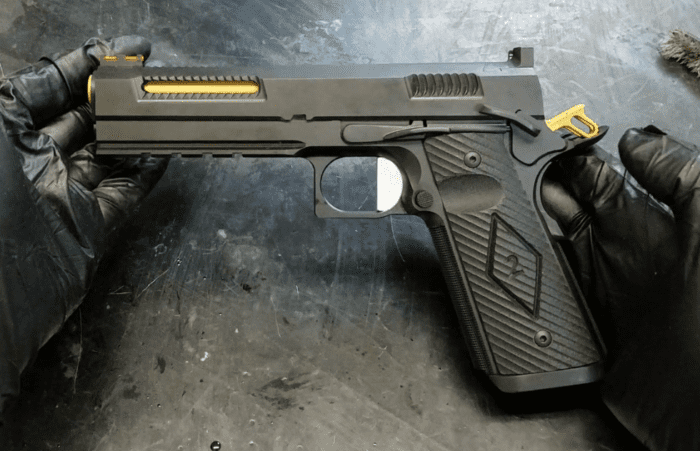
First, make sure your gun is clear and safe. Then start by field stripping the gun.
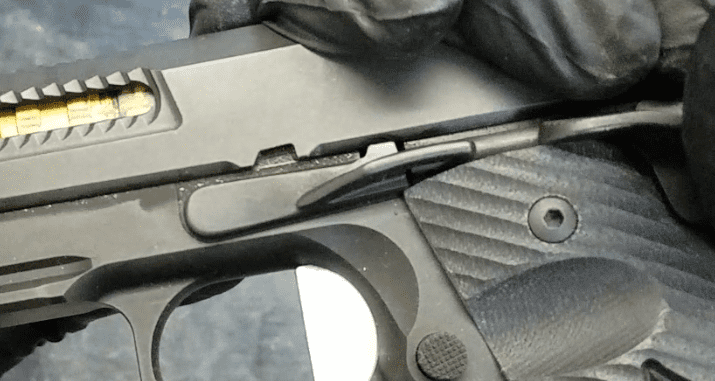
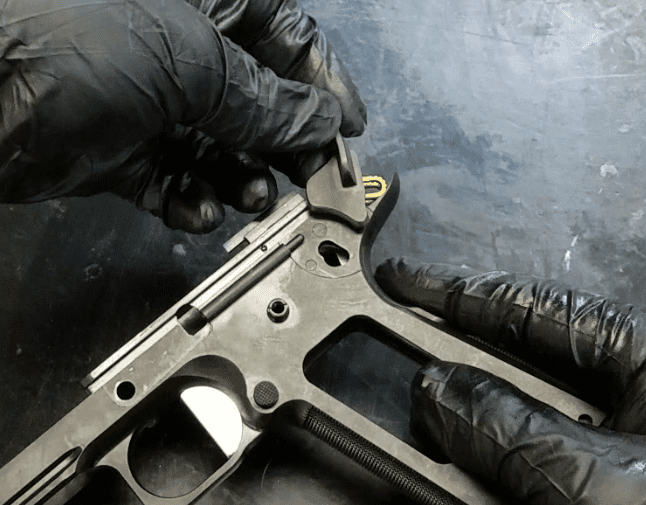
Although a field strip normally implies no tools, some 1911s will have tight barrel bushings and require a bushing wrench to remove. I prefer to remove the slide first like a CZ (some prefer to remove the bushing first). Pull the slide back so the circular cutout in the slide lines up with the rear of the slide stop.
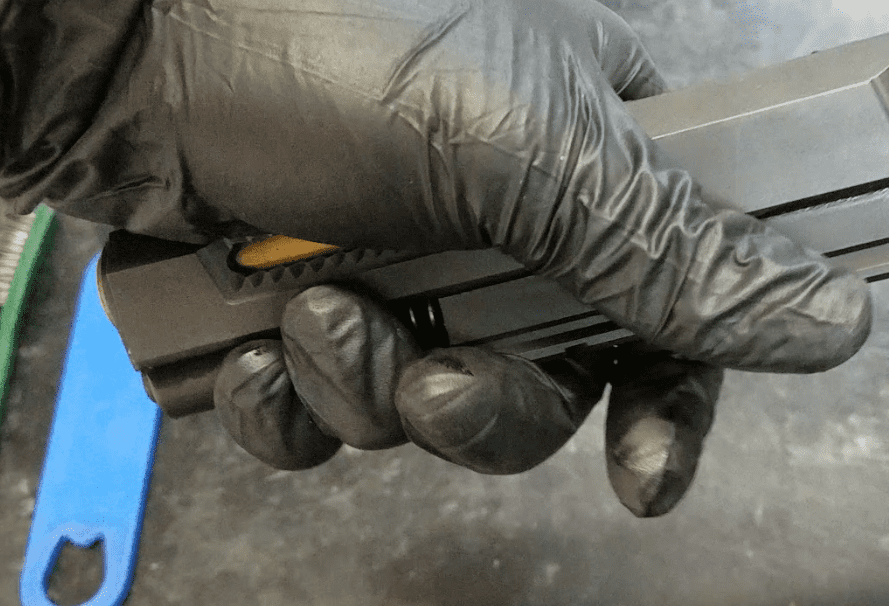
Push the slide stop out from the other side of the gun, then gently let the slide forward. Use your other hand to capture the recoil spring and keep it from flying off as you remove the slide from the frame.
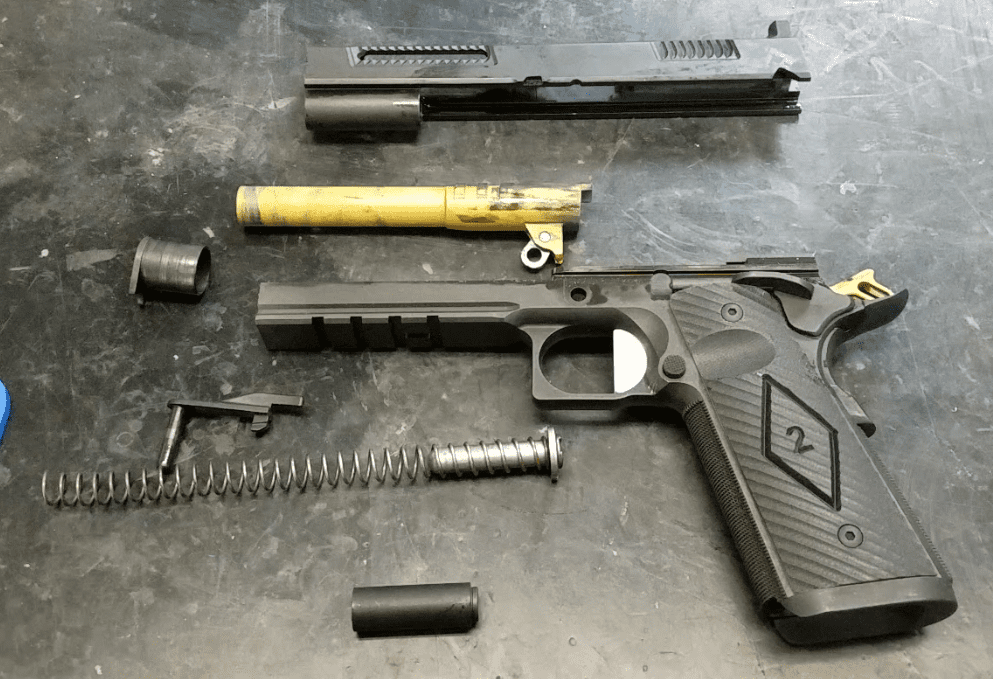
Let the recoil spring and guide rod out easy, then twist the bushing counterclockwise and remove it along with the barrel. Some people don’t bother taking the barrel out for this level of cleaning, but it’s simple and makes things a little easier.
Use a rag or some paper towels to wipe everything down. You can buy a cleaning kit, but I find some sort of solvent like Hoppe’s Elite Foaming Gun Cleaner and some gun oil do the job.
Get the gunk out of the slide rails and make sure there’s no fouling on the feed ramp. Run a Bore Snake through the barrel. Get everything wiped down to your preferred level of cleanliness, apply a light coat of fresh oil and reassemble. Rack the slide and check for smooth, proper operation and you’re good to go.
The Deep Clean
Most shooters are only comfortable field stripping their gun for regular quick cleanings. That’s fine most of the time. But every pistol should occasionally be deep cleaned to ensure internal parts are cleaned and lubed.
That requires a full disassembly or detail strip of the pistol. Start by field stripping the gun, as above.
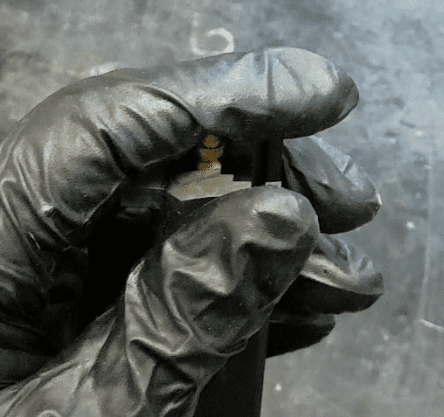
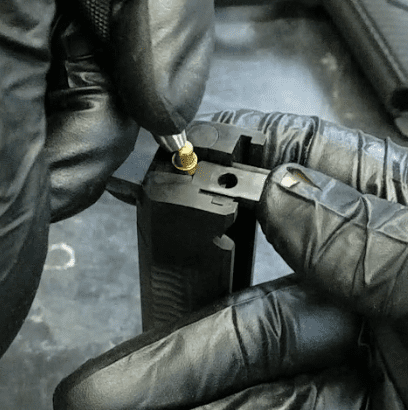
Grab the slide and a small punch. Push the firing pin in, then pull down with the punch to remove the firing pin stop plate.
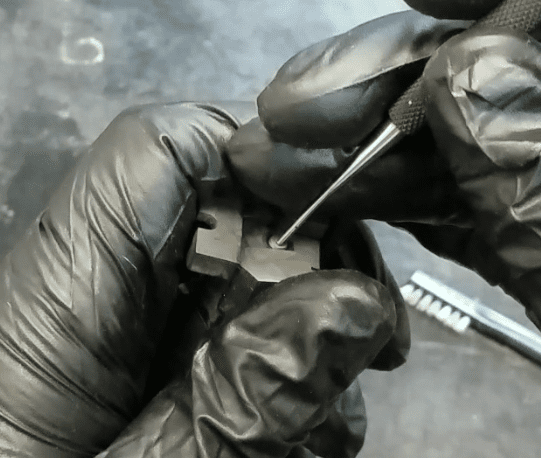
The firing pin is sprung, so make sure you cover the firing pin with a finger to keep it from flying off.
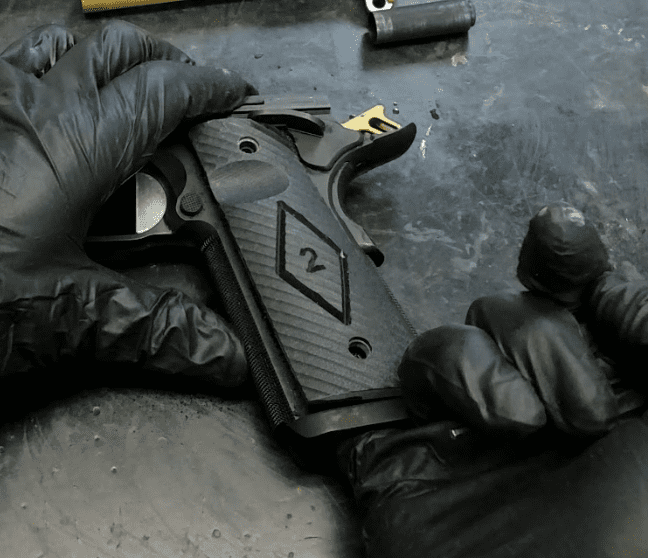
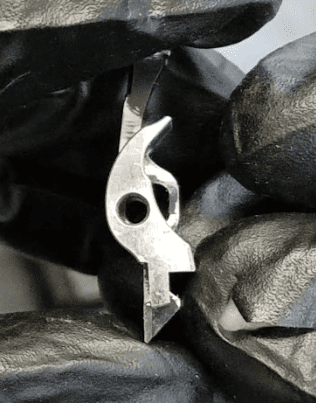
With the stop plate removed, the firing pin, firing pin spring and extractor can all be taken out. To disassemble the frame, remove the grip panels. If they’re stuck, reach into the mag well with whatever finger fits and press on it from the inside. It should pop off.
Next, remove the mainspring housing by tapping out the mainspring housing retaining pin and sliding it out.
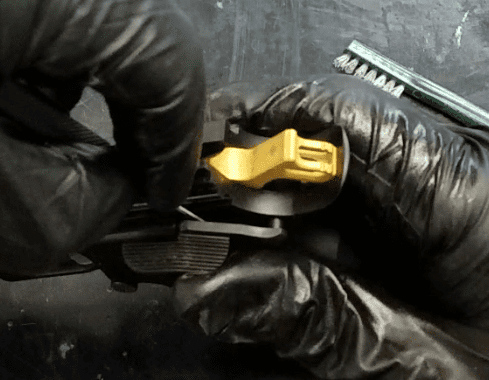
Next move the hammer to the cocked position and wiggle out the thumb safety. It will come out somewhere between the safe and fire positions. Cover that area with your hand, as the safety plunger will want to shoot out of the plunger tube once the thumb safety is out of its way.
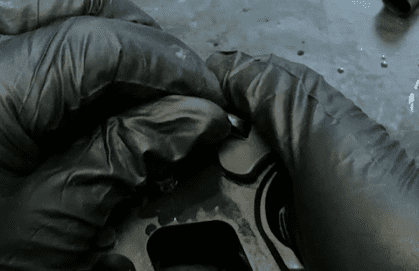
With the thumb safety removed, the grip safety and sear spring should fall out. Push out the hammer and sear pins, and the hammer, sear, and disconnector will all fall out too. To remove the magazine catch, press the mag catch just a little, then turn the mag catch lock counterclockwise.
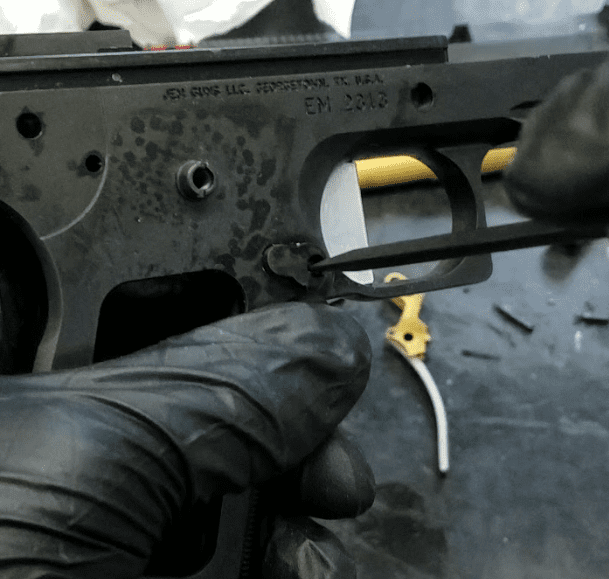
It should turn easily. If it isn’t, you need to push the magazine catch in a little more or a little less. There’s a sweet spot there.
Now that the magazine catch is free, the trigger should come right out. With the gun fully disassembled, you can start cleaning.
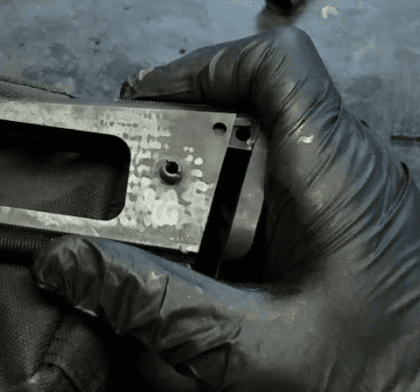
I like taking a nylon brush and scrubbing everything down, again using the cleaner of your choice. I pay special attention to the feed ramp and barrel throat as well as the extractor. I make sure they are completely carbon/dirt free.
Pay close attention to areas that have moving parts. This applies to the rails on both the frame and the slide, the space in the frame that houses the sear and hammer, the trigger track and the magazine well.
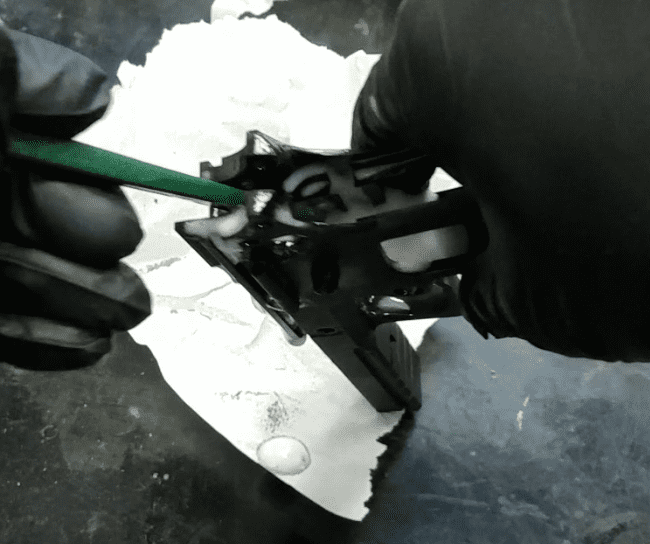
Clean the barrel with whatever cleaning rod you have or a Bore Snake. I like to use the snake.
Once you’re satisfied with the level of cleanliness of all the parts and you’ve applied a light level of lubrication, you can re-assemble.

Start with the trigger and magazine catch, they go in just as they came out. Once those are installed, grab the disconnector and sear. Make sure you orient them properly.
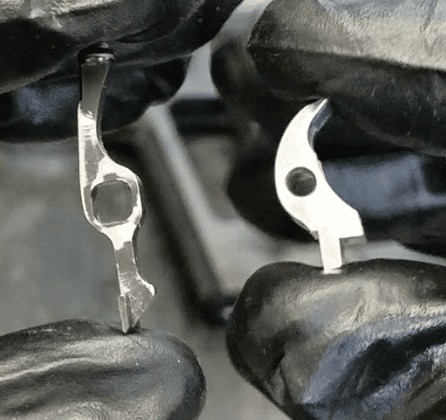

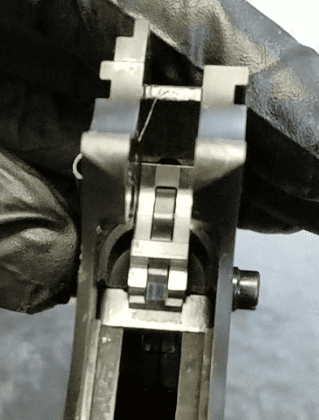
Once they’re in the frame, I like to turn the frame on its side and use a small punch to line up the holes.
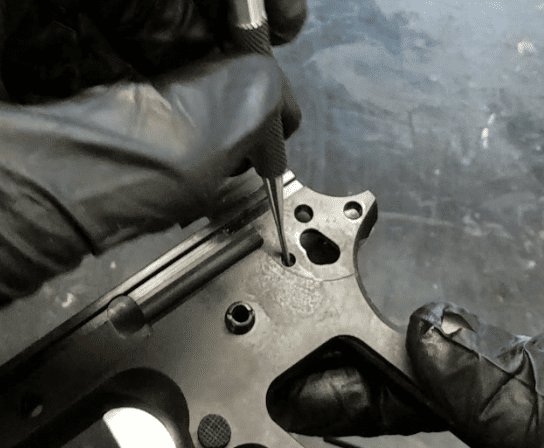
After that, the sear pin drops right in. Install the hammer next. Flip the hammer strut up and out of the way so you can install the sear spring.
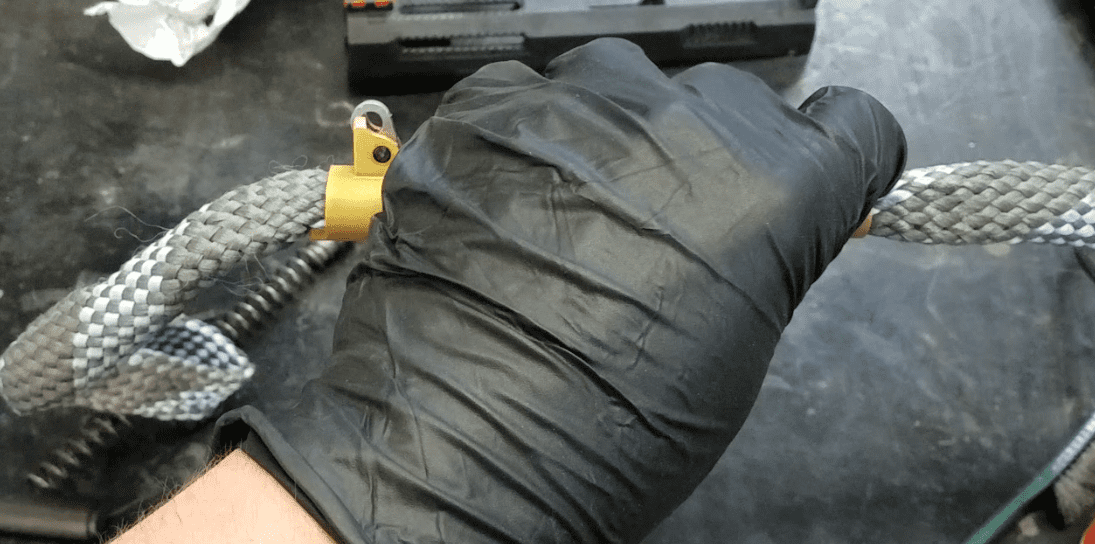
I like to start the mainspring housing in the frame in order to keep the sear spring from falling out. Put the grip safety in the frame and start to insert the thumb safety. Twist the thumb safety out of the way so you can install both plungers and the plunger spring into the plunger tube.
Cock the hammer back and push the thumb safety in until the plunger stops it. Grab a small punch or screwdriver and push the plunger into the plunger tube as you push the thumb safety the rest of the way in.
Set the hammer forward against the frame so you can fully install the mainspring housing. Make sure the hammer strut is properly aligned and the bottom two feet on the grip safety are captured by the mainspring housing.
I will operate the trigger to make sure everything is working right. Don’t let the hammer strike the frame, block it with your thumb or hand.
The thumb safety likely won’t function properly without the slide installed. If the slide isn’t there to limit the upward travel of the thumb safety it may move too far up and no longer properly block the sear. Don’t be alarmed, you can confirm it works once the slide is installed.
Grab the slide, install the extractor, firing pin spring and firing pin. Line up the stop plate and push it in until the firing pun blocks its progress. Grab a punch and push the firing pin down so the stop plate can fully seat.
Apply a little fresh oil to the rails (a little goes a long way) and get ready to pop the slide on.
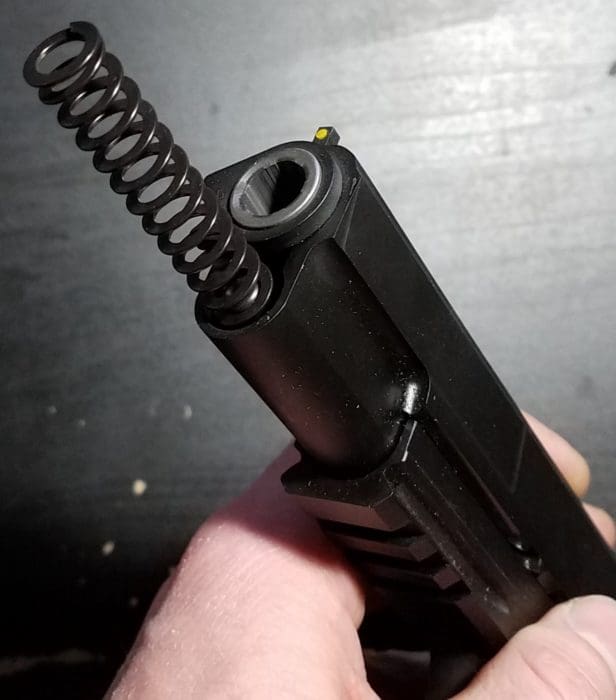
If you have a 1911 frame with a standard-length dust cover, install the barrel and bushing. Turn the bushing clockwise as far as it will go. Install the recoil spring and recoil spring guide rod with the spring sticking out the front. Put the slide on the frame and install the slide stop.
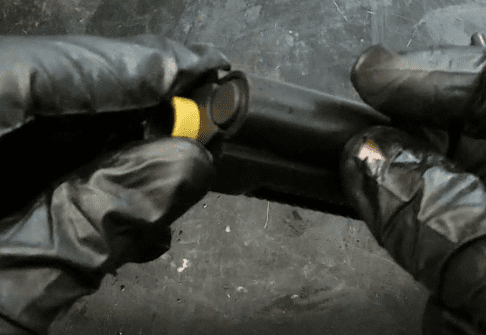
Cock the hammer and put the thumb safety on. Put the recoil spring plug on the recoil spring, push it down and twist the bushing to capture it.

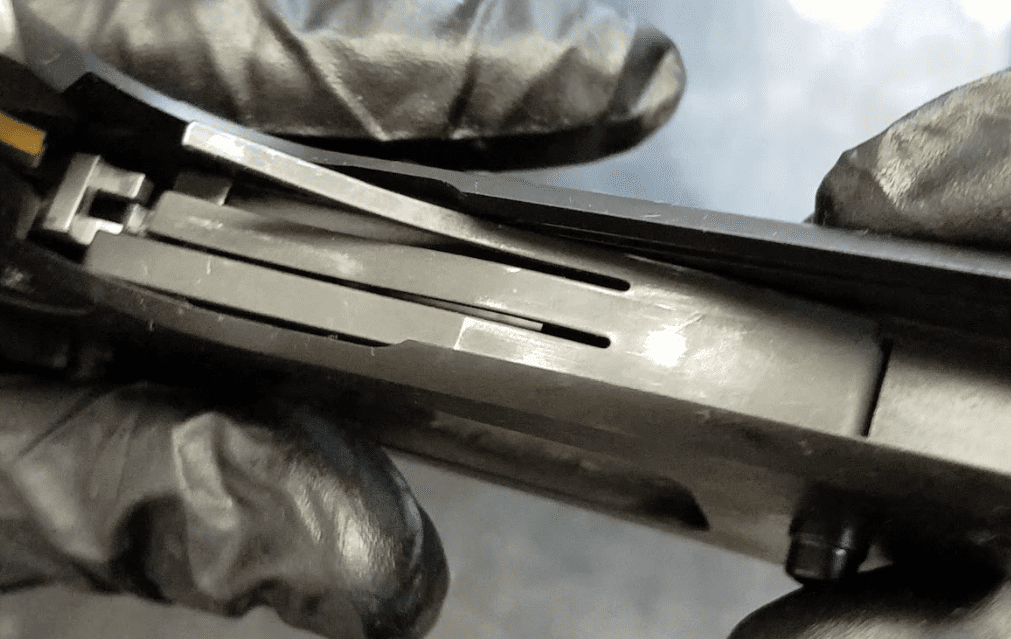
Putting the safety on keeps the slide from moving away as you try to push the spring down. Your slide stop SHOULD have a notch on the back side.
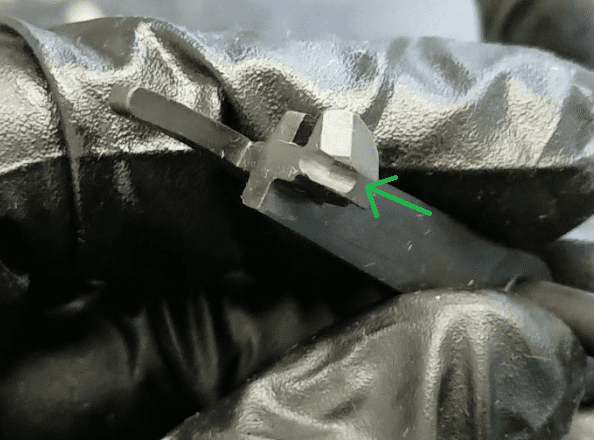
This notch lines up with the plunger to make it easier to push the slide stop straight into the frame. Don’t set the slide stop low and try to push it up and in. That’s a good way to scratch your frame. If your slide stop doesn’t have this notch — and not all of them do — you’re SOL. Just do your best not to scratch your frame.
If you have a full-length dust cover, I prefer to install the barrel, bushing and recoil spring plug in their final configuration.
Then I put the recoil spring and guide rod in, compress them down and hold it in with my thumb.
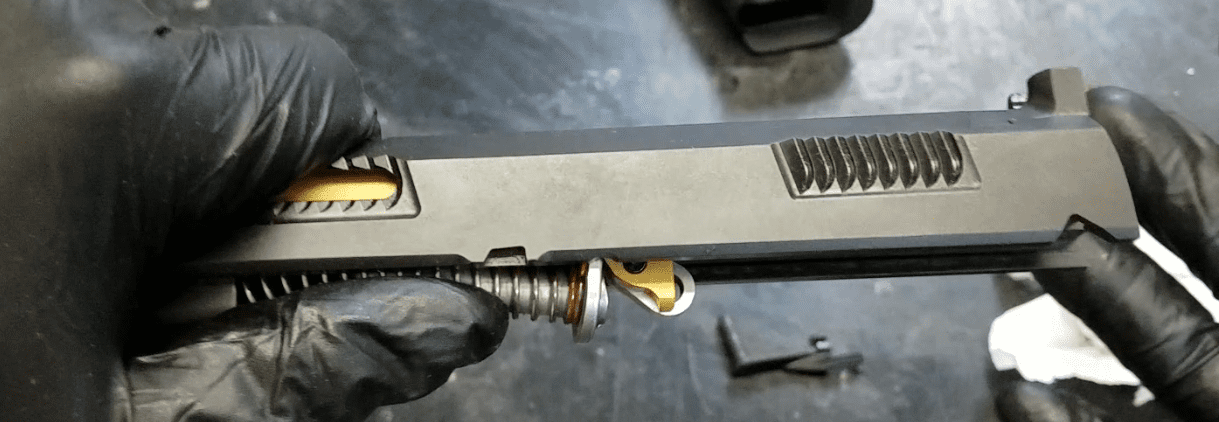
I slide it on the frame and then install the slide stop.
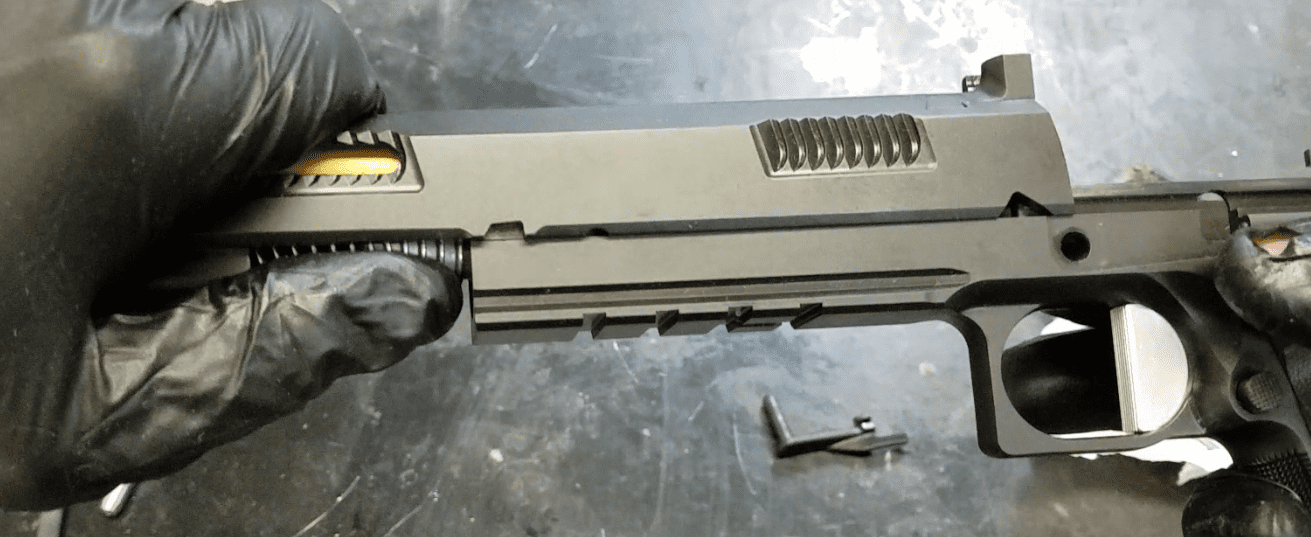
I think this is a little faster. It definitely feels easier. I don’t like doing this with standard-length dust covers because it doesn’t seem to work as well.
And that’s it. You’ve fully dissembled, cleaned and reassembled your 1911.
How often should you clean your gun? That’s very much user preference. I like to do a quick clean every 200 to 300 rounds and a full detail strip and clean between 1500 and 2000 rounds.
Lots of gun owners find gun cleaning fun and even relaxing. It’s also a great way to learn exactly how your pistol works, which is always a good thing.
Matt Sandy is a gunsmith who competes in both USPSA and PRC matches.


… there’d be less cleaning necessary if not for the stupid window cuts in the slide. Form follows function, especially with something you’re staking your life on.
Nobody’s going to be carrying that blued equivalent of a gold neckchain to anywhere other than a fancy barbeque … and stuffed into a fancyass highride holster for max presentation.
A dust cover with mud holes. That makes sense.
The open-slide design of the Beretta must really get your panties in a twist.
Nope, not at all, as it lacks a tightly fitted barrel bushing and has a non-tilting barrel.
Ahh, the self-cleaning, non-tilting barrel….
I notice your using a flat wound recoil spring.
Do they give you better longevity or is it just for the elimination of binding?
I knowledgeable fellow once told me, ” The more you change JMB’s design the more problems you’ll create.”
I was taught in the military to ALWAYS do s function check on a weapon after reassembling it. Also check to make sure you don’t have any extra parts that you forgot to put back in….
We used to clean our weapons by bringing them into the shower with us and just hosing the crap out of them with hot soapy water and then rinsing them off with even hotter water. Shake them dry before even drying yourself off and by the time you get dressed again most of the water has already evaporated from the hot metal parts.
Then we did a detail cleaning after a complete disassembly, oiling every part and wiping it down dry again got them squeaky clean and not a hint of moisture left over. Jam the bore brush down the barrel and a few patches until it comes out clean. The shower GREATLY reduces the time it takes to clean an M-60 that had a few thousand rounds through it, but also helps cut down on the work on other firearms too.
When you’re done cleaning it, sell it.
Isnt that kind of like trying to sale your Vespa at Sturgis?
I’m not saying you’d get a lot of money, but at least you’d have one less POS in your armory.
I’m a 1911 fan bouy. It and a long rope is what helps hold the bouy in place when the fans blowing.
I think all that is in my DNA.
Why the gloves ?
Heh heh, My nephew watched me clean one of my gunms when I was wearing rubber gloves. When I got finished I handed him the gunm with a “What do you think of it?” when he handed it back I put it in a zip lock baggy. The look on his face was priceless
Thats damn funny right there!
the 1911 jokes almost write themselves dont they
No matter how careful you are, the barrel bushing will launch itself into low earth orbit 50% the time.
By the way JMB designed the barrel bushing there is zero chance to launch the bushing. When installing the bushing it’s pushed flat up against the slide nose and rotated counter-clockwise til it stops. There’s a small stud that locks into a cut inside the nose of the slide. The bushing is now captured. Then you drop in the recoil spring with the recoil spring plug in-place. When you’ve fully compressed the recoil spring til the recoil spring plug is flush with the nose of the slide you can partially rotate the barrel bushing til the ‘leg’ of the bushing catches the step at the end of the recoil spring plug. Now you can relax and change your grip. After your fingers are uncramped you recompress the spring and finish rotating the bushing til the recoil spring plug clicks into place.
BTW if you reeeally want to have an adventure with a reeeally tiny spring try detail stripping a Colt Gold Cup, this is the factory bullseye 1911. To maintain contact between the sear and the hammer during recoil Colt put a reeeally tiny spring into a reeeeally tiny pocket into one leg of the sear. That’s not the only reeeeally tiny part. Colt, in their wisdom, also designed a reeeeally tiny spring retainer to keep the reeeally tiny spring in place. It is a very wise person who keeps multiples of these reeeally tiny springs in-stock for the inevitable ‘plink’ when that reeeally tiny spring decides to enter another space-time continuum. Ask me how I know. Note: this little boobytrap was NOT designed by JMB.
that’s EdP.
I guess Tik-Tok’rs and 1911s just go together like oil and water.
Tik-Tokmorons go with the clap.
Actually a very informative article, thank you.
How to clean a Glock.
Step 1: ask why?
Step 2: do something else.
Phil, they have to be cleaned too. Ask Glock.
Vs the 1911 in the article….
https://us.glock.com/en/own/caring-for-your-glock
“Caring for Your GLOCK
To make sure your GLOCK pistol keeps working reliably, you should clean and lubricate it on a regular schedule. Refer to your owner’s manual for the proper lubrication points, as well as the proper amounts of lubrication required.
Your GLOCK pistol should be cleaned and lubricated:
When it’s brand new, before it’s fired for the first time
After each time it’s fired
At least once a month, if it hasn’t been used in that time
If it’s been exposed to rain, snow, perspiration, salt water, dirt, dust, etc.”
vs the 1911 as stated in the article…
The 1911 in the article is doing what he is calling a ‘field strip’ but its more of a detailed strip to clean, nothing wrong with that. But a ‘field strip’ for cleaning should not involve a lot of pins and smaller internal parts laying around because you took the whole firearm apart…. field stripping is suppose to be disassembling a firearm to the greatest possible extent 𝘄𝗶𝘁𝗵𝗼𝘂𝘁 𝘁𝗵𝗲 𝘂𝘀𝗮𝗴𝗲 𝗼𝗳 𝗮𝗻𝘆 𝗲𝘅𝘁𝗿𝗮 𝘁𝗼𝗼𝗹𝘀 and clearly the author is using extra tools to go beyond into detail. But I guess some people see a field strip that way, and that’s ok for them.
The video I posted above, is showing the ‘routine’ Glock recommended field strip cleaning and lube procedure. Its not necessary to detail strip a Glock to clean and lube it but you can if you want, its your gun.
Does Glock have a customer service department? I wouldn’t know. I’m in the shoot it till it stops group. I’ll let you know if it stops. I guess I do clean my G19 every year or so.
BTW- I know all about how to strip and clean a 1911. Well, I think I remember anyway. It’s been 10 years since I got rid of my 1911. As I recall it included a quick prayer while leaning away from the barrel shroud, as well a pledge to only use round nose ammo.
Resigned to the fact that I will never clean a Gluck. Or ride a bike w/training wheels, post on tik-tok, burn to death driving Tesla/”EV”, or vote for a prog. Oh well/so sad.
And then the idiot scratch happens’
One of the many reasons my 1911/2011s generally stay in the safe these days and I shoot 5,000+ rounds on my Glocks between cleanings.
Comments are closed.