


There is literally no end to the number of items that can be mounted on an AR-15 rifle in some fashion, whether it’s a high-end $4,000 scope designed for extreme range shooting or a rail-mounted bottle opener for extreme range drinking. Of all the things that you’re able to stick on an AR, though, the most common and seemingly least understood are iron sights.
Most people have a basic working knowledge of what iron sights are supposed to do, but often not much understanding of what makes them work or what they’re really good for. I hear it said over and over again these days that red dot sights and scopes are in all ways superior to iron sights, which, for many shooters, are nothing but close-range afterthoughts. But this is far from the truth.
The first myth we need to dispel is that AR-15 iron sights are cheap and outdated. The folks who think that are usually the same people who buy a budget set of low profile Picatinny-mounted iron sights that folds down, think of them strictly as backups, and only zero them by making them line up with their red dot in order to co-witness.
If you’re thinking that iron sights are the gun equivalent of that near-useless donut tire in your trunk, you’re doing it wrong. Don’t buy a cheap set of folding flip-up sights and expect them to perform with any degree of repeatability or precision. You can sometimes get away with just a rear sight if your gun already has a front sight integral to the barrel.

The “battle sights” I’m referencing here are usually found on the budget/junk tables at gun shows, right next to those $50 ‘tactical’ scopes and ‘military’ grade lasers. If you’re paying only $25 for a set of irons, you aren’t spending enough and you’re getting even less.
I don’t want to be a snob about it, but I guess I kinda am. I consider iron sight sets that are in the $125-300 range to be of the best quality. You can even get good set of BUIS with a 45 degree offset in this price range to use in tandem with a magnified optic.
I talked to a guy at the range when I was working on another article who had a $2,500 AR. His nice rifle was sporting a set of knockoff Magpul MBUS flip-ups mounted ‘just in case the SHTF’. It was obvious to me that he lacked the experience to prioritize some of the most important aspects of his gear.

Most $1,500 rifles are easily as good has the one he bought, and with the $1000 he’d have saved, he could have afforded a better, well, everything else he had attached to it. A great rifle is nothing special when you’re aiming it with junk.
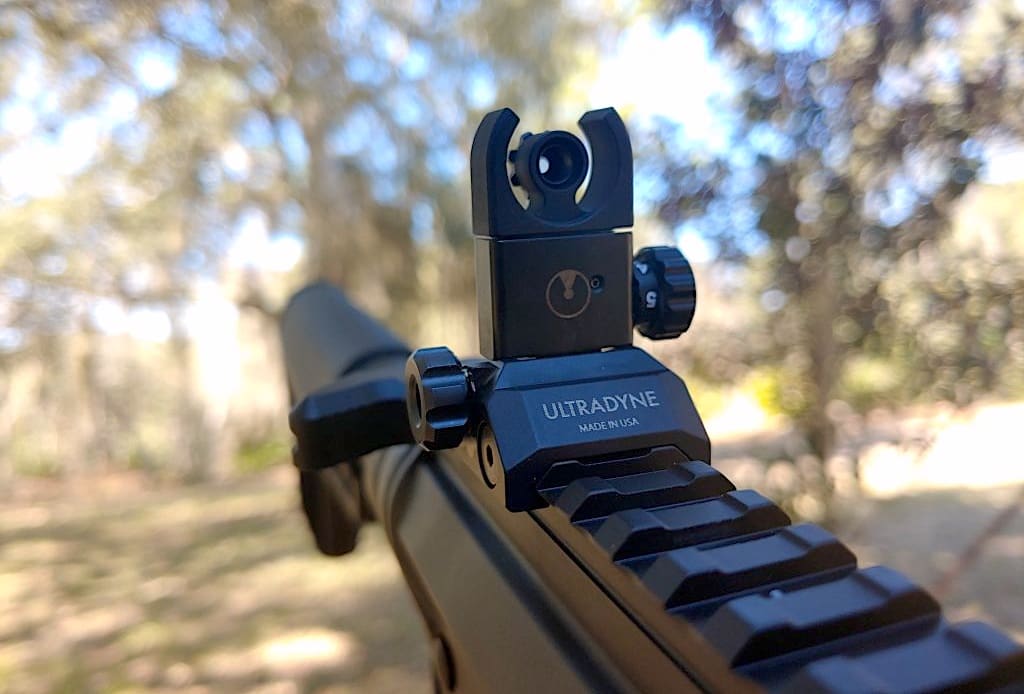
A high quality set of AR-15 iron sights will give you greater precision than any red dot and many magnified scopes. If you have cash for a cheap scope in the $200 range, realize that the USA-made, world-class set of sights pictured in this article, the Scalarworks PEAK sights, are $130 for the set. You can either buy cheap, easily-broken gun show junk, or you can buy something that works and will last. Your choice.

This brings us to the next problem associated with AR-15 iron sights: zeroing. There are many philosophies surrounding this and lots of ways to zero a rifle. Some can be hard to grasp, especially for newer shooters.
I’m a National Match competitor and have won all my CMP medals with iron sights, but they are never zeroed at point of aim. How is that possible?
Well, I zero for what is called a six-o-clock hold, which means that my front post is aimed at the bottom of the black target center. My bullets impact about 7” high at 200 yards, which puts them in the center of the black.
The actual point the bullet intersects the tip of my front sight is somewhere around 275 yards depending on the caliber/bullet used. That means I can hold just a touch high to hit deer-sized game out to 325 yards, but would need to hold a bit low at 100 yards to be sure to hit the vitals, as I’d be hitting too high at that closer distance.
Having a ‘floating’ zero may seem like a foreign concept, but you’d be surprised at how accessible it is after a range session or two.
The idea of a zero at a fixed distance is a myth. All that iron sights do is give you a reference to a specific point along a bullet’s trajectory, but it’s very flexible.
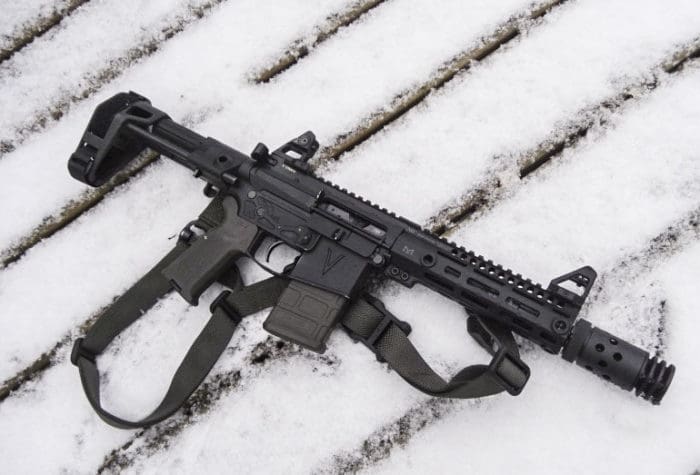
If I were to take the gun in the photos, which is a 7.5” barrel 300 Blackout rifle, and zero it at 100 yards for point of impact (bullets hit right on the tip of the front sight) I can hold center mass on anything out to about 200 yards using most supersonic 110 to 125gr ammo. Past that, I can just hold high on the target, about head level, and hit center mass again.
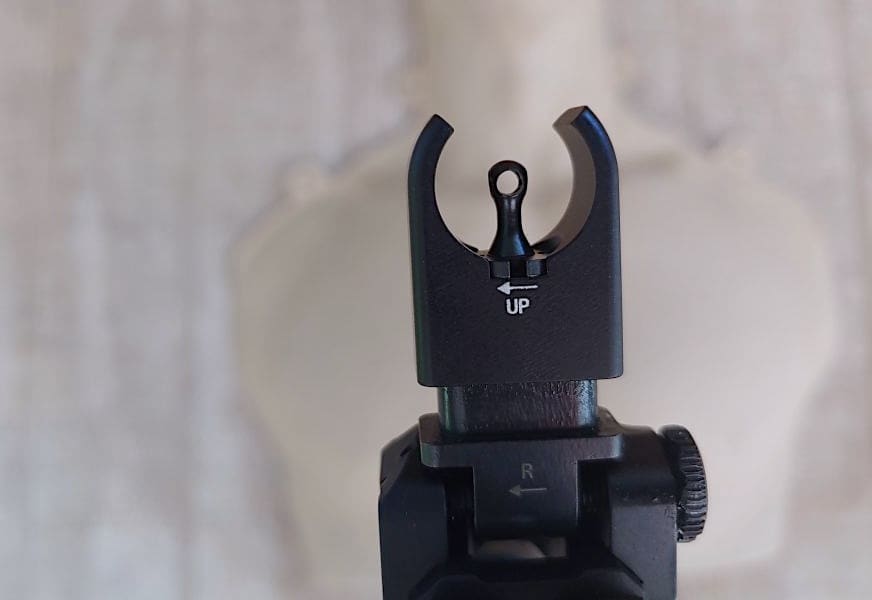
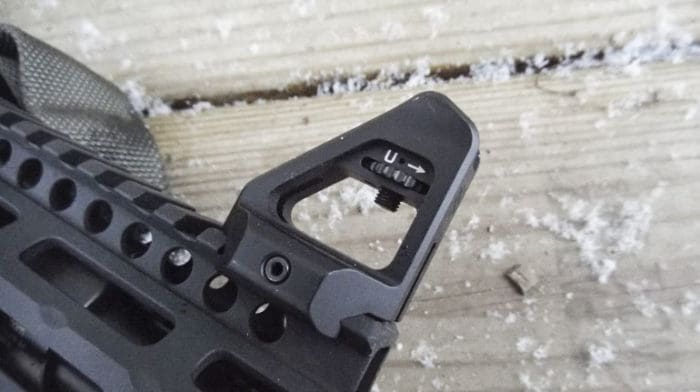
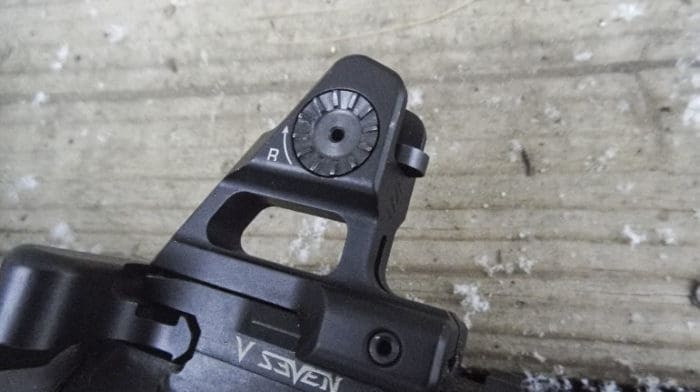
If I wanted to be more precise at longer ranges, I can adjust my front sight just like I would on a scope. The PEAK sights are great in that they allow toolless, repeatable adjustment.
Advantages to having iron sight include their ruggedness and ability to hold their zero even with bumped getting in and out of the stand. It’s much harder to lose zero with irons as the sights are attached in a much more integrated way than a scope.
Scopes, being more delicate, are more prone to damage. Everyone has at least one story of smacking their scope on something before a key shot. You can idiot-proof your gun to a certain degree by removing glass from the equation, especially since most hunting occurs inside 200 yards anyway. That’s well within the effective range of most good iron sights.
The zero you want for an ‘emergency’ is one that accounts for the flattest part of your round’s trajectory. This idea includes both ‘close’ and ‘far’ zeroes. Many AR shooters zero their sights at 50 yards, which is the ‘close’ zero. The bullet will rise above point of aim in the meantime and again cross that point of aim somewhere around 200 yards.
This isn’t a precise means of zeroing, but it works for a lot people for their intended use. If you do this, understand that there’s no “magic” zero. You will certainly have to test it at all ranges you plan on shooting.


An easy way to zero is to do it at 100 yards, as most iron sight usage will take place inside that distance. Many shooters find it hard to see or aim at longer ranges, but it just takes some time to learn and you’ll be able to adjust your sights as you gain skill and learn how to best apply them.
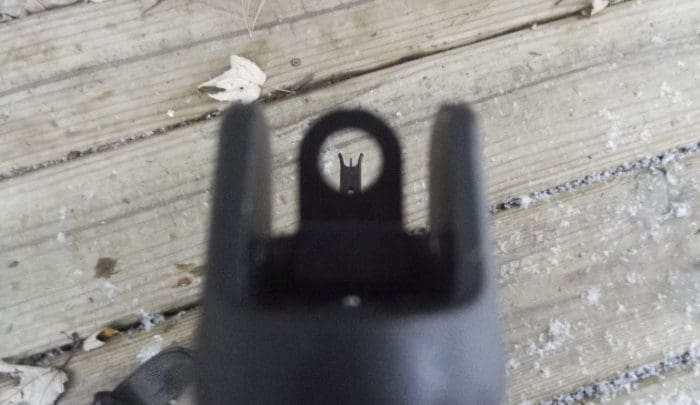

The last part I’ll address here is the size of the physical sights. Most front sights I see out there are far too thick. A wide front post won’t allow for precision shooting. That’s made worse by sloppy rear sights that have apertures with random dimensions.
The PEAK sights I recommend have a fine front post and a flip-style rear sight with both fine and wide same-plane apertures. Your elevation setting won’t change by switching between apertures, unlike many other sights out there. I like the wide one for close work and the fine one for precision shooting at longer ranges.
Give shooting with iron sights a chance. If you haven’t tried them before, you may be pleasantly surprised by their affordability, their accuracy, and their durability.
Although it takes a little getting used to, if you try out various styles and techniques, you’ll find a zeroing style that works for you. Once you practice a little, you’ll be very accurate at a surprising range of distances. You may even find yourself converting others at the range and sharing your success story with the skeptics.