


[This is the second post in a series on 3D printing for producing your own homemade firearms and accessories. See our first post here. Despite the best efforts of federal and state level politicians, making your own guns at home for your own use is still legal in almost every state (some require registration…check your local laws)].
By Ivan the Troll
Now that we have a basic understanding of 3D printing from the previous article, it’s worth delving into what exactly is possible in the 3D printed firearms world – some things are obvious, but some go beyond even the wildest expectations of folks who are new to it.
For those wishing to download files in the background while you read – here’s a link to a listing of Deterrence Dispensed’s tested releases.
Major Printable Firearm Parts
These are a few of the more noteworthy 3D printable ‘firearm parts’ – the frames and receivers that are regulated as firearms in the US. It’s worth mentioning that the estimated cost/lifespan of these parts depends on a number of factors, so the numbers provided are more baseline values than maximum or ideal numbers.
GLOCK 9mm Frames – G17, G19, G26

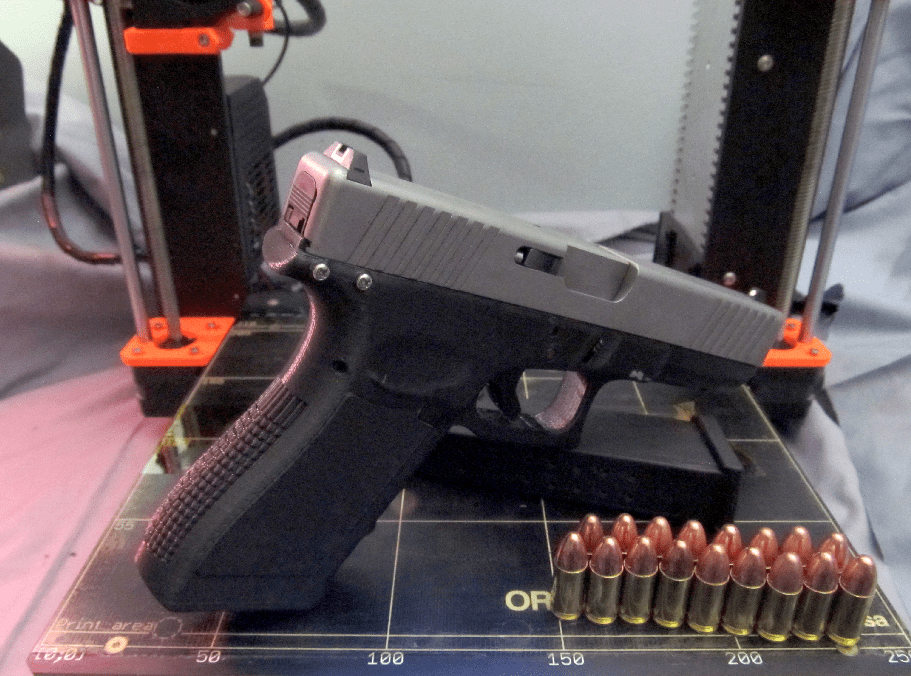
These frames were developed by the Deterrence Dispensed developer ‘FreeMenDontAsk’. They can be printed in PLA or any better material, cost about $3 bucks to print in PLA, can last upwards of 1000 rounds in PLA, and rely on simple metal rail inserts to retain the slide (though 3D-printed nylon rails can be used for short term applications).
A GLOCK parts kit is required to finish the build, and prices on those vary widely.
Ruger SR9/SD9

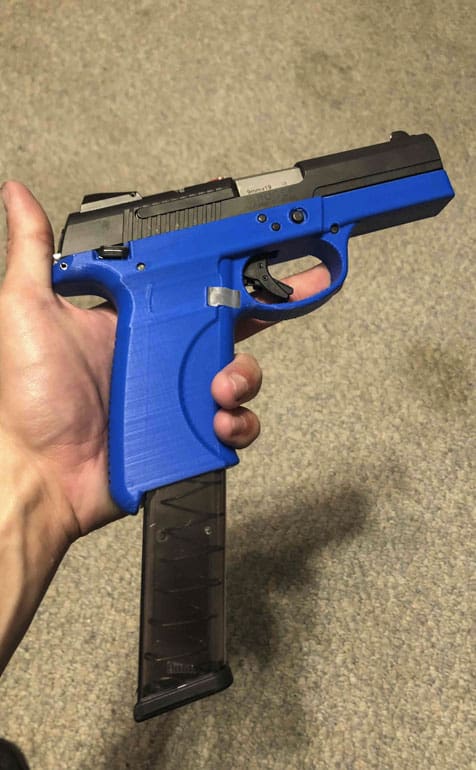
These frames were also developed by the Deterrence Dispensed developer ‘FreeMenDontAsk’. They can be printed in PLA or any better material, cost about $3 to print in PLA and can last upwards of 1000 rounds in PLA.They rely on simple metal rail inserts to retain the slide (though 3D printed nylon rails can be used for short term applications).
An SR9 or SD9 parts kit is required to finish the build – these can be had from gunbroker.com auctions or from everygunpart.com sales.
AR-15 Lower Receivers

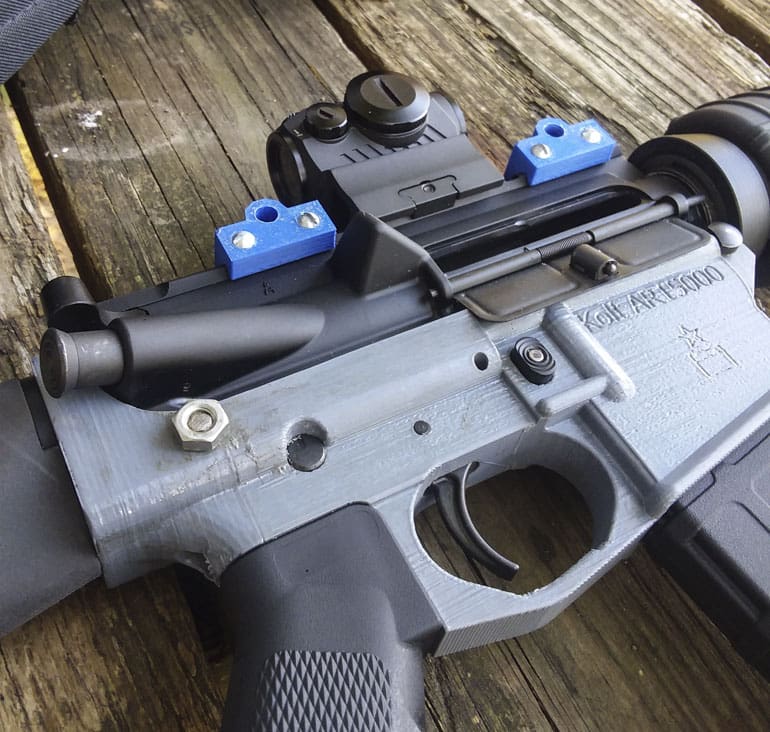
AR-15 lowers were some of the first ‘firearm parts’ to be 3D printed, dating back to 2012 and even earlier. Many different people have developed working AR-15 lowers – my personal favorites are the Fosscad V5.1 GS and the Warfairy Vanguard. These generally need to be printed in PETG, ABS, or nylon, as PLA is just too brittle to last a long time under the fatigue environment an AR-15 lower is subjected to when firing.
A well-printed AR-15 lower that isn’t abused (not dropped or bent about the receiver extension) will last beyond 2000 rounds. By that point you can have spent more money on ammo than your parts kit.
When printing in ABS, PETG, or PLA, these cost about $5 each to print. An AR-15 parts kit is required to finish the build – I love Palmetto State Armory for their cheap deals and surprisingly good quality AR kits.
There’s just something special about running mags through a sub-$300 AR-15 build.
AKM Receivers

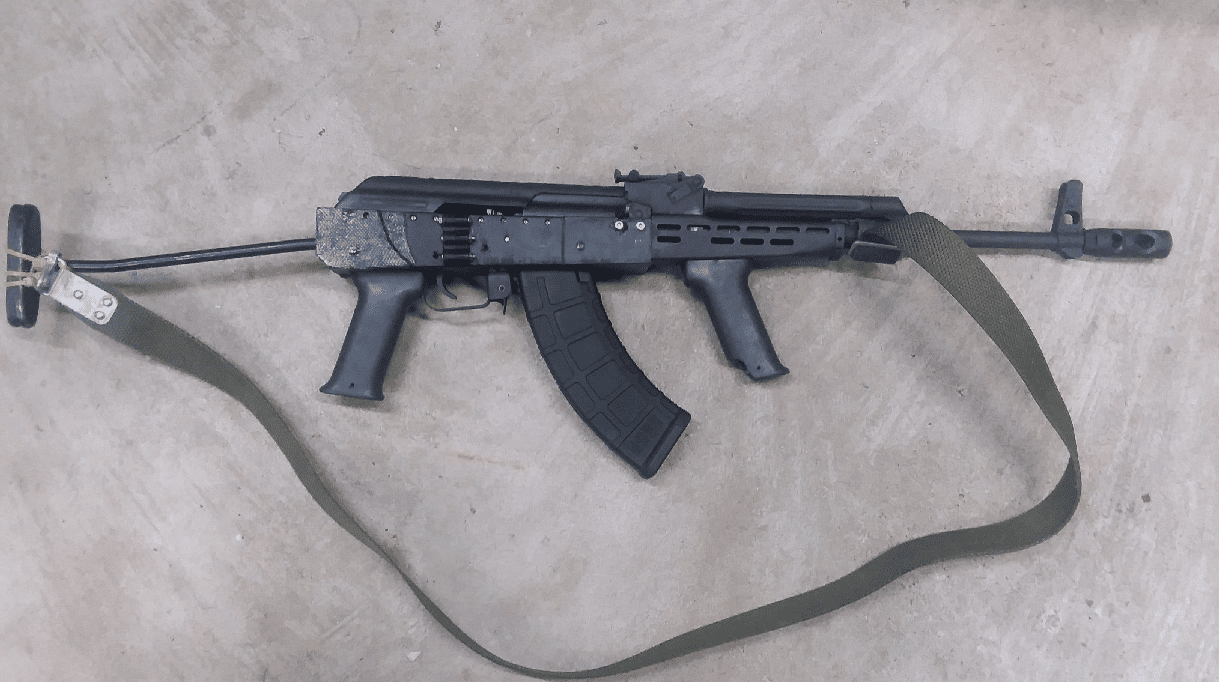
AKM receivers were developed as a passion project by me. There were enough people out there repeating the idea that there are ‘just too many forces involved on AK receivers’ to print one.
DNO Firearms had demonstrated a 3D printed version of their DX-7 AK receiver, but that pattern of AK is proprietary to them and requires a modified bolt carrier. I wanted something true to the AKM (stamped) receiver pattern.
This receiver was dubbed the ‘Plastikov’ as a merge of ‘plastic’ and ‘Kalashnikov’. I got nearly 2500 rounds through my final version of the receiver when printed in PLA before it finally cracked on its side. It costs about $7 in PLA to print and uses metal rails to hold in the bolt carrier and for the shark-fin ejector.
At the time of this writing, I’m assembling a glass-filled nylon Plastikov receiver that should last well beyond 2500 rounds. The current Plastikov uses AMD65 rear trunnions, but can take any headspaced barrel assembly.
I like the AMD65 kits from ClassicFirearms. There sadly isn’t much demand for headspaced AKM parts kits, and they most certainly aren’t competitive with AR-15 parts kits in terms of price.
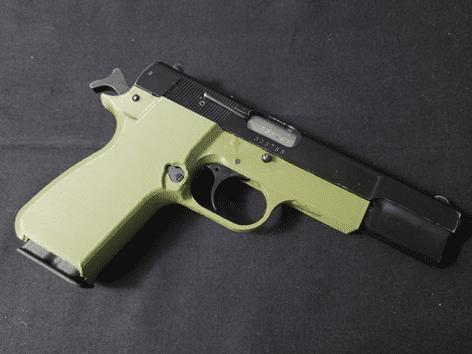
TEC-9/AB-10 Frames

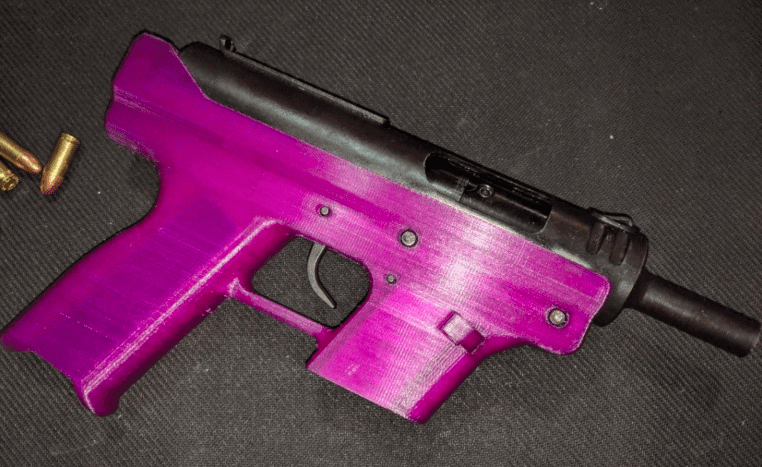
The 3D printable TEC-9/AB-10 frames, dubbed the ‘Ghetto Blaster’ by their developer, FreeMenDontAsk, improve the reliability of the iconic firearm by converting them to use GLOCK magazines. You can load up your fun-stick and let loose 33 rounds in classic 90’s fashion.
These frames cost around $3 to print in PLA, last well into the thousands of rounds, and don’t require any metal inserts…just a TEC-9/AB-10 parts kit.
These kits used to be very cheap, but since this frame was released, parts kits are going for 5x what they used to. The kits can be found on everygunpart.com or gunbroker.com auctions. Hopefully an outfit will start making TEC-9 parts kits to address the rise in demand these frames have seen.
There are several other printable frames and receivers and more are constantly being developed, tested, broken, and improved over time. These aren’t the only areas progress is being made though.
Printable Magazines and Accessories
One of the most challenging aspects of making guns at home traditionally is making reliable magazines. Armchair gunsmiths will tell you it’s easy to do with a metal brake, but quickly shy away from proving they’ve made reliable mags that way when challenged.
3D printers offer a way to make reliable magazines for unbelievably low prices – as well as some other add-ons and accessories that traditionally sell for far more than you can print them for.
9mm GLOCK Magazines – the Mendendez Magazine Family

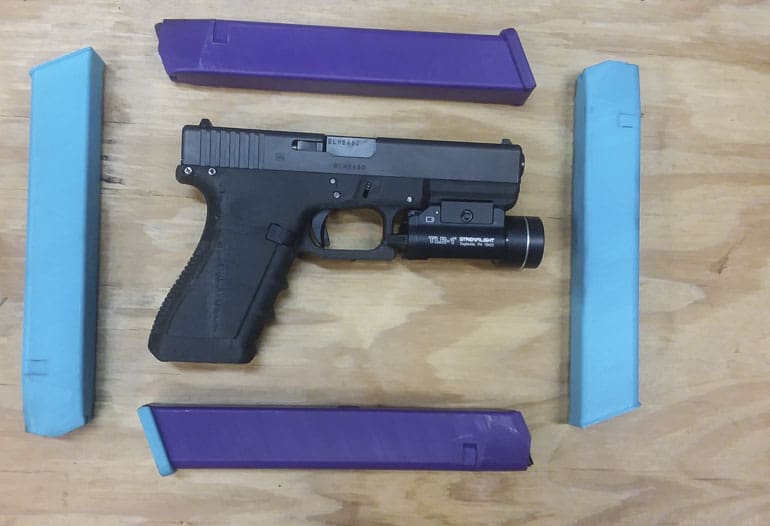
Perhaps the most common pistol magazines — the GLOCK 9mm double-stack mags — were a prime candidate for 3D printing. OEM mags are fairly expensive and some aftermarket mags such as PMAGs have compatibility issues with some guns (especially guns with non-tilting barrels).
The Menendez Mag is a solution to this. Printable in PLA, you can have a 17-round G17 pattern magazine printed for 80 cents. Drop in a $2 mag spring from Wilson Combat, and you’ve got a $2.80 magazine that works better than a PMAG GLOCK-pattern magazine.
The printed mags lack the longevity of commercial mags. After around 500 rounds they begin to wear out. But the follower, baseplate, and locking tab can all be reused along with the magazine spring. So for $.60 more you can print another magazine body and be right back in business. Even still, at $2.80 a magazine, you’re looking at reliable magazines that cost less than the ammo they can hold.
These mags are great for homebuilt guns, testing or training use (no sense in beating up your nice OEM ones), as well as general range use. The Menendez Mag is a G17-sized mag, but G19 ‘Mini-Menendez’ (15 rounds) and G18 ‘Extendez’ (30 rounds) patterns are printable as well.
Printable AR-15 PMAG Magazine Couplers

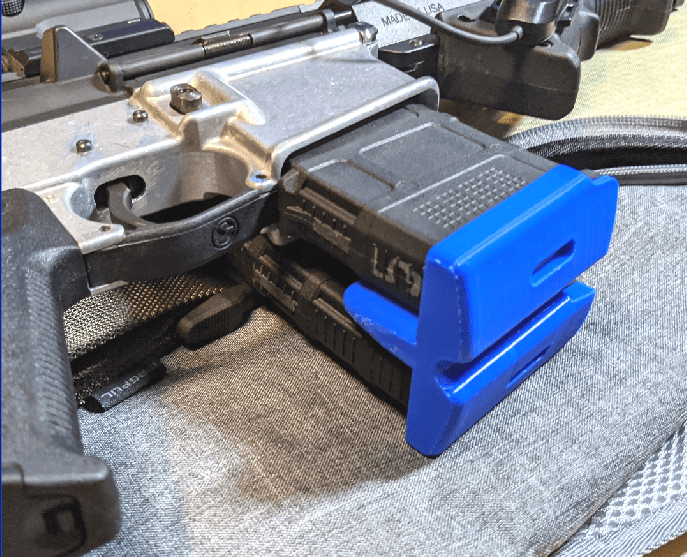
As far as I am concerned, the PMAG is one of, if not the best choice in AR-15 magazines. The magazines themselves are quite cheap, but some of the accessories can get expensive, especially if you have lots of PMAGs.
This is just one example of printable magazine accessories – a baseplate that combines two magazines together, side-by-side. It costs less than a dollar to print, and at the very least is a cheap way for you to try out having stacked mags rather than buying a commercial one for $10 only to decide you don’t like it.
80% Lower Jigs
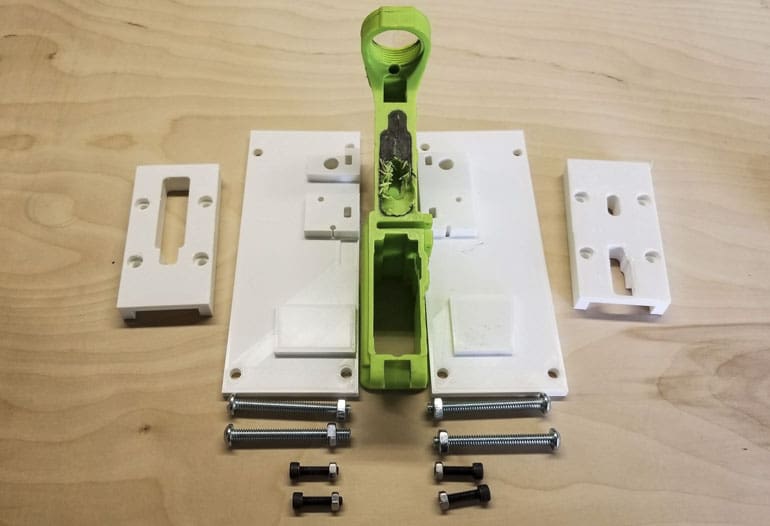
Another interesting application for your 3D printer is 80% receiver jigs. One of the biggest drawbacks to finishing 80% receivers is the high up-front cost of buying the necessary jigs.
Yes, you can try and lay out the borders of the pocket without a jig, but one wrong move and you’re out the price of a lower and potentially an hour’s work. That’s where your 3D printer comes in. For around $3 in PLA, you can print a jig for AR-15 or AR-9 80% receivers, then finish them on your mill, drill press, or router setup.
As seen in the picture above, some small metal hardware is needed to assemble the jig – nothing too fancy, but worth noting.
I have used these 3D printed jigs myself to finish several AR lowers. Assuming you don’t mess up at all, the jigs are reusable.
If you’re really hogging things out, you may want to consider using cutting fluid to keep the temperatures from cutting friction from melting or warping the plastic, but when doing 0.050” passes on my mill, I only needed a little squirt of WD-40 to keep things cooled off.
(Yes, I know, you armchair machinists…WD-40 isn’t cutting fluid. But it does help with evaporative cooling. If it’s stupid and it works….)
Brass Catchers

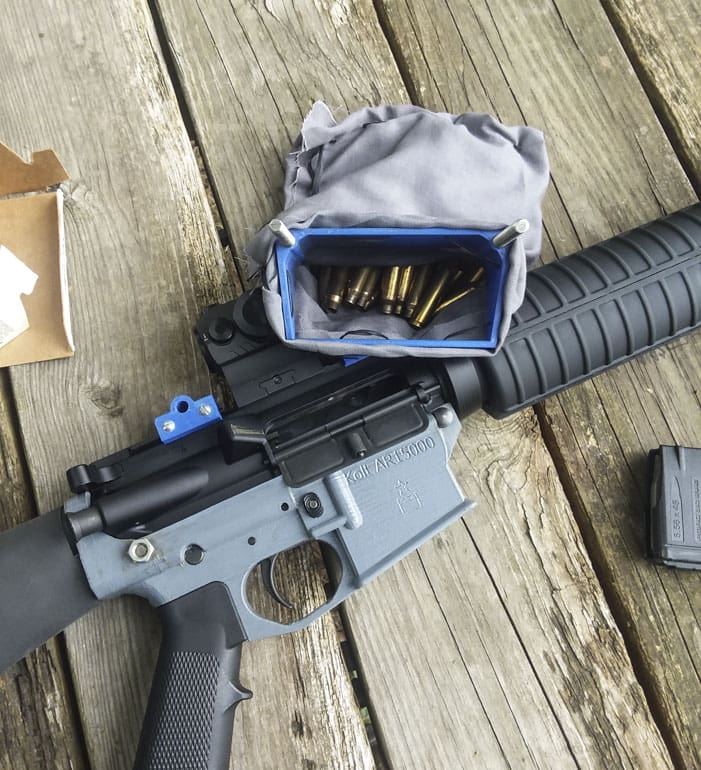
Another useful device you can print yourself is a brass catcher. Often overlooked, they help save you the trouble of stooping over to pick up your spent brass, having brass fly past the firing line at a public range, or simply getting lost if you shoot outdoors.
While commercial catchers are fairly cheap, you can print your own catcher and it mounts for less than two bucks.
I sewed up a bag for mine using spare canvas cloth, but a mesh drawstring bag or any heat-resistant material will work fine. If you have CAD skills, you can easily modify the catcher to fit your specific setup – some commercial catchers can’t fit around certain scope/iron sight setups without being too far from the ejection port to properly function.
Conclusion
Hopefully this was useful to help you better understand the sorts of things that can be printed as soon as your first day of owning your 3D printer. Some folks have managed to assemble their printer, dial it in, print a GLOCK frame, built it out, and test fire it in under a week. If you follow the available tutorials you’ll find it’s far less daunting than you may have thought.
In the next installment in this series, we’ll cover the more advanced applications and techniques the budding home gunsmith can use with their 3D printer – everything from rifling chrome alloy steel plumbing tubes to overcoming the weaknesses of 3D-printed parts and pushing the boundaries of what is possible today.
Read Part 1 in this series here.
Read Part 3 in this series here.
Experienced 3D gun maker Ivan the Troll is head of PR for Deterrence Dispensed.