By John Mounce (republished with permission from Blue Force Gear)
A few months back we produced Vickers Slings in one of the coolest camo patterns – Multicam Tropic. This pattern is awesome when used in the southeast, but doesn’t look so awesome used on a black rifle. Unsatisfied with the Multicam Tropic sling and black rifle combination, I decided to paint guns to match my slings . . .
Before painting your guns, we warn you to follow the steps at your own risk and to remember that guns are expensive and paint is cheap. I never use any paint finish that can’t be removed and reapplied just in case.
Materials
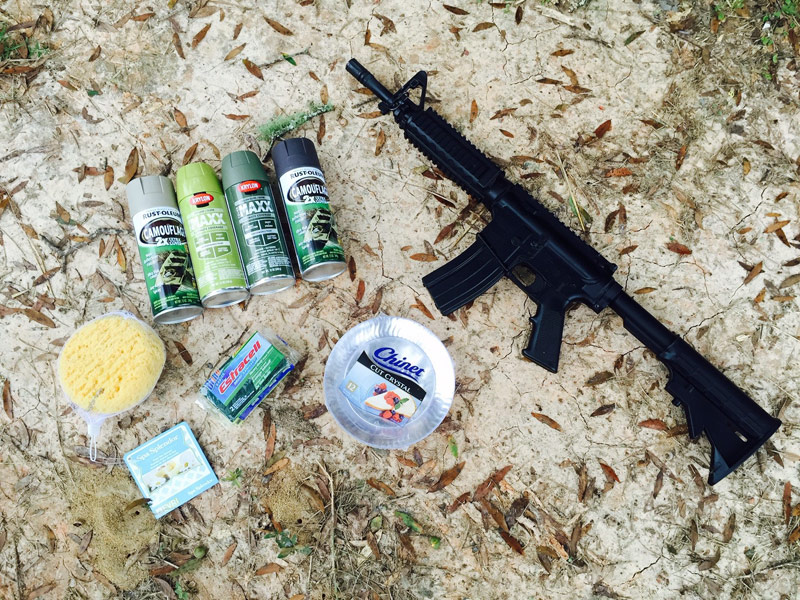

I found everything I needed at the local Walmart, except the blaster. Anyone should be able to get these items at a local variety store for about 25 bucks. Use as many or as little paint colors as you prefer to get the look you want.
Spray Paint
Spray paint is the most important material you’ll buy for this project. I’ve found that the flatter the paint, is the better the project turns out. Rust-Oleum® makes a nice Specialty Camouflage Spray paint that is very flat, but can be dusty when dry. Krylon® COVERMAXX™ and Fusion for Plastic® spray paints are also good to use. I haven’t found either type of paint to be more or less durable on plastic or metal parts, so I shop for color and not surface application.
Sponges
I tried using both a regular kitchen sponge and a sea sponge, and found that the sea sponge produced a more open, grainier pattern I was looking for. You can find these in the bath area of a home goods store.
Plastic Plates
For paint trays, I used plastic plates found in the paper plates and goods section at Walmart.
Tape
Blue Painters Tape and Masking Tape work well for covering areas you don’t want paint to get to, like optic lenses and the end of flashlights.
Process
Step 1 – Prep
I begin my projects with one thought in mind: the finished product is only as good as the prep work behind it. Keep in mind, spray paint will stick to anything and the surface prep determines how long it will stick to the surface. If you use a dirty, greasy gun, the paint finish won’t be as durable as it would be on a better prepared gun.
A solid prepping solution is Acetone for metal or 91% Isopropyl Alcohol for plastics. Both of these can be found at Walmart.
Simply wipe down the weapon with a lint-free paper towel or rag with the appropriate cleaning agent until both the weapon and towel are clean.
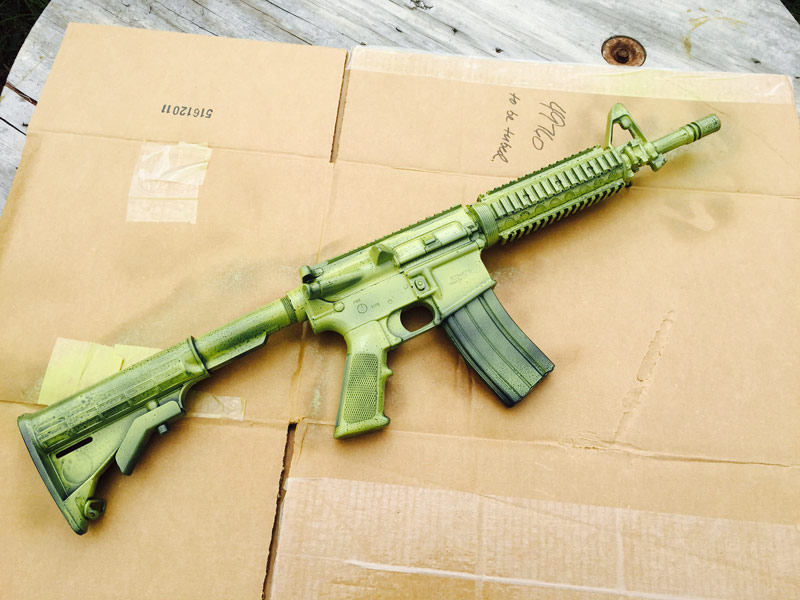
Step 2 – Base Layer
You’ll start by applying a base layer on the gun. This step is key as it affects what the finished product will look like.
For one of the guns, I used a dark base layer and painted progressively lighter. I reversed this on the other gun and the results were worlds apart.
It’s hard to see in this picture below, but I sprayed some dark brown stripes on one of our black practice guns.

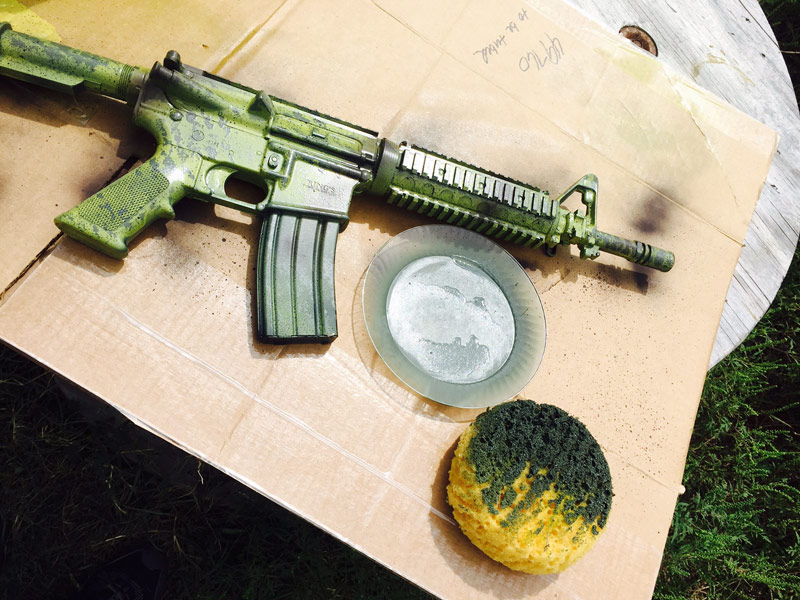
Step 3 – Sponging
You may be wondering to yourself, “How do I get spray paint on a sponge?” Well, my friend, it’s easier than you may think.
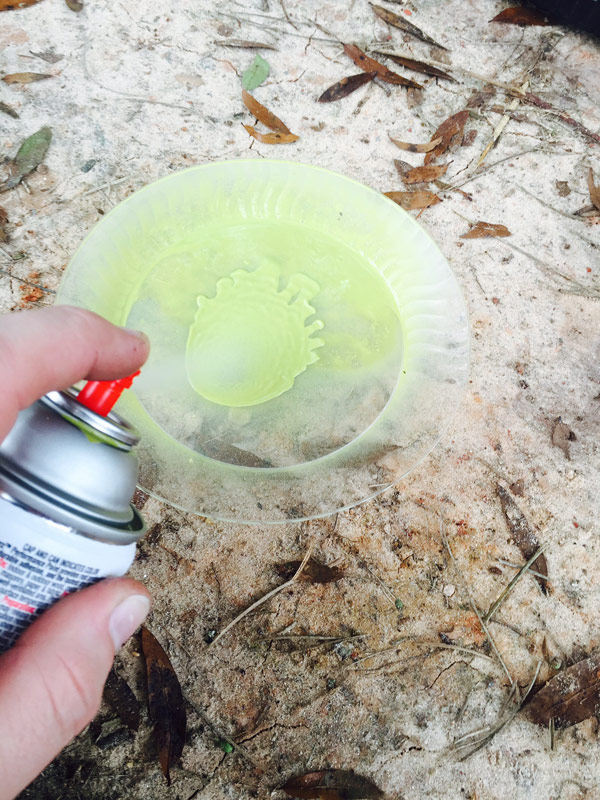

Here is where the plastic plates come in handy. Spray each paint color onto its own plastic plate. I recommend spraying each color as you use it to avoid the paint drying before you get to use it.
Gently dab the top of your sponge in the wet paint and quickly dab it on the rifle to avoid the paint drying too quickly. Get creative with your paint pattern as it fits your needs. I personally try to avoid repetitive patterns. Don’t worry about getting color everywhere; this is only the first step.

I went a step further and “misted” the paint on the gun for a speckled look. I did this by pressing the spray cap ever so lightly so that the paint flows with very little force.

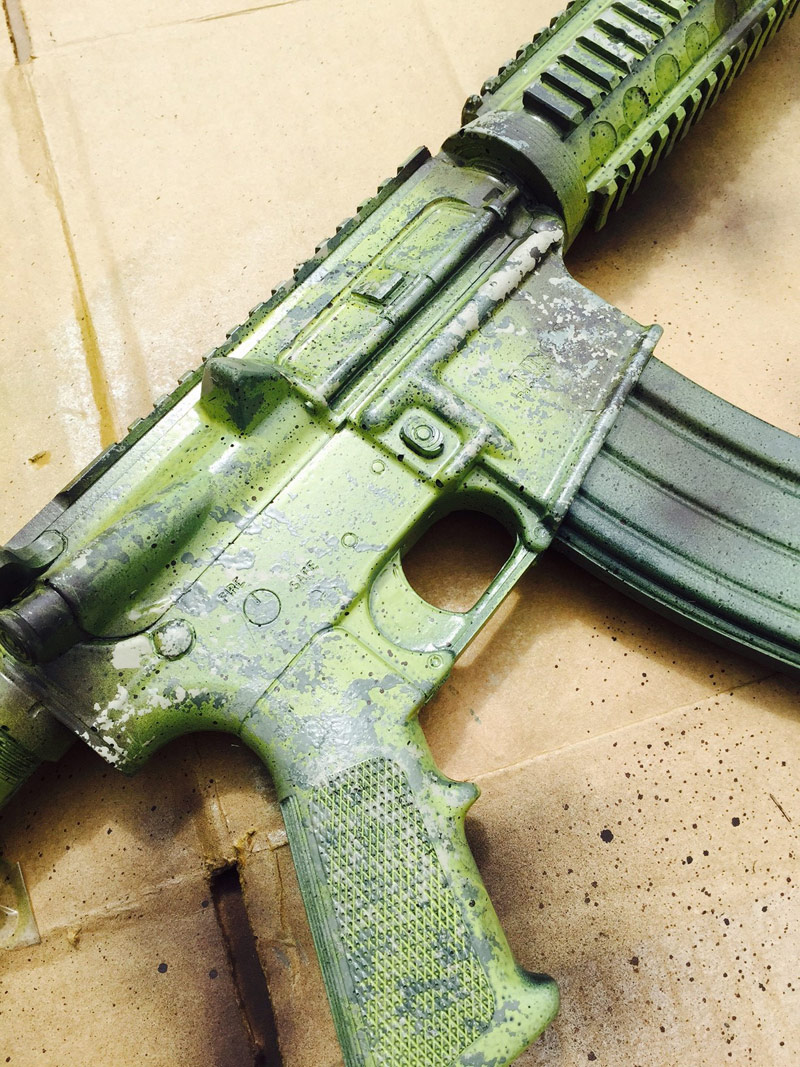
You’re probably having the same thoughts I first did: “Cool, but this doesn’t look like Multicam Tropic.” I realized that starting with a darker paint and adding the lighter paint color wasn’t going to help me achieve the greener, brighter Tropic pattern.
Admitting initial defeat, I decided to restart from the beginning, using the lighter color green first, and then adding the medium green color.
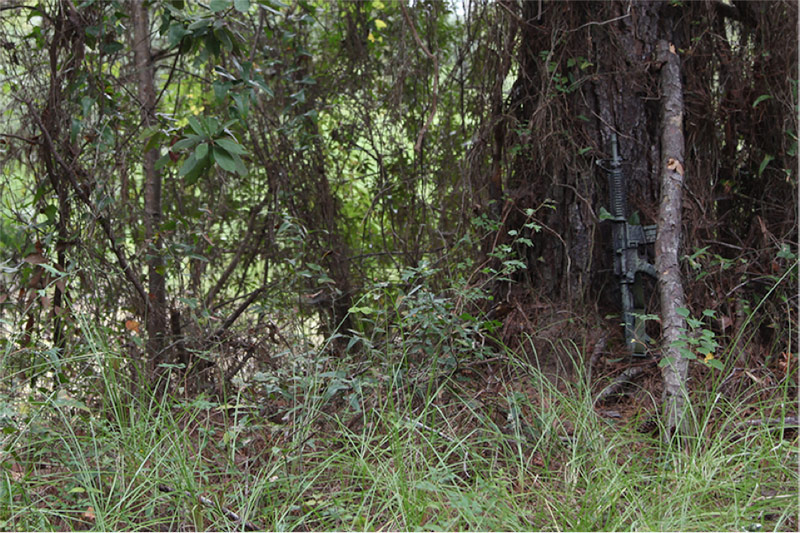
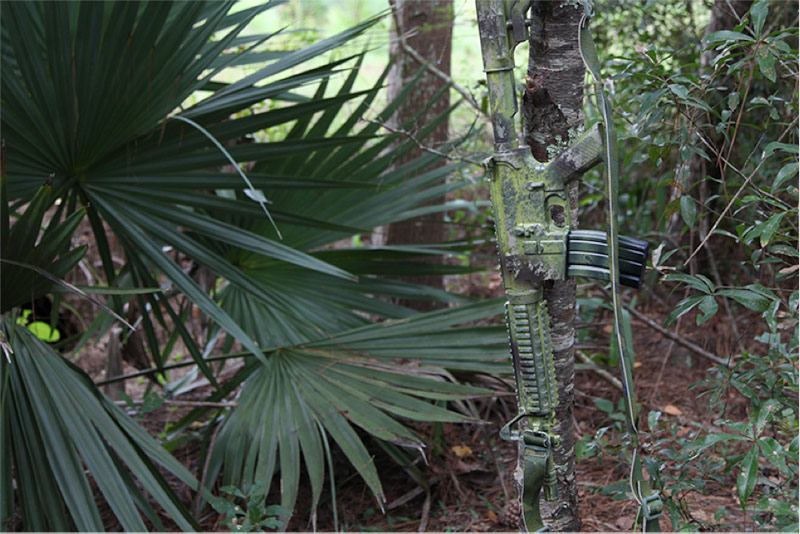
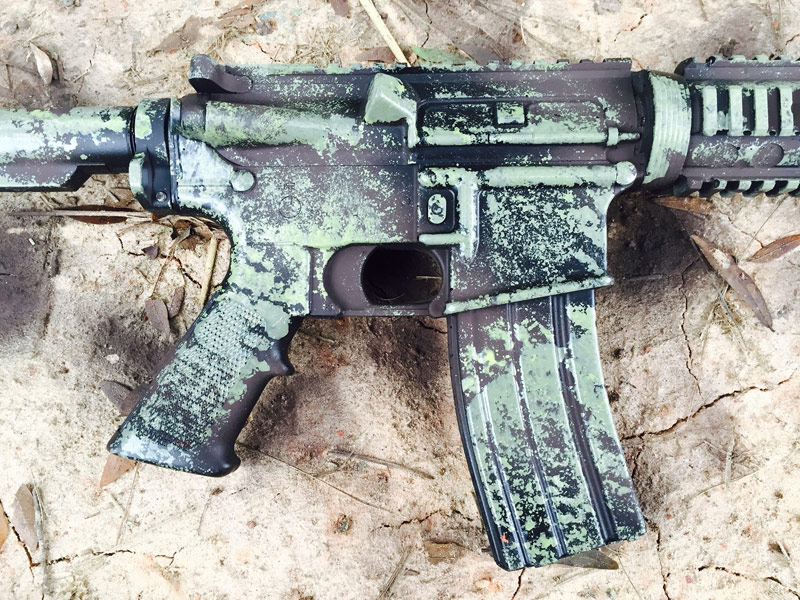
Finished Product

Now for the real test! Check out the finished product in the wild of Savannah, Georgia.