


Normally, I’m no big advocate of rebarreling a gun willy nilly. Truth of the matter though, the Savages have been notorious for being friendly to the hobbyist gunsmith. Where a Remington 700 patterned bolt gun almost requires a machine shop to work on, the Savages can be disassembled and reassembled with a minimum of tools thanks to their low cost manufacturing processes. That’s not to say the Savages aren’t shooters — they certainly are. Especially when you take their cost into account.
I was in the kitchen at my in law’s extolling the virtues of the various 6.5 Creedmoor chambered rifles I’ve been able to shoot in the last year when my father in law started to show signs of interest in the cartridge. I showed him several of the ballistics tables available comparing one of the 140 A-Max factory loads to something like the ~50 gr V-Maxs that his gun preferred. The difference was night and day. The deal was sealed when I showed him the results I was getting out of Hornady’s factory 6.5 Creedmoor loads and reminded him that he wouldn’t have to have his hunting buddy load up some hand rolled .243 WIN for him anymore.


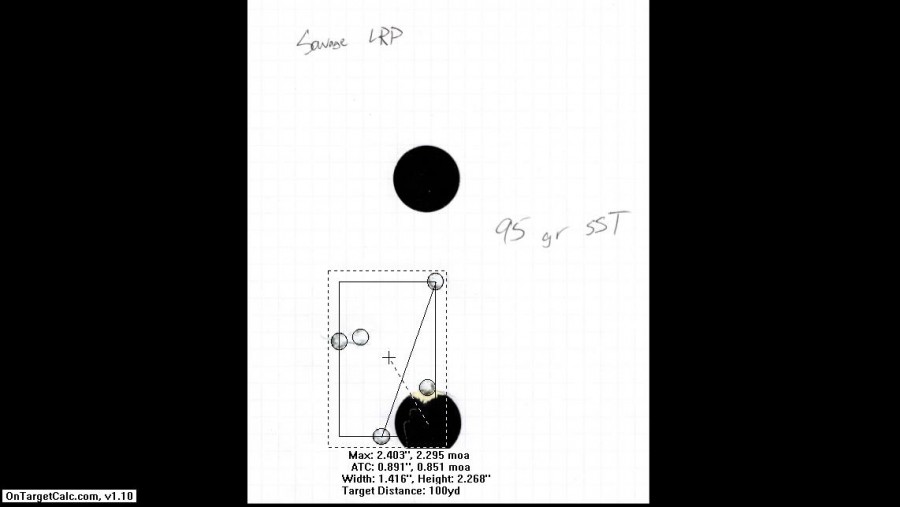
Ammunition availability aside, my father in law’s Savage had accuracy issues. I had (wrongly) declared it to be quite the shooter in my original review. Having time and an understanding of how to use OnTarget, I went back and evaluated my previous targets to find that the .243 chambered LRP never really shot better than 1 MOA with the exception of one factory load. To put the final nail in the accuracy coffin, I took the rifle back out to the range before I ordered any parts.
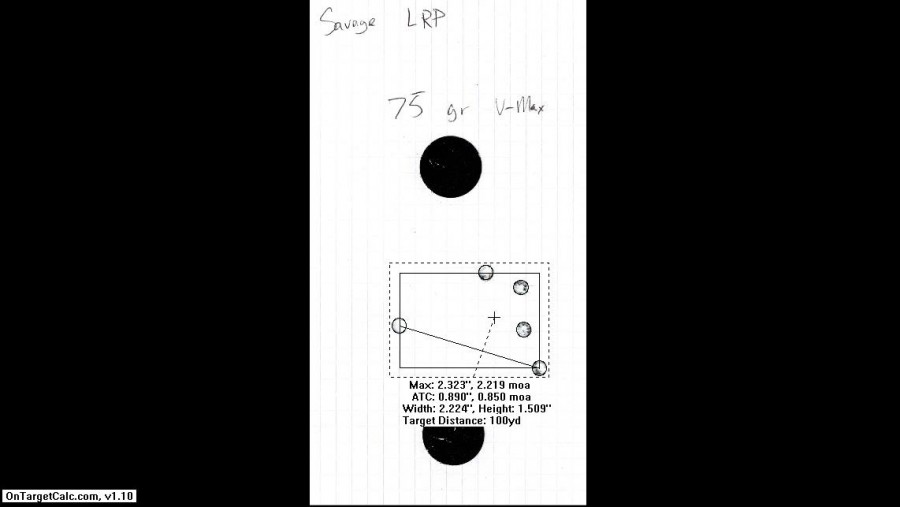
What I found was that it was still an erratic shooter giving preference to some loads, and hating others. Normally I’d call it confirmation bias, but I had the numbers staring me straight in the face. This gun simply wasn’t a shooter, and given that my father in law regularly has access to private land to shoot out to 1000 yards, something better really did need to be done.
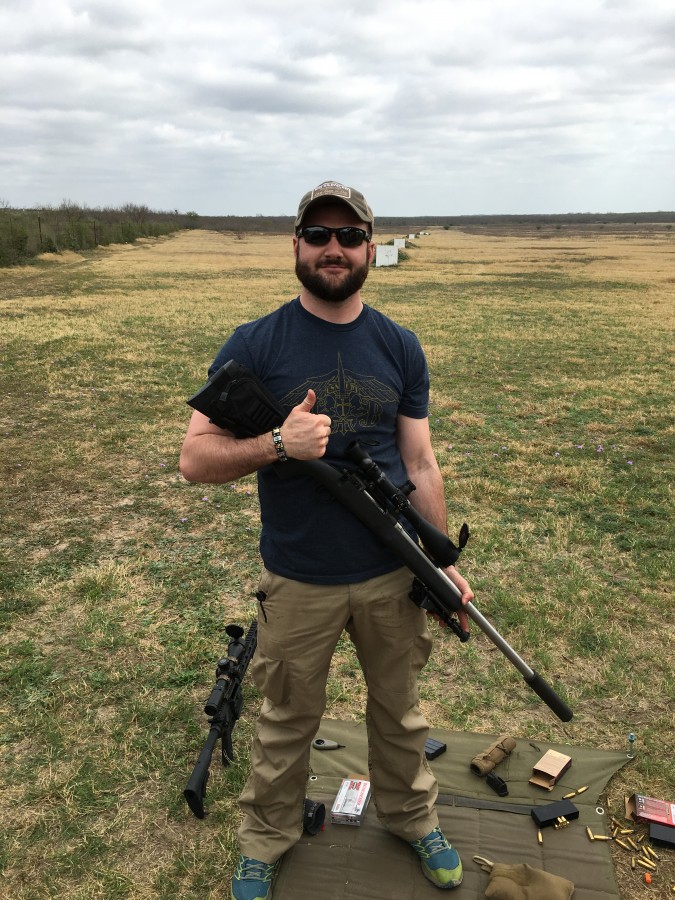
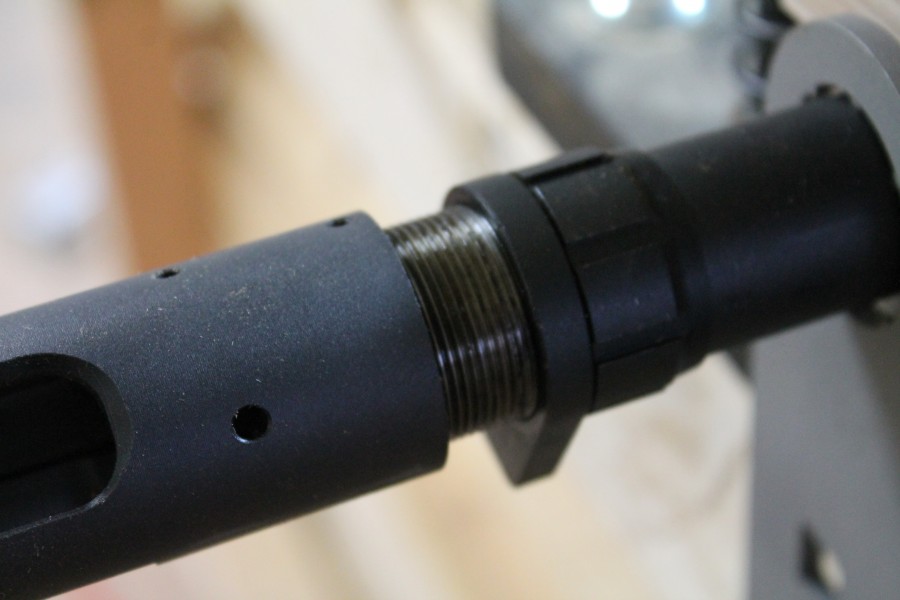
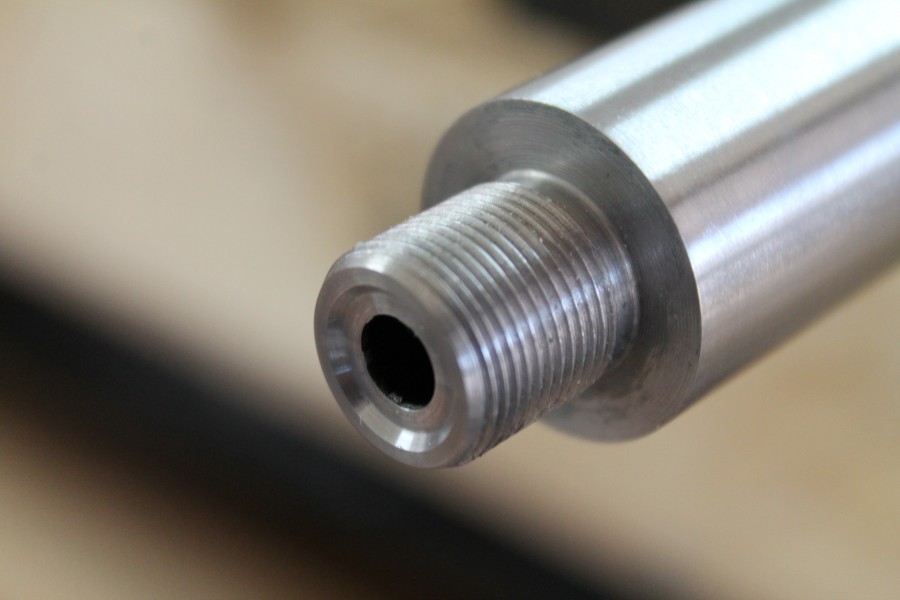
Rifle in hand, I made a call to Jim at Northland Shooter’s Supply. Jim is likely well known to those who have ever ordered parts for a Savage, but he was new to me. Jim still does business over the phone and spent the better part of an hour on the phone with me discussing the requirements I had for this rifle before making several suggestions on what I should order. Several items were non negotiable. Specifically, my father in law wanted a bull barrel. I wanted it chambered in 6.5 Creedmoor, threaded 5/8″-24 at the muzzle, and twenty-two inches long. From there, Jim counseled me on shank sizing and various other small parts I’d need. With few exceptions, the majority of Savages on the market are the small shank kind. The exceptions are the receivers chambered for the short magnums and the Model 12, the action I had in my hands.
Jim didn’t have the barrel in stock, so it had to be ordered direct from Shilen, an issue that moved my lead time up by several weeks. A quick review of Northlands recently updated website will show you the barrels they have in stock. While he had me on the phone, Jim counseled me on picking up their precision barrel nut and recoil lug. Given that I’ve seen some pretty horrendous stock parts come out of various guns and motorcycles, I opted to spend a bit more of my father in law’s money for the upgraded parts.
The last piece of the puzzle was tooling. I already had a barrel vise, but lacked an action wrench or the barrel nut tool specific to Savages. Jim has both in stock, and the prices were comparable to what I’d see on the market at large. Jim was sure to tell me several times that all of their tools, down to the allen wrench included with the action wrench, are made in the USA. Loaded up on tools and parts, Jim slammed my credit card for the better part of $700. Less than three days later, all the small parts and tools showed up. Four weeks later, a very heavy tube arrived direct from Shilen.
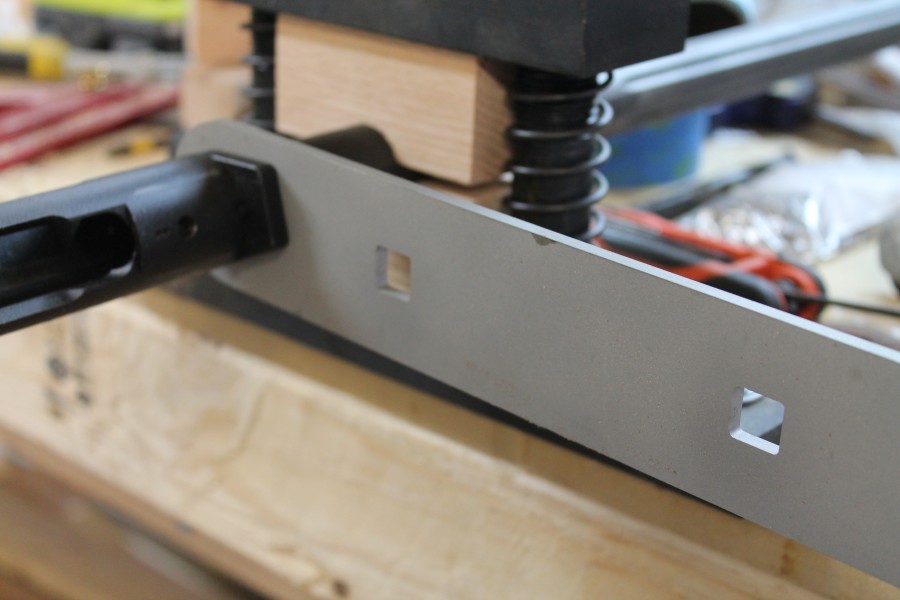

The first order of business was separating the action from the old barrel but only after removing the scope, rings, and bolt. Locked up in my fancy new barrel vise, I used the Northland barrel nut tool to break the old nut free which required a bit of grunting and a decent sized breaker bar for leverage. From there, the action spun off and the old barrel went into storage.
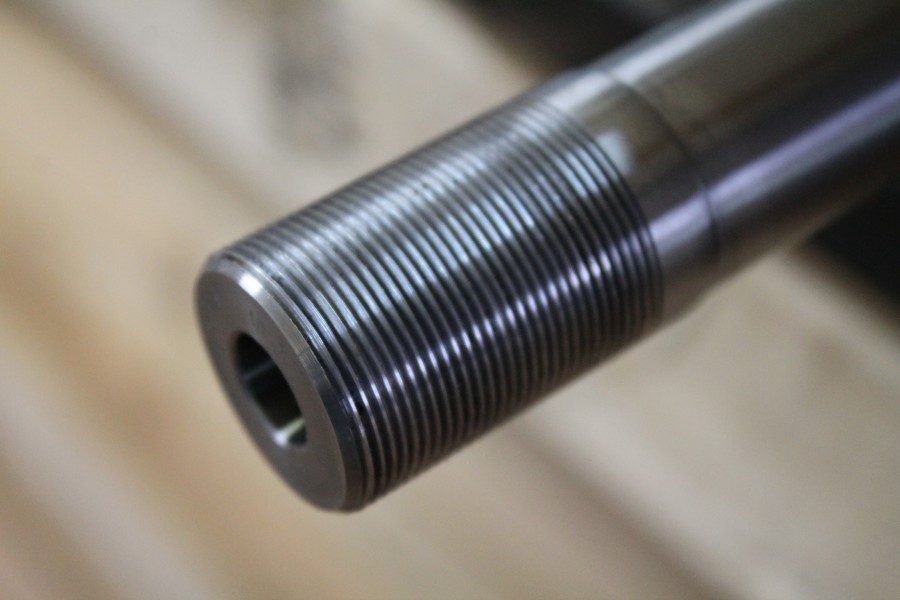
I completely degreased the action and got the new Shilen barrel mounted up in the vise along with the new barrel nut and recoil lug. I dabbed on a bit of moly grease and then threaded the action onto the barrel. At this point, I removed the ejector and extractor from the bolt, and closed the bolt on a 6.5 Creedmoor GO headspace gauge. I threaded the action down until it was tight against the gauge, and then threaded the barrel nut down hand tight.
At this point, I set my torque wrench for the correct specification, and attached it to Northland’s tool. I then mounted up Northland’s Action Wrench which helpfully features a relief cut for the recoil lug, and held it tight while I torqued the barrel nut down. Once at spec, I cycled the bolt on the GO gauge to confirm that the bolt closed without any stickiness. I then loaded up the NO GO gauge and confirmed that the bolt would not close. At that point, I reassembled the bolt and started putting the rifle back together.
Once reassembled, I took the gun to the range to sight it in. At this point, I found that the bolt would not close on a live round without quite a bit of force. Fearing that I’d somehow messed everything up irreparably, I went home, and tried things with the GO and NO GO gauges. I ended up only able to replicate the issues by using live rounds as the GO gauge worked fine. My first thought was that the chamber had been cut incorrectly and that the bullet ogive was being pushed against the rifle lands. I tested this by measuring the OAL of a loaded cartridge, loaded it, cycled the bolt, and then extracted it and measured the OAL. With it unchanged, I looked to the extractor which in retrospect should have been my first thought for two obvious reasons.
The first reason was that I had been having difficulty closing the bolt on a loaded round for the first “cycling” only. By uncocking the bolt, and closing it again, I had smooth bolt handle movement. I incorrectly chalked this up to the bullet being pushed further back in the case, a foolish assessment on my part. The second piece of evidence was that I wasn’t closing the bolt on the headspace gauge, instead choosing to load the headspace gauge into the bolt (held by the extractor), and then insert it into the chamber. Naturally, everything worked fine when I did it that way.
At roughly the same time I came to this conclusion, I launched the ejector spring across my shop whilst reassembling the bolt. Given that shipping was the same whether I bought one part or many, I elected to replace every part in the bolt face. I’m happy to report that the new extractor I purchased fixed my issue and the gun fed, extracted, and ejected with no issues.

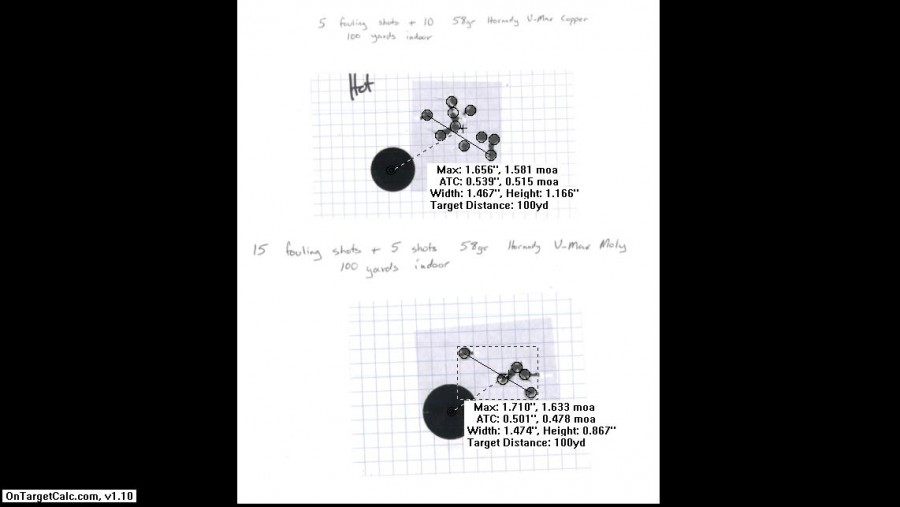
At the range with a functioning firearm and a calm day, the newly rebarreled Savage turned in some really impressive groups at the hundred yard line. It does not seem to like the 129 gr. SST factory load from Hornady turning in pretty consistent five shot groups in the 1.2 – 1.4 MOA range. Switching over to the 120 and 140 gr A-MAX loads from Hornady, this rifle consistently turns in sub MOA performance with my best group a ~.6 MOA five shot group (yes there’s five) from some 140 gr. A-MAX loads. Stepping it back to the quarter mile line and beyond, it performed as well as any of the other 6.5 Creedmoor chambered guns I’ve tested out, turning in sub MOA groups at well past the 500 yard line when I did my part.
Thanks to the beefy barrel, long strings of fire can be had without changing POI or group size. The group above was actually shot with a very hot, very dirty barrel. I put something like 120 rounds through the rifle to confirm that it worked fine, and then called up my father in law to let him know that his rifle was ready to go.

With a bachelor party at a private hunting ranch coming up before I was due back at the in laws, I took the rifle out along with the various ammo I had left. Among the fifteen or so guys assembled for the party, I was the only one who had ever shot past 200 yards. With nearly 900 yards to work with at the ranch, I set up an IPSC steel target at a laser measured 891 yards and managed to get everyone, including the bachelor, on target at least once in a pretty wicked little wind. Of all the guns we had out at the range, this one was easily everyone’s favorite, and the one that ran out of ammo first.
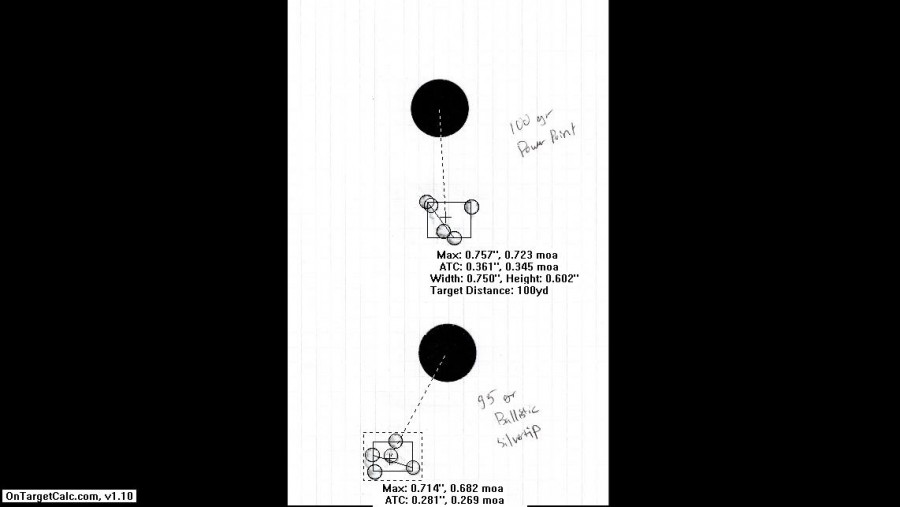
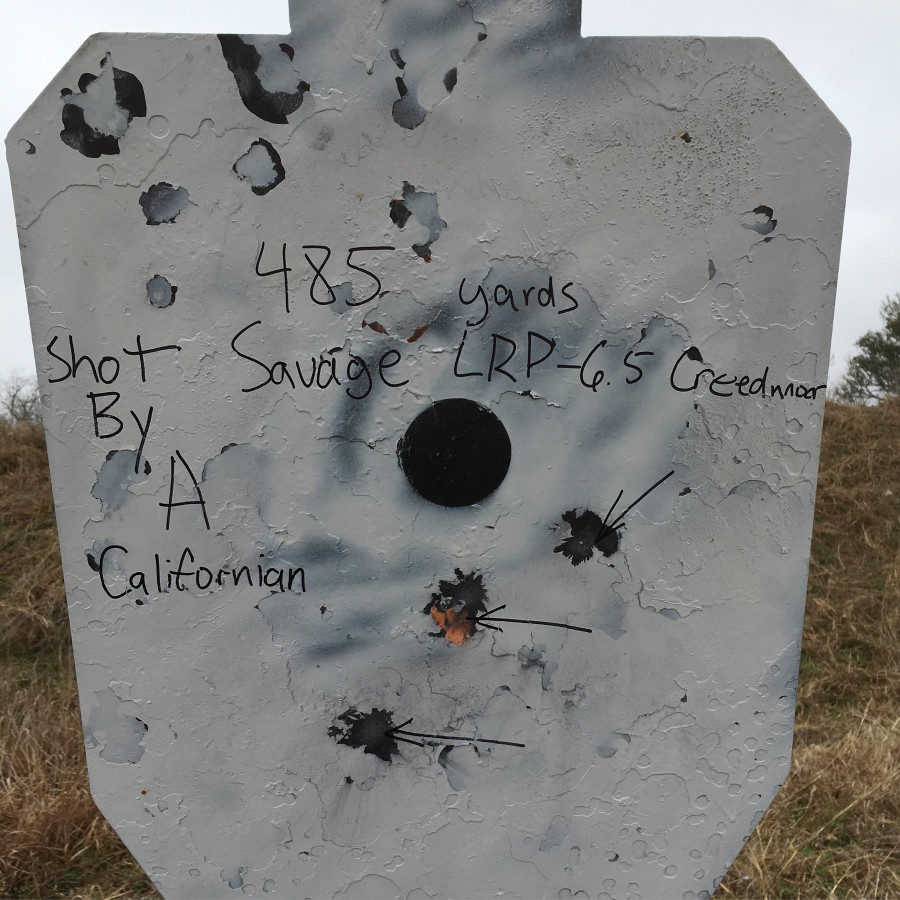
On the way back home, I stopped by the family ranch to drop off my steel target, and took the opportunity to take one of my parent’s friends out to my little spot under the big oak tree. He’d never shot anything with a silencer, and hadn’t done any shooting past 200 yards in his life. I set him up with a bit of ammo I’d squirreled away from the bachelor party and had him send three rounds. Pictured above are his first three rounds ever shot past the 200 yard line.
This rifle flat out shoots circles around its former incarnation and has been a crowd pleaser with everyone that’s shot it. Unfortunately, my father in law still hasn’t gotten the chance to take it out due to our combined work schedules. We’ll get out before it gets too hot to see if he likes it.
- Original Configuration
- Chamber: .243 WIN
- Twist: 1:9.25
- Length: 26 inches
- New Configuration
- Chamber: 6.5 Creedmoor
- Twist: 1:8
- Length: 22 inches
- Parts Cost: $471
- Barrel – Stainless Select Match – $339
- Muzzle Threading – $75
- Recoil Lug – $29
- Barrel Nut – $28
- Tool Cost: ~$250
- Barrel Vise – $59.99
- GO Gauge – $49.99
- NO GO Gauge – $49.99
- Barrel Nut Wrench – $28
- Northland Shooter’s Supply Action Wrench – $60
Ratings (out of five stars):
Ease of Installation * * * * *
Assuming you have the tools, and a bit of mechanical aptitude, rebarreling a Savage is fairly straightforward. Now that I’ve done one, I assume they can be knocked out fairly quickly from this point forward. The correct tools make life easier, so go ahead and pony up for them if you’re looking to do this yourself. As a nod to Shilen, the barrel threaded perfectly and the muzzle brake timed with a minimum of shims.
Accuracy * * * * *
I’m astounded at how good this rifle shoots. 6.5 Creedmoor is already a really great long range cartridge and one that can make a competent shooter look like he knows what he’s doing. Pair it up a with a gun that drives those bullets through the same hole, and you’ve got a winner. Mated up to a solid stock, and a good piece of glass, this is every bit of the 1000 yard rifle that my father in law wanted when he bought it originally.
Cleaning * * * * *
I have never owned a rifle that cleaned up this easily. I shot something like 200 rounds in total during my testing without a single cleaning. When it finally came time to return the gun to my father in law, I gave it a thorough once over. To my shock, a few patches soaked in KG 1 were all that were necessary to clean the carbon fouling from the barrel. No matter how much KG-12 I ran through it, I couldn’t get any copper fouling out of the bore. Shilen has done an excellent job with their hand lapping. This barrel can be shot all day and be clean after a few patches of quality carbon remover.
Overall Rating * * * * *
Less than $500 worth of parts and a few hours of work turned a safe queen into a bonafide shooter. I’ve always heard that Savages were the AR-15s of the bolt action world and this little project has firmly cemented it for me. So much so that I’m now trolling the pawn shop aisles for a donor Savage action.