

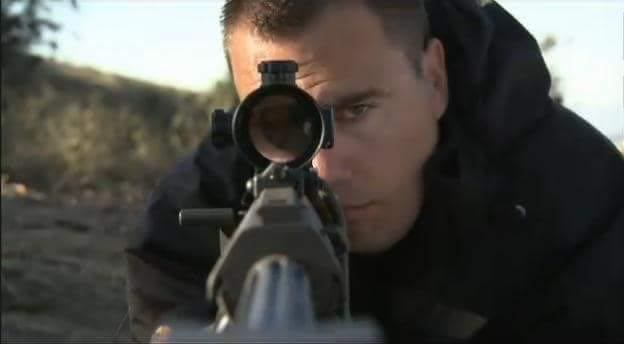

Ryan Cleckner [above] was a special operations sniper team leader in the US Army’s 1st Ranger Bn (75th) and a sniper instructor with multiple combat deployments. Click here to order his book Long Range Shooting Handbook- A Beginner’s Guide to Precision Rifle Shooting from Amazon. Here’s chapter 18 on estimating and adjusting for target distance . . .
I strongly believe in learning how to shoot a rifle with iron sights before putting glass on your gun. It should come as no surprise that I also encourage learning and practicing to estimate a target’s distance with angular measurements — using the Mil or MOA marks in a scope — before buying or using a laser range finder. So let’s get to it!
18.1 Angular Measurements (“Milling”)
There’s an inverse relationship between how big an object appears and how far away it is. As the distance to an object increases, the size of the object appears to decrease. Imagine a target at 100 yds as a starting point. See Figure 18.1-1.
If you moved that target to half the distance (50 yds) from your vantage point, it would appear twice as large. Likewise, if you moved the 100 yd target twice as far away (200 yds) it would appear to be half the original size. And if you moved it four times as far away, (400 yds) the target would appear to be one quarter the size.


This predictable relationship allows us to estimate a target’s distance based on how big or small the target appears.
You can measure a target’s size in a scope using the marks in your reticle, which are either MOA (Minute of Angle, explained here) or Mil (Milliradians, explained here). Using the apparent measurement of the target, you can determine the distance to the target.. In order for this to work, you have to know the size of the target.
18.1.1 Calculating Distance with Mils
To calculate a target’s distance with
Mils, 


18.1.2 Calculating Distance with MOA
To calculate a target’s distance with MOA, multiply the known size of the target in inches by 95.5 and then divide that number by the size of the target measured in MOA through your scope (See Figure 18.1-3). Unlike the Mil formula, this formula should only be used when working with target sizes in inches and distances in yards. If needed, however, there are alternate numbers that can be used in the formula (See Figure 18.1-5).


18.1.3 Alternate Units with Mil and MOA Calculations

Sometimes you might need to use one unit of measurement for the size of the target and another, non-standard unit of measurement for the distance to the target. For example, you may have a rifle scope which measures in Mils and a target size in yards and you need your distance in meters (instead of yards). Or you may have a scope which measures in MOA and a target size in inches but you need your distance in meters (instead of yards).
If you’re trying to determine the distance of a target in a non-standard size and distance unit combination, you have a few options. 1) Convert the actual size of the target into a different unit, 2) alter the formula, or 3) convert the calculated final distance into the desired unit. To try out each of these options, let’s use the following hypothetical:
Let’s say you have a target that is 12 inches tall which measures 1 Mil tall in your scope and you need your distance in yards.
Option 1: Convert the size of the target into a different unit. In our hypothetical above, we can convert the target size from inches to yards to get a distance calculation in yards. The linear unit conversion chart in Section 9.2 of this book (Figure 9.1-3) shows that to convert from inches to yards, you divide the size in inches by 36 (the number of inches in a yard). (12/36=0.333). After converting to yards, we can use the standard Mil formula:


Option 2: Alter the formula. In our hypothetical above, we need to alter the Mil formula to allow us to start with a target size in inches and end up with a distance in yards. The chart in Figure 18.1-4 below shows that in order to input inches into the Mil formula and end up with yards, you replace the “1000” in the Mil formula with “27.77”. Now we can use the altered formula:


Option 3: Convert the distance into the needed unit. If we used a target size in inches from our hypothetical and we used the standard Mil formula, our target distance would be in inches and need to be converted to yards. The linear unit conversion chart in Section 9.2 of this book (Figure 9.1-3) shows that to convert from inches to yards, you divide the size in inches by 36:


In each of the three options, we can calculate that a 12 inch target measuring 1 Mil tall in a 

To help you with entering one target size unit into the Mil formula in Figure 18.1-2 or the MOA formula in Figure 18.1-3, and calculating a target distance in another unit, see Figures 18.1-4 and 18.1-5.


18.1.4 Measuring Target Size with Mils and MOA
As targets get further away, it’s harder to calculate range using Mils or MOA. For one thing, smaller appearing targets are harder to measure For another, a small percentage error can magnify the result.
For example, when a 1 meter tall target measures 10 Mils tall in 

On the other hand, if the 1 meter target was 1000 meters away, it would measure 1 Mil tall in your scope. At this distance, when the target appears so small in your scope, it’s easy to make a 10 percent error. The mistake has a much larger effect on accuracy.
For example, if you mistakenly measured the target as 1.1 Mils tall, 

To get the most accurate measurement possible from your scope, your rifle must have a stable platform. The most difficult part of measuring a target with your reticle: holding the rifle steady enough to line up one part of the reticle with one edge of the target, and then shifting your focus to the other edge of the target to see where it measures on the reticle. It’s difficult to ensure that one edge is lined up properly while looking at the other.
Here’s a trick that helps: use the edge of a mil-dot — instead of the middle of the dot — as a starting point. By doing this, you can better keep track of its alignment while I’m looking at the other edge of the 

Some targets are narrower than the mil-dot. By using the edge of the mil-dot, you won’t have to keep moving the mil-dot to confirm where the location of the target’s edge.
Get creative with your measurements!
For example, it might be easier to measure a certain target’s width rather than its height. In the military, we often used “E-type” targets which measured 1 meter tall and 1/2 meter wide. It was sometime difficult to determine whether one of these targets measured 1.6 or 1.7 Mils tall in a mil-dot scope. So we used the target’s width oand the dimensions of the mil-dots in our scope to our advantage.


From the outside edge of one dot (e.g. the bottom) to the outside edge (e.g. the top) of an adjacent dot was 1.2 Mils; the bottom of one dot to the bottom of the next dot is 1 Mil plus the width of the top dot is 1.2 Mils. Using the same math, we knew that the inside edges of two dots were 0.8 Mils apart. (See Figure 18.1-8.) By combining the edge of one dot with the center of another, we could measure 0.9 and 1.1 Mils. (See Figure 18.1-9.)


Back to the example above of not knowing whether an “E-type” target was 1.6 or 1.7 Mils tall . . .
We knew the width of these targets was half their height. Therefore, if we used the edges of the dots to our advantage and measured the width, we could see whether the target was exactly 0.8 Mils wide. Which meant it must be 1.6 Mils tall. (See Figure 18.1-10.)
Angled Target Measurements
Often, targets are not perpendicular to your line of sight. In other words, targets don’t always appear perfectly flat towards you. Sometimes you are at an elevated vantage point looking down at a target Other times you may be looking at a target from the side. (See Figure 18.1-11 for examples.)


An angled view of a target makes at least one dimension appear smaller than it really is.
For example, assume that the targets “A” and “B” in Figure 18.1-10 are both 25 inches tall and they’re both the same distance from your position. Target “A” is directly in front of you while target “B” is below you (you’re looking down at it). You measure target “A” to be 1.1 Mils tall and you measure target “B” to be 0.9 Mils tall.
If we don’t compensate for the angled view our Mil calculation based on the height of the target may lead us to think that target “B” is further away than target “A”. (Remember: targets appear smaller as they are farther away.) For example, a 25 inch target measured at 1.1 Mils tall would be 631 yards away and the same target measured at 0.9 Mils tall would be 730 yards away.
There are two methods of compensating for angled targets: mathematically compensating for 

To mathematically compensate for an angled view, multiply the angle’s cosine by the distance calculated by the Mil or MOA formula. (See Figure 18.1-12 for a table of angles and their corresponding cosines.)
In our example, target “B” is 30 degrees below us. The cosine for 30 degrees is 0.866. The 730 yards calculated from the angled view of target “B” multiplied by the cosine for the 30 degree angle of target “B” equals 632 yards. Although the corrected distance for target “B” of 632 yards is not exactly the 631 yard target distance of target “A”, it’s nothing more than a rounding error. It won’t have an effect on hitting the target.
It is important to note that this will only work if the target is straight up and down from the ground. If a target is 30 degrees below you and angled back 30 degrees, then you would see the full size of the target and an angled-view compensation is not required.


The other method for compensating for an angled view of a target: use a non-skewed dimension.
For example, although the height of a target “B” and the width of target “C” appear smaller, the width of target “B” and the height of target “C” are unaffected by their angles. If the target is angled forward or back — because it’s not level with the ground or it’s above or below you — use the target’s width for your Mil or MOA calculation. No adjustment to the formula or result is required. Likewise, if a target is twisted to one side or it is angled away left or right, then use its height. This method only works if you know both the target’s height and width dimensions.
I know this seems like a lot of math, because it is. But once mastered, the mathematical formulas are easy to use, accurate and extremely rewarding. Especially when you hear the word “hit.”