


The modular, easily customized AR-15 is everyone’s favorite “build your own” rifle. Nothing gives you more satisfaction than putting one together yourself (and simultaneously infuriates so many anti-gunners).
Some, especially first-timers, will buy a parts kit that includes everything you need. You can pick one up for as little as $99. That’s a good idea, if for no other reason to have the parts on hand. Others will want to individually select every component so the finished product is exactly what they want when it’s complete.
Whatever approach you take to your build, this guide will go over the process of assembling an AR-15 lower receiver. We’ll take a step by step approach, but this is intended just for your information. If you don’t have the right tools or aren’t sure about doing building a lower receiver yourself, be sure to talk to a qualified gunsmith.
To clear up any possible terminology discrepancies I’ve included a full parts list of the AR-15 lower.


Tools
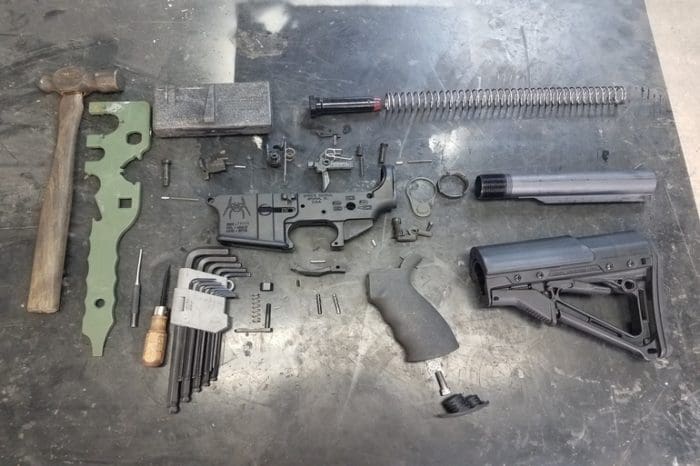
You don’t need any fancy or expensive tools. I’m using Allen wrenches, a roll pin punch, an AR-15/M16 armorer’s tool, lower receiver vise block, and a small flat head screwdriver. That’s it.
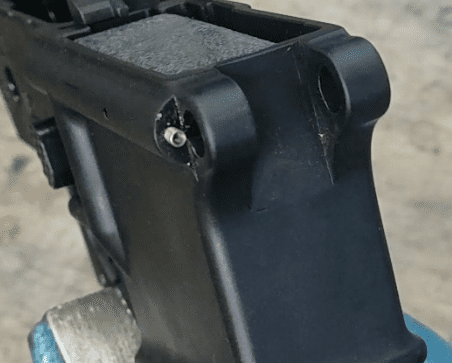
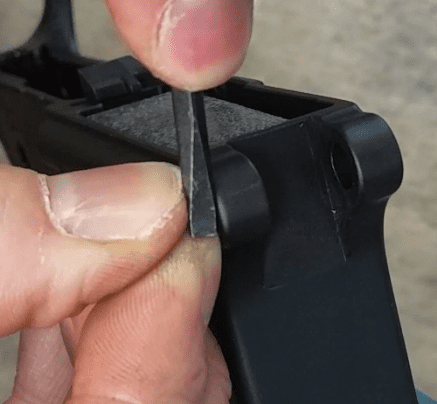
Trigger Guard Assembly
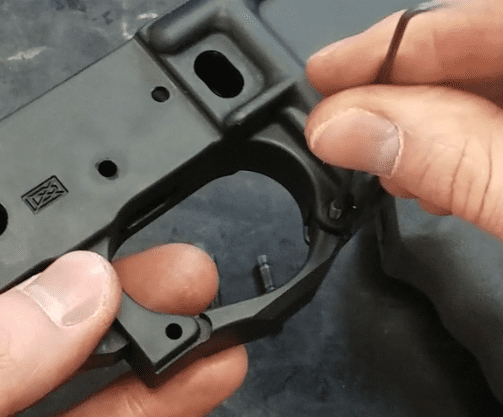
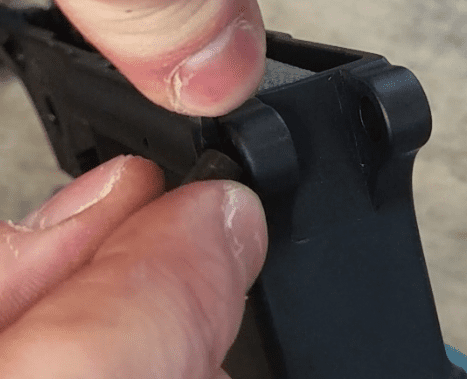
My trigger guard utilizes a set screw and roll pin. Some use spring-loaded detents. Either way, set the front of the trigger guard.

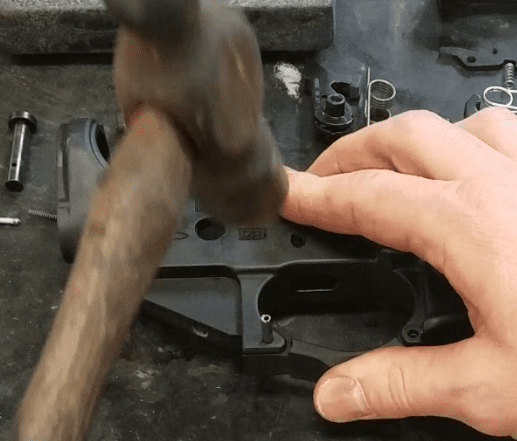
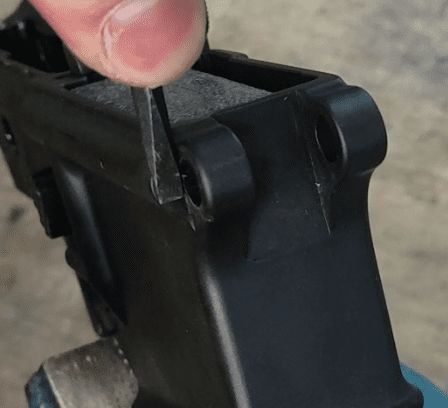
If yours has the spring-loaded detent, depress the detent and slide it into the lower until it pops into the hole. Line up the rear holes and hammer the roll pin in.

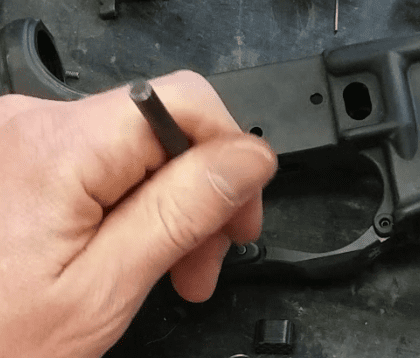
I finish it with a punch to make sure the roll pin is centered in the hole.

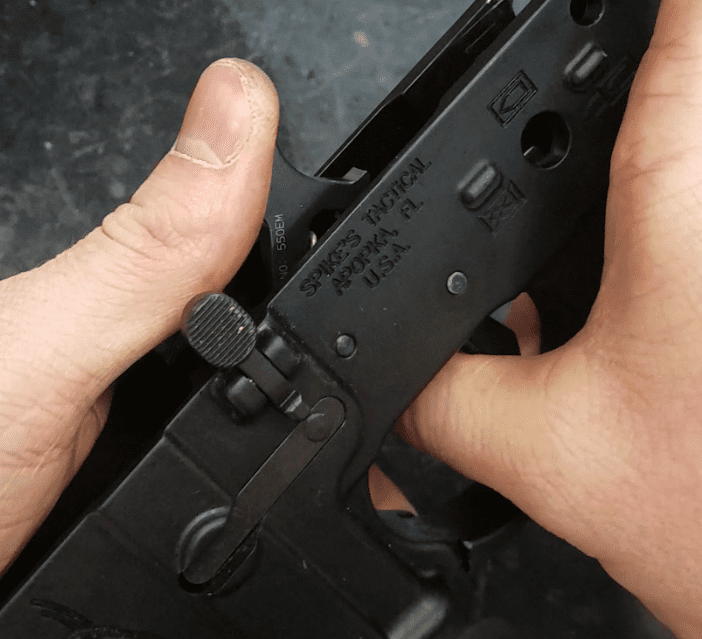
Magazine Catch Assembly
Grab the three pieces of the magazine catch. Insert the magazine catch into the lower receiver.

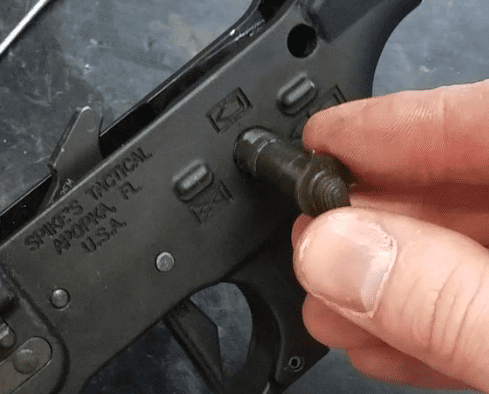
Put the magazine catch spring over the threaded end from the other side.

Then screw the magazine catch button on.

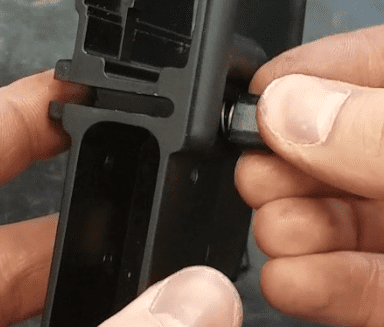
You should be able to get the button on by a few threads before it reaches the lower. Push the button deep into the lower and continue to screw it in by twisting the magazine catch.


Grab a magazine and test it out. You can tune how deep you need to push the button to drop the mag by screwing the magazine catch in and out.
Bolt Catch Assembly
Gather the four parts of the bolt catch assembly. I like to get the bolt catch roll pin started in the lower first.

Install the bolt catch spring and buffer.


Line up the bolt catch and pound the roll pin through. I carefully tap the roll pin in with a hammer while I hold the catch with my other hand. Once the pin is holding the catch, I’ll finish it with a punch.


A vise and vise block are really handy (and inexpensive) tools for this step. You could also use pliers or small clamps to squeeze the roll pin in. If you’re worried about marring the outside of the lower, put some tape on it, take your time and be careful.
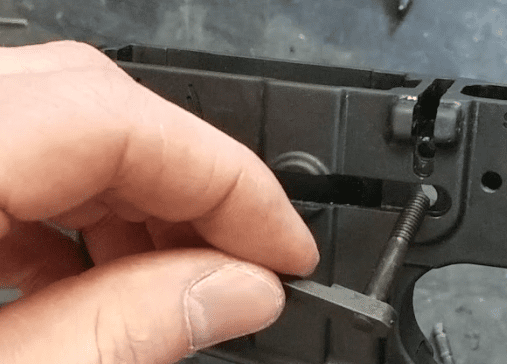
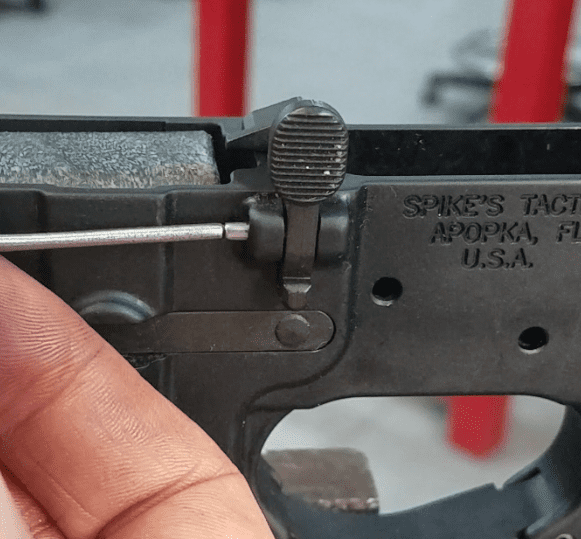
Pivot Pin
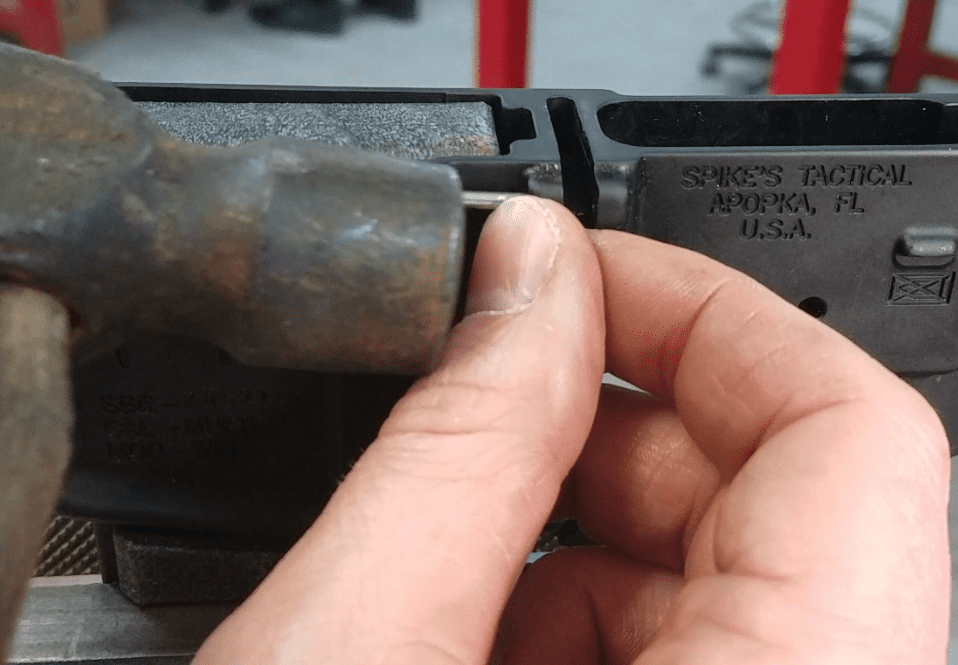
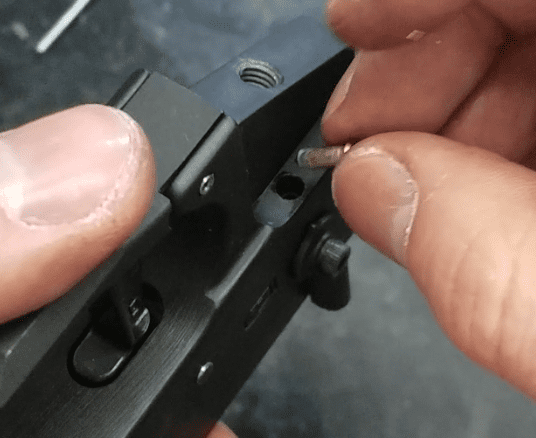
This one can be tricky, but is made much easier by a vise or a third hand. First, install the pivot detent spring.

Now install the pivot pin detent. I used my index finger and thumb as guides to hold the detent as I press down from the top with a screwdriver.


This method works well for me, but there is no one right way to do this. Just get that little detent held in the hole by something thin enough to allow the pivot pin to access its hole. A utility razor works well too.
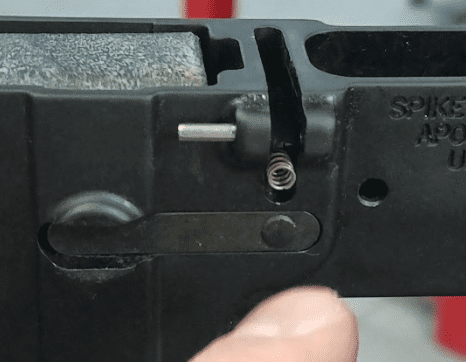
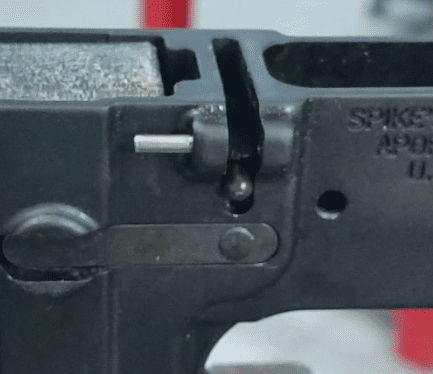
Start the pivot pin in the hole and remove the screwdriver.


Twist the pivot pin until the detent drops into the trough on the pivot pin, if needed. There are some handy tools on the market that make this step easier, like Brownells pivot pin installation tool, but they aren’t necessary.
Be very careful when installing the detent. If you slip and it goes flying, good luck finding it.
If you can, drape a cloth or towel in front of the lower so if the detent does get launched, it won’t go too far. A wall works, but the detent will bounce or ricochet and still may end up lost. You might even want to buy an extra or two for your first build, just in case.s
Trigger assembly
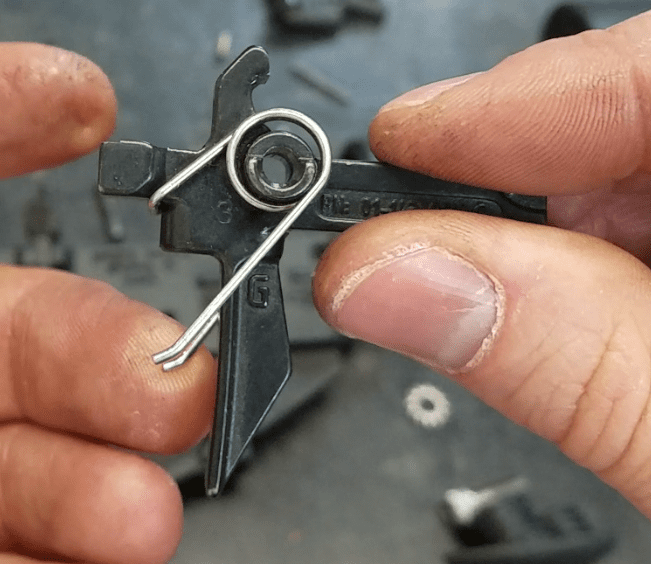
Start with the trigger. Make sure the trigger spring is installed correctly.

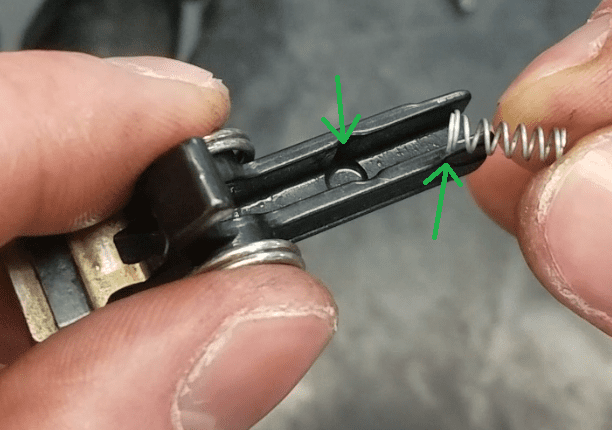
Grab the disconnector spring. Notice how one side of that spring is flared. That side goes into the slot in the trigger.

I like to install the trigger and get the trigger pin started on one side.

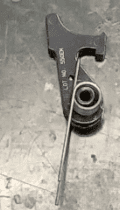
Grab the disconnector, make sure it’s oriented correctly.

Line up the hole in the disconnector and drive the trigger pin through. The trigger spring puts tension on the trigger. You will have to apply some pressure to make sure that the trigger’s pin hole is still lined up with the lowers trigger pin hole.
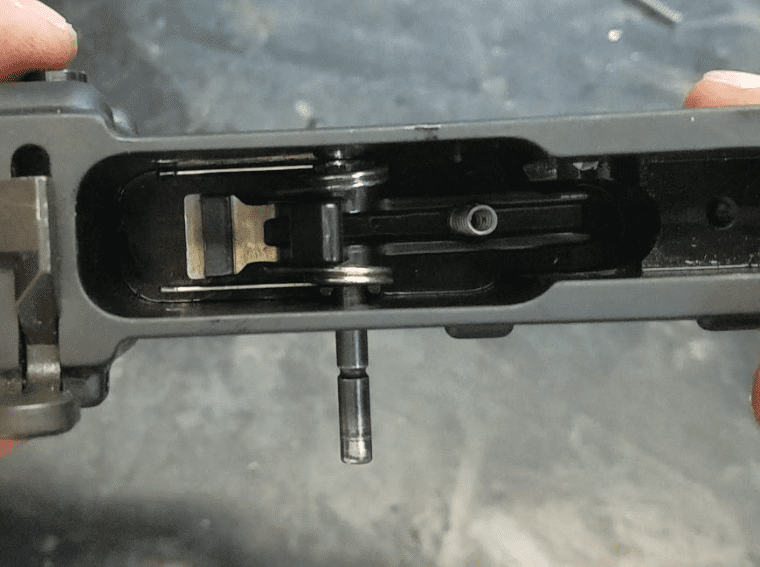
Next, grab the hammer. Make sure the hammer spring is installed correctly.

Put the legs of the hammer spring on top of the trigger/trigger pin.

Push it down until the hammer hole lines up with the lowers hammer pin hole and drive the hammer pin through. Like the trigger, the spring tension cocks the hammer, so you will need to apply sideways pressure to make sure the holes stay lined up on the far side.
Do not dry fire! The hammer will hit the lower receiver and eventually damage it. Cover the hammer with your thumb or hand to prevent it from hitting the lower as you ensure the trigger assembly is functioning correctly.

Pistol Grip and Selector
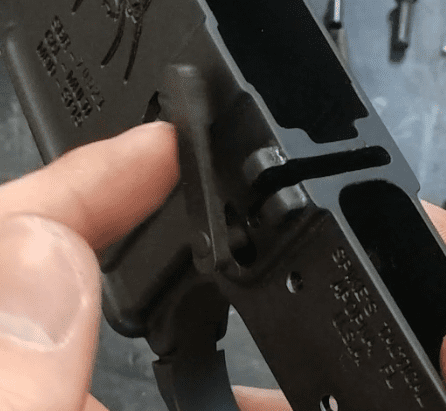
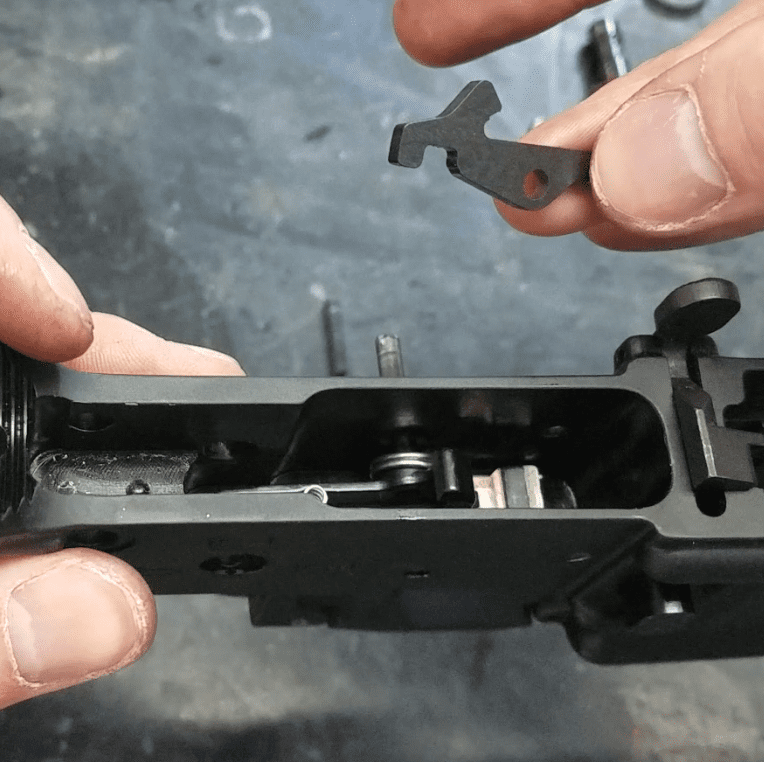
Put the hammer in the cocked position. This will allow you to insert the safety selector switch into the lower.

Grab the pistol grip, pistol grip screw, pistol grip lock washer, selector detent, and selector spring. Install the selector detent, pointed end goes in first.
This may help you visualize how the trigger and safety will work together.


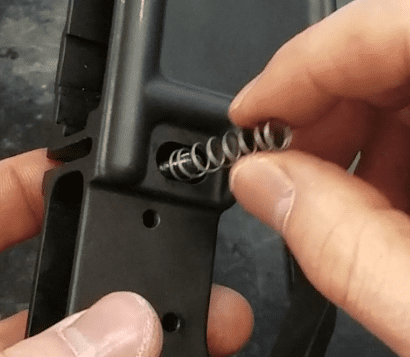
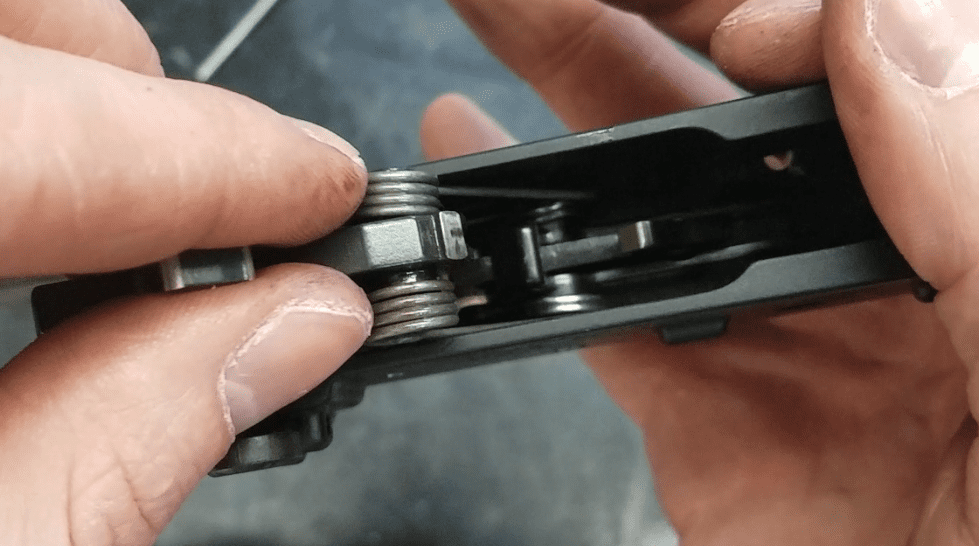
Now put the selector spring inside the grip.

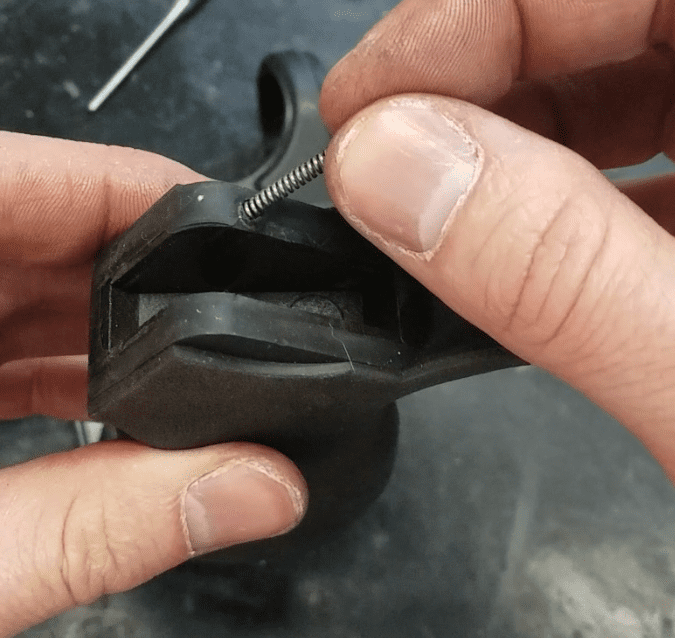
Get the grip started onto the lower. It may be tight and require some force. As you seat the grip, make sure the spring stays straight.

If you aren’t careful, the spring can bend and become pinched between the grip and the lower. This can damage the spring and impede its function. Now put the lock washer over the screw and screw it all together.
Buffer tube assembly
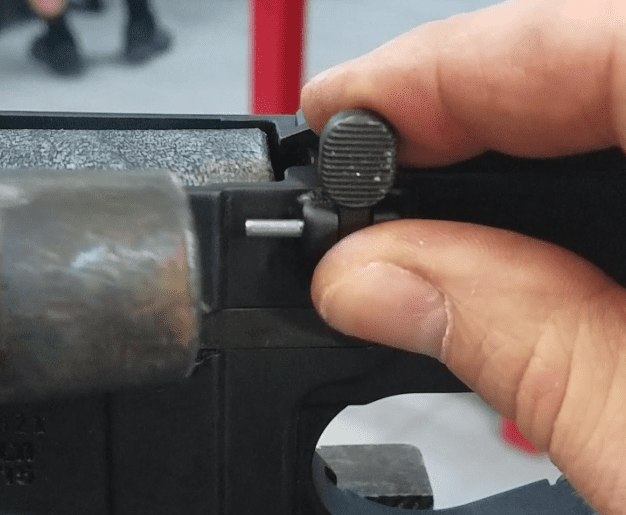
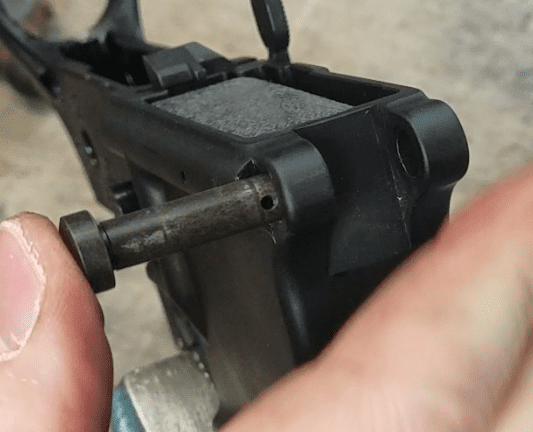
This step is also made much easier if you use a vise and vise block to hold your lower. First, insert the takedown pin.


Install the takedown pin detent and takedown detent spring.

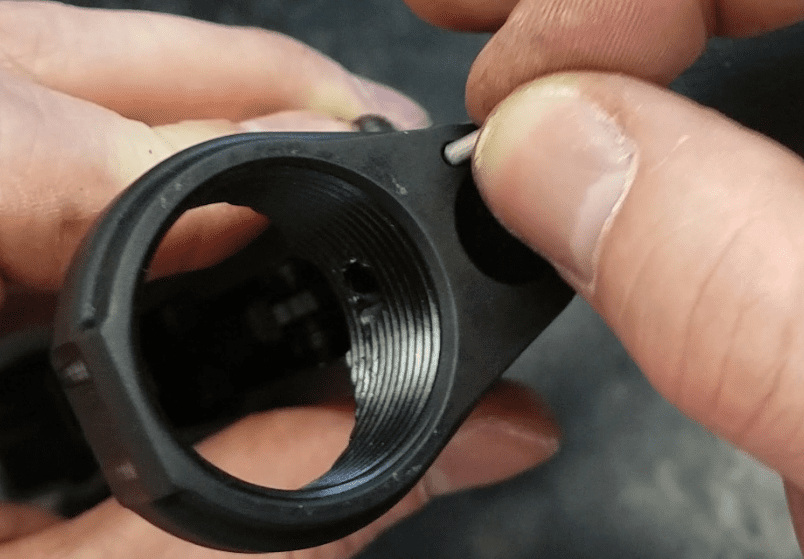

Grab your buffer tube and screw the castle nut on as far as it goes. Make sure the “castle” part of the nut points rearward. Then put the stock latch plate on the buffer tube. Make sure it’s facing the right direction, with the indentation pointing into the lower.

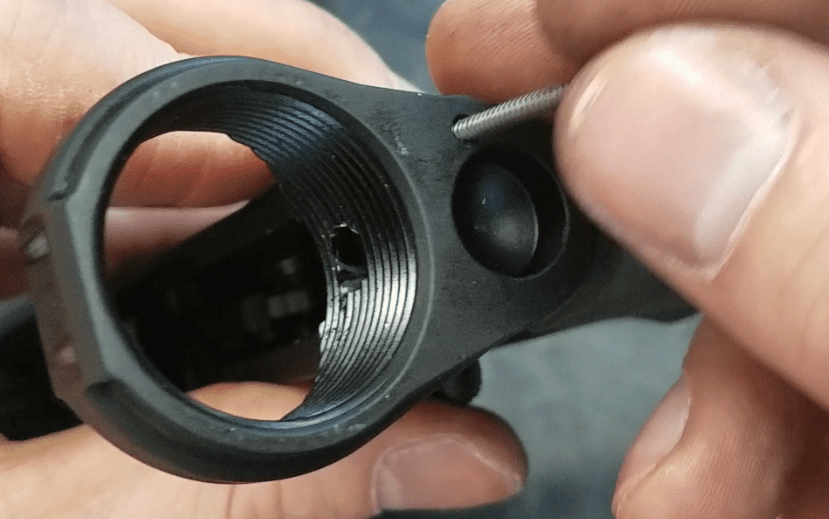
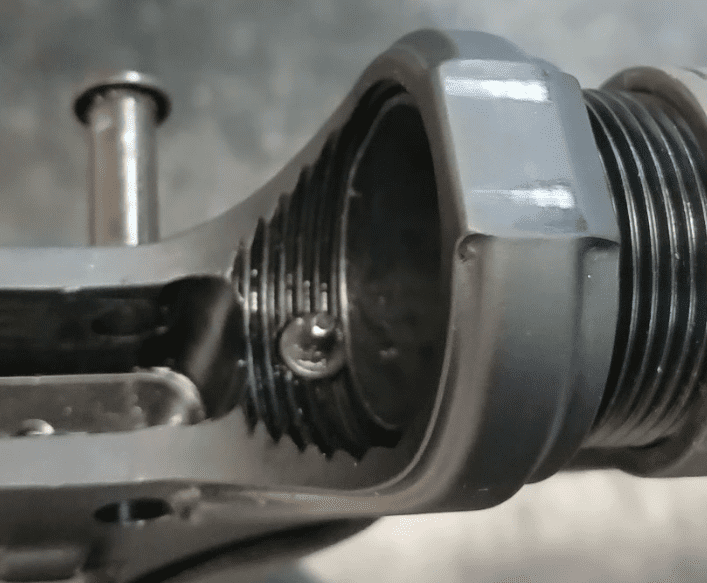
Keep the plate pressed against the castle nut as you begin to screw the buffer tube into the lower. Screw the buffer tube in until it gets close to the inner hole in the lower.

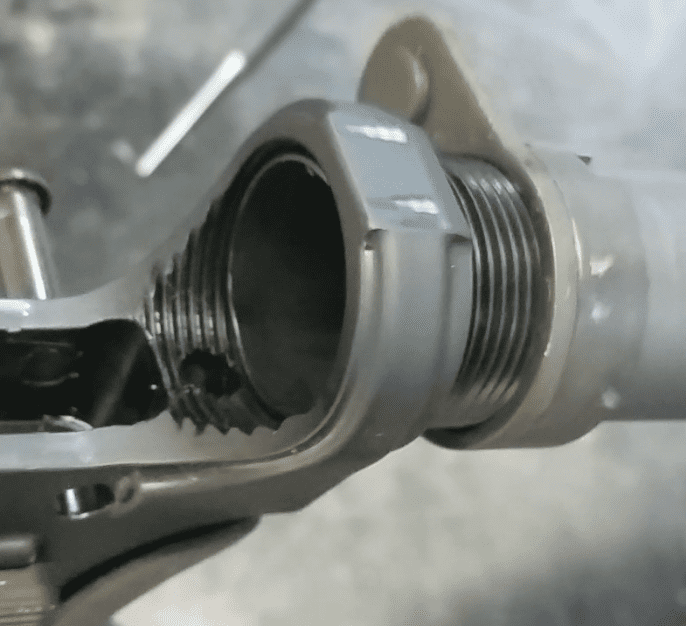
When it’s close, install the buffer retainer spring and buffer retainer. Depress it and screw the buffer tube in another ½ to one full turn, until the buffer is oriented correctly and the buffer retainer is captured.

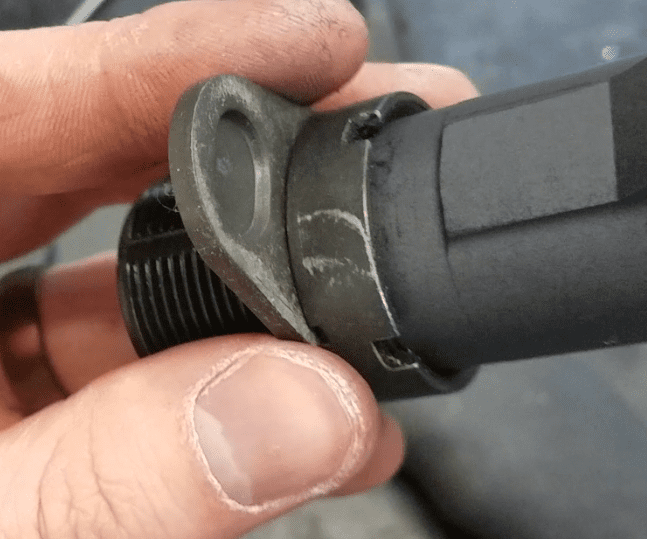
Push the stock latch plate against the lower, making sure the takedown detent spring doesn’t get pinched and tighten the castle nut.

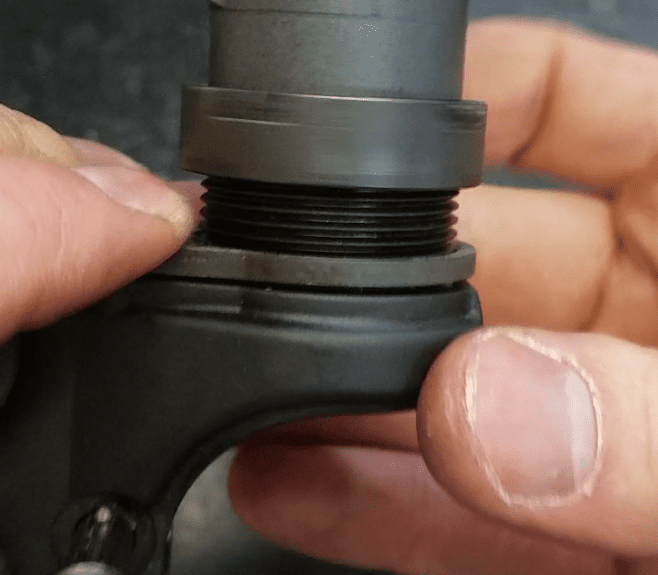
Grab your armorers’ tool, or a buttstock wrench, and get it nice and tight. Make it snug, but don’t tighten it so much that you damage you lower.
Once everything is good and tight, insert the buffer spring and buffer. You can stake the castle nut in position, or not. I don’t, and probably never will. I’ve run mine after only tightening the castle nut with a wrench without it coming loose. If I was really worried, I’d Loctite it before I staked it.
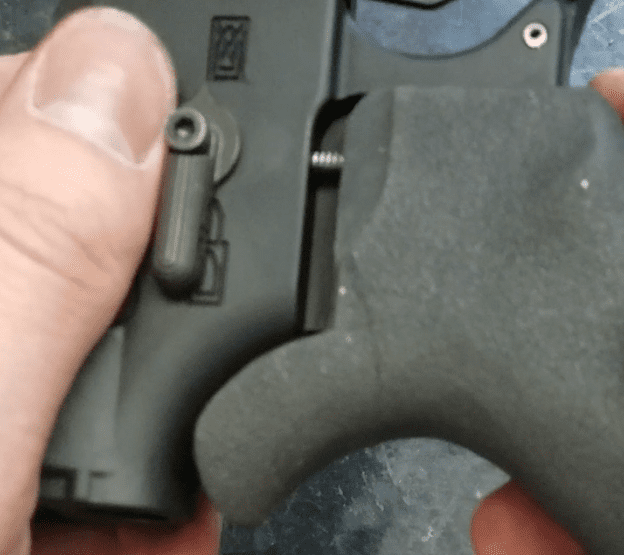
The Stock
The stock is inserted and removed by pulling the adjustment lever on the stock down and away from the top of the stock. Then slip the stock onto the buffer tube and release the adjustment lever.
There are many different stock designs out there now. The stock you choose may stray from this basic design, but the majority will follow it.

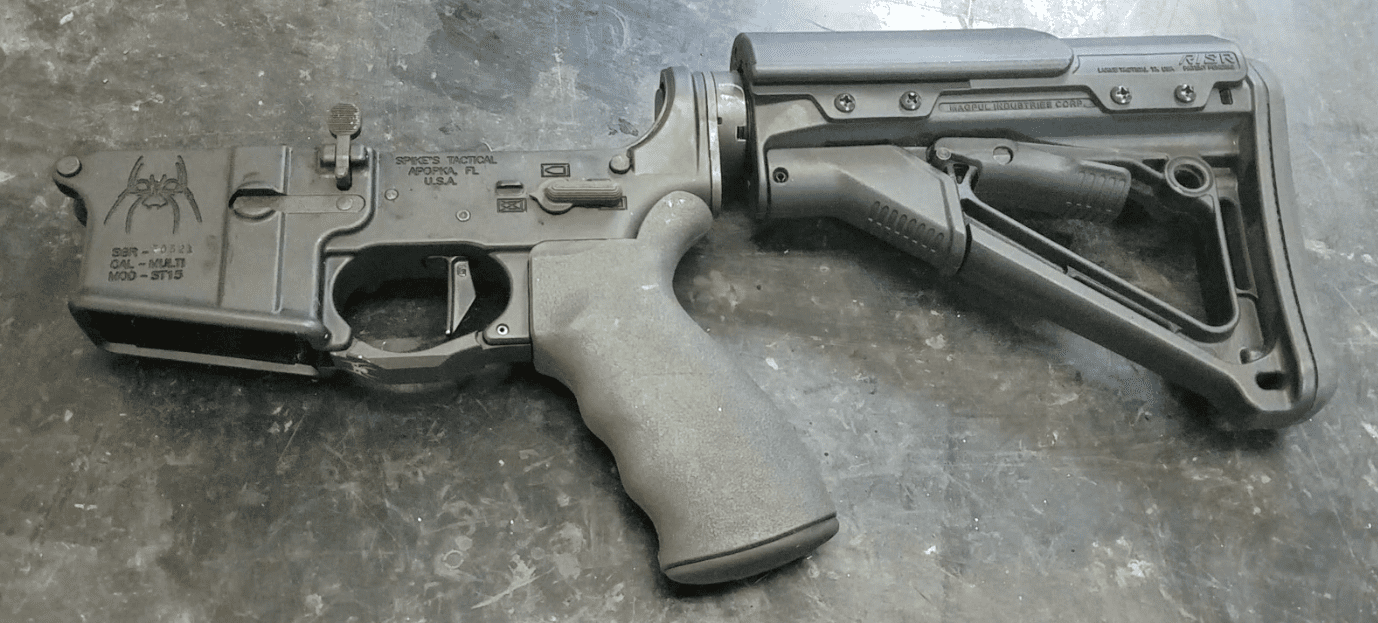
You should now have an assembled and functioning AR-15 lower receiver.
Although they aren’t required, I do highly recommend having a vice and lower receiver vise block for the job. My first build was significantly more aggravating trying to do it on my living room table. Those two items make the job significantly easier, holding everything for you while you work.
There are a ton of different aftermarket parts out there for AR-15 platform rifles, so be sure to read any instructions that come with the ones you buy. Also, because tiny pins under spring pressure are involved, eye protection is highly recommended.
Good luck and have fun.
Matt Sandy is a gunsmith who competes in both USPSA and PRC matches.