

MagnetoSpeed was at SHOT Show this year, displaying its magnetic field (read: no light necessary) chronographs and demonstrating them on range day. New for 2015 is the “Sporter” model, which is available for around $189. However, I’ve been so annoyed in the past few months attempting to use a traditional photo sensor chronograph in overcast weather, at the indoor range, or even in sunny weather with roving clouds and moving shadows that I picked up the top-of-the-line V3 model ($399). I hoped it would pull its weight and ensure that wasted 2-hour round-trip drives to the woods were a thing of the past. What I’ve found is. . .

It’s awesome. Better than I expected, and based on what I had seen at SHOT Show and in a few reviews online, I had fairly high expectations to begin with. If you watch only 15 seconds of the video above, click here to skip to what I’d say is the most impressive part.

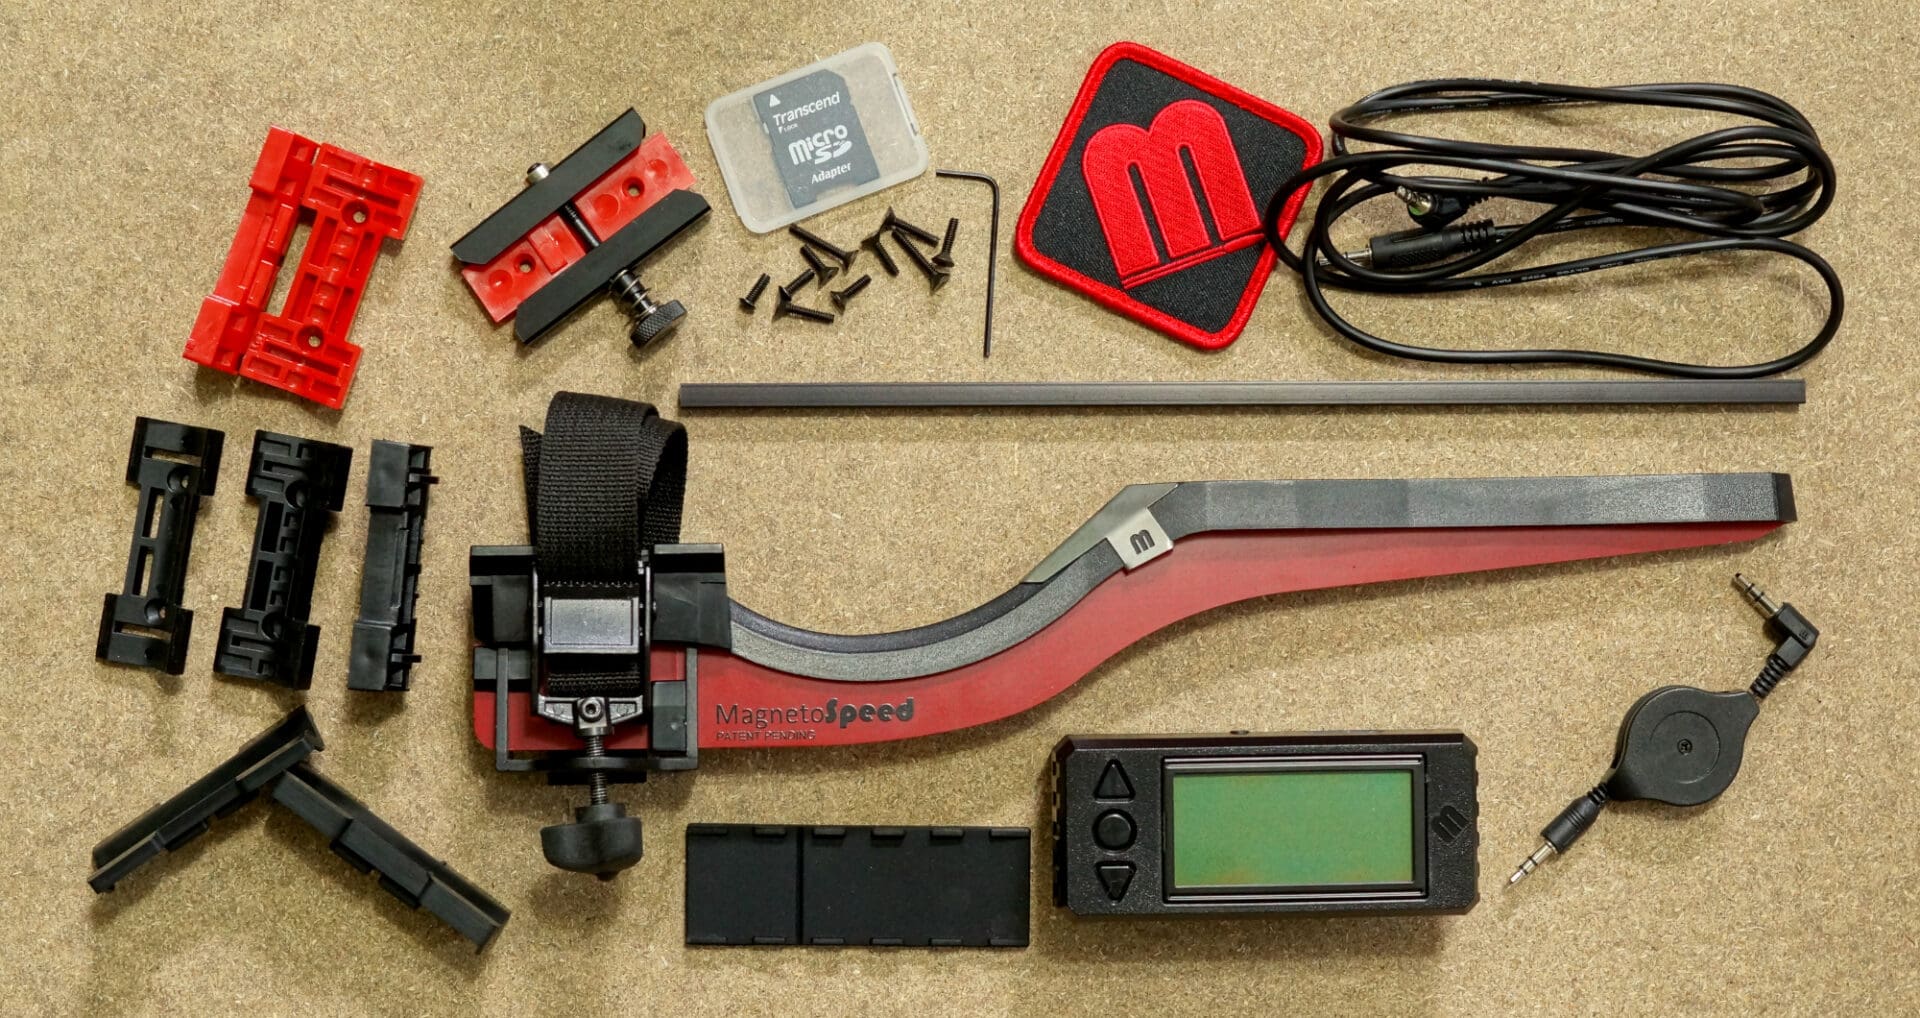
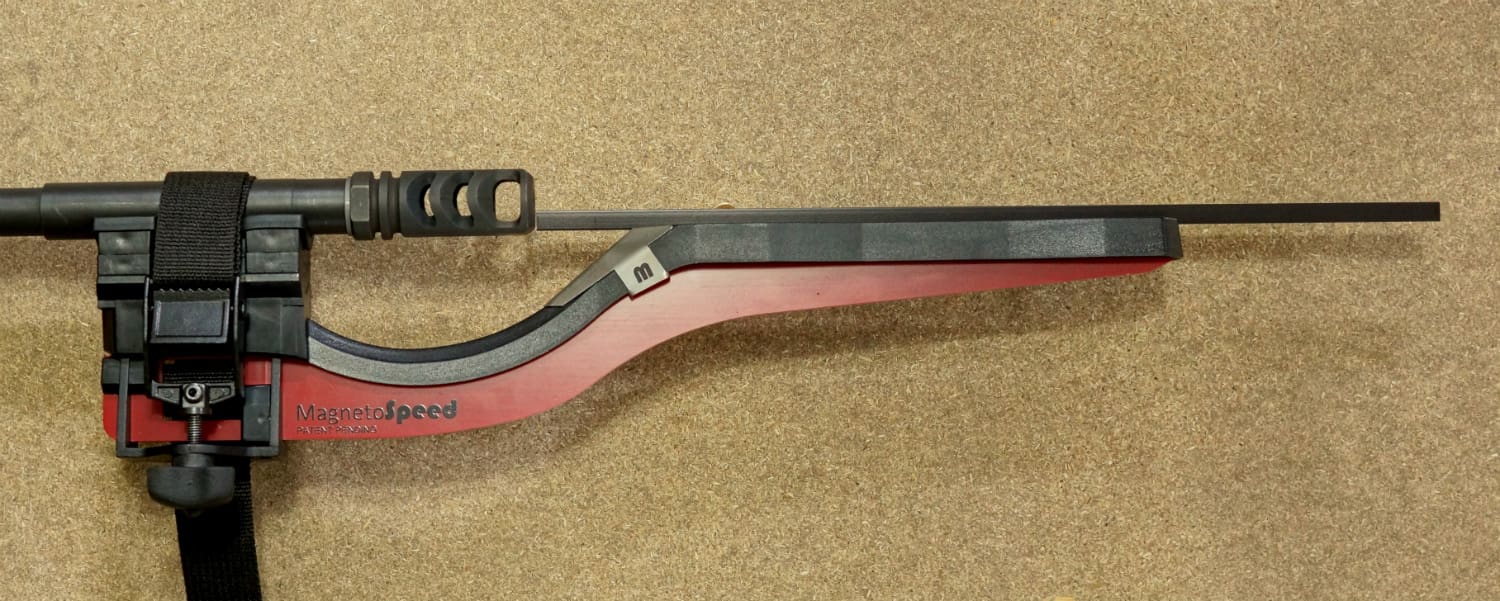
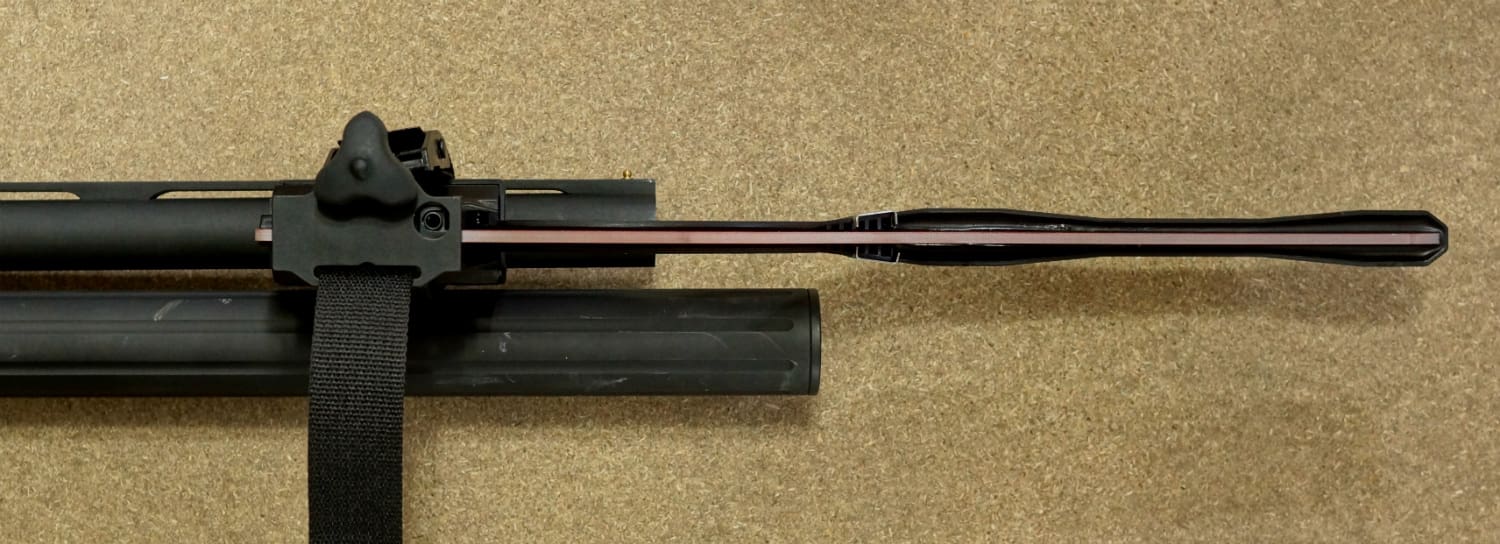
The MagnetoSpeed bayonet attaches to the barrel of your firearm. It can also be strapped to a suppressor or clamped to a picatinny rail. It uses sensors to detect changes in the magnetic field as a bullet passes over the bayonet. The V3 comes with three spacers and two rubber pads, all of varying thickness, which can be combined as needed to achieve appropriate spacing between the bayonet and the bottom of the firearm’s bore (bottom of the bullet).
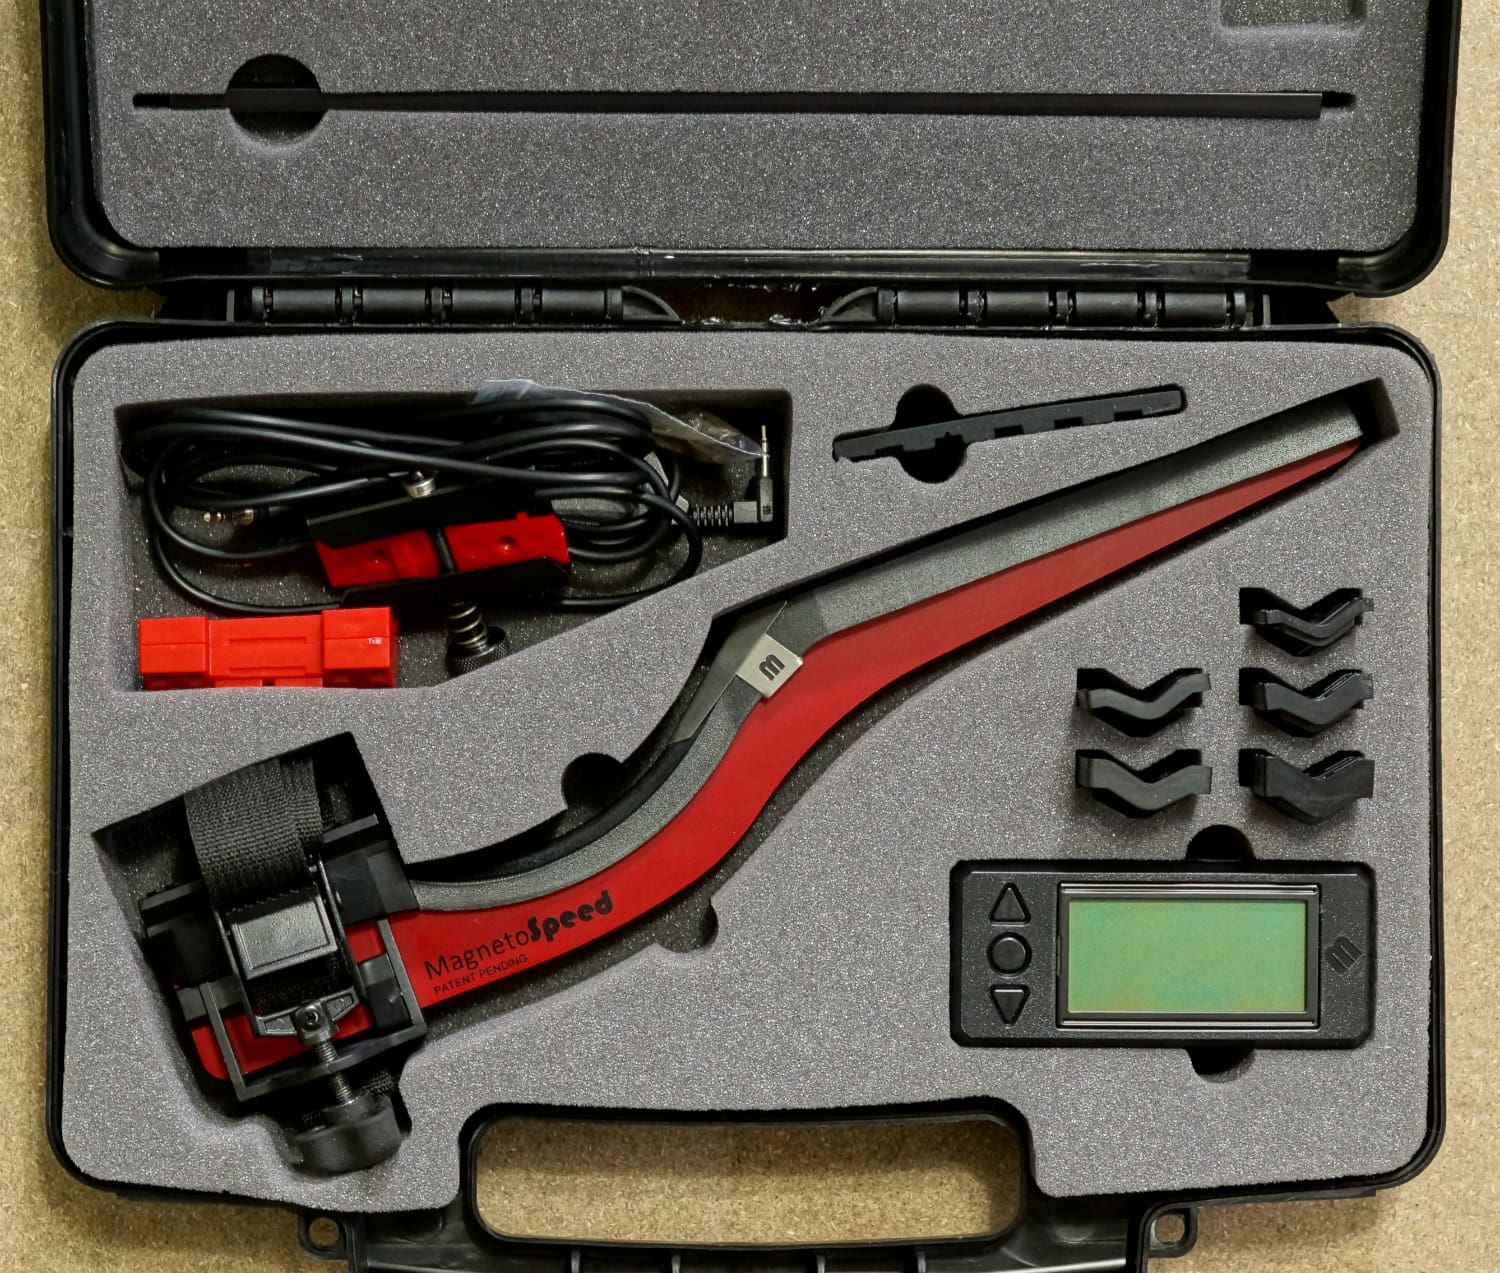
Ideal spacing is 1/4″ down to 1/8″, and the kit ships with a 1/4″-thick aluminum bar to check spacing and help ensure that the bayonet is straight so you don’t shoot it. If you’re not sure, a cleaning rod — or the aluminum bar if your bore is larger than 1/4″ — can be inserted in the bore to approximate the bullet’s trajectory.
Should the need to mount the bayonet on a tapered barrel arise, MagnetoSpeed sells tapered spacers (the two red ones seen in some of the photos). These can be stacked in either direction to create various degrees of cant.
Also included in the kit is a heat shield for the strap itself if rapid fire and a hot barrel or suppressor is in the cards. The strap is standard 1″ webbing though, so it’s easily replaced if it came to that.
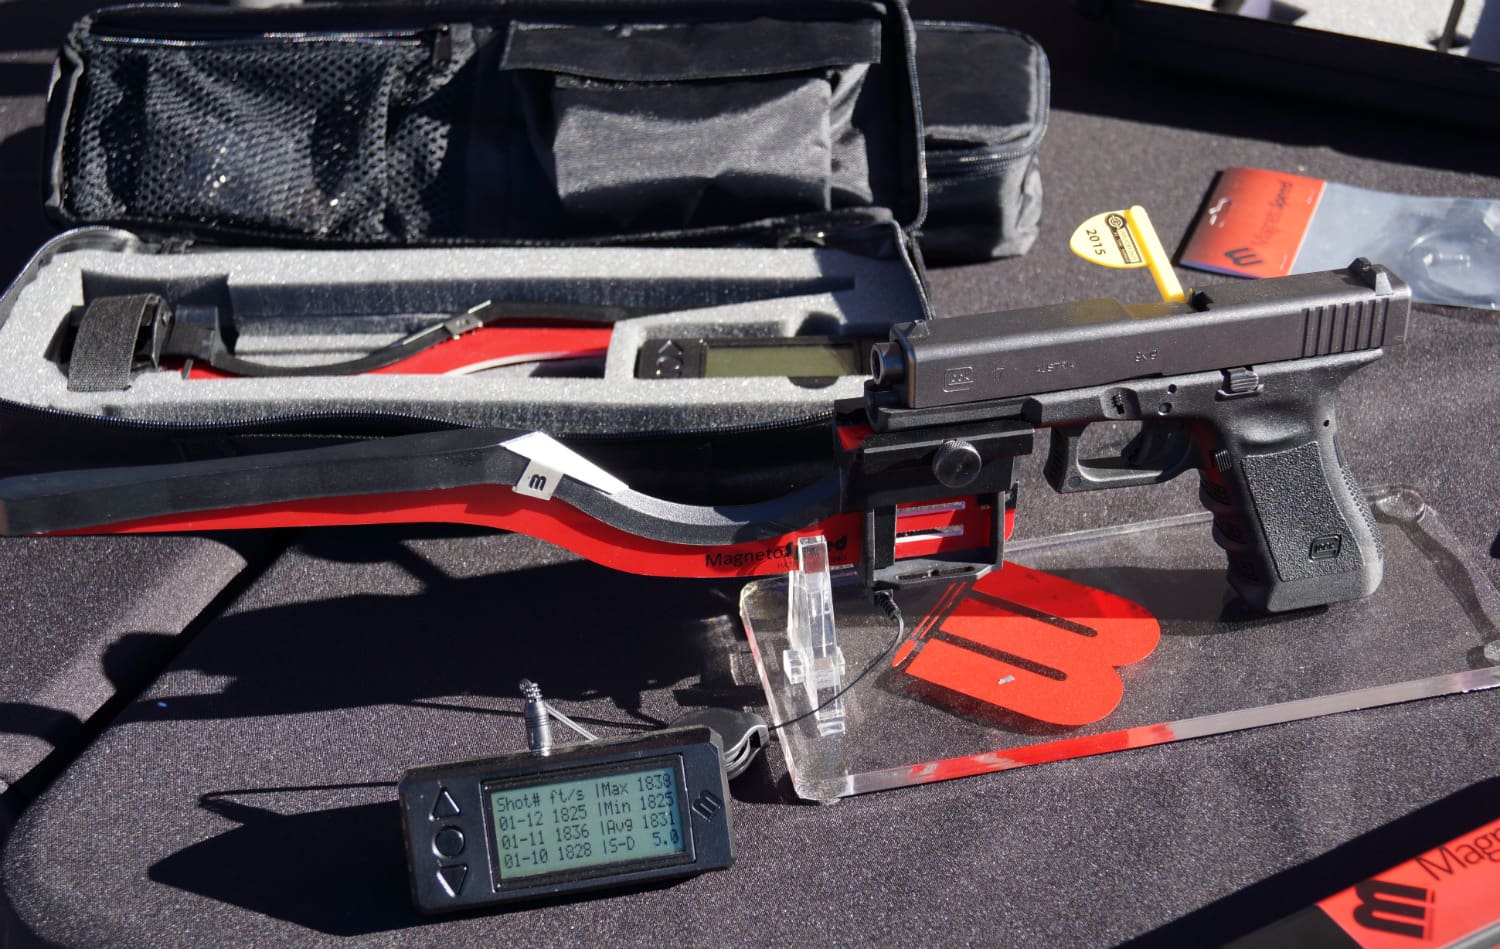
One add-on I definitely wanted was the picatinny rail adapter, which has worked great so far on a couple of standard pistols (CZ, GLOCK) as well as on a not-so-standard pistol:
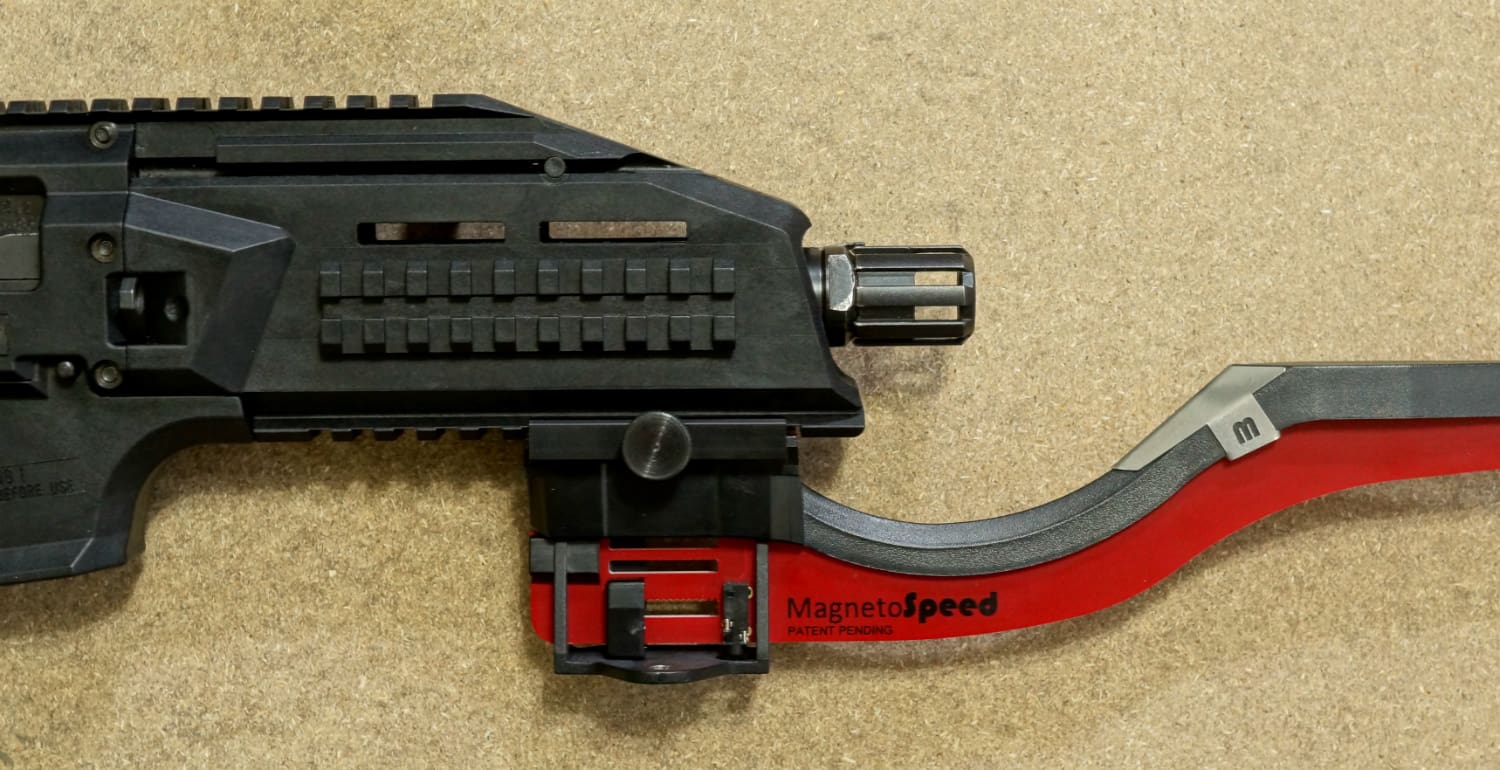
In actual practice, I’d likely mount the bayonet on one of the side rails instead of the bottom rail. It has no up or down. This 360° ability may also come in handy on some shotguns and other firearms:
The red part of the bayonet itself is cut from a sheet of fiberglass. It’s light weight, but stiff, and feels very strong. Using the MagnetoSpeed on shotguns or with muzzle brakes, as seen above, is a-okay.
Overall I think the physical design is extremely good, and there was clearly a lot of thought that went into making it easy to use. For instance, tighten the strap by hand and then follow up with a few turns on the knob to make sure it’s fully secure. Extra strap length is kept out of the way by routing it through a slot on the other side.
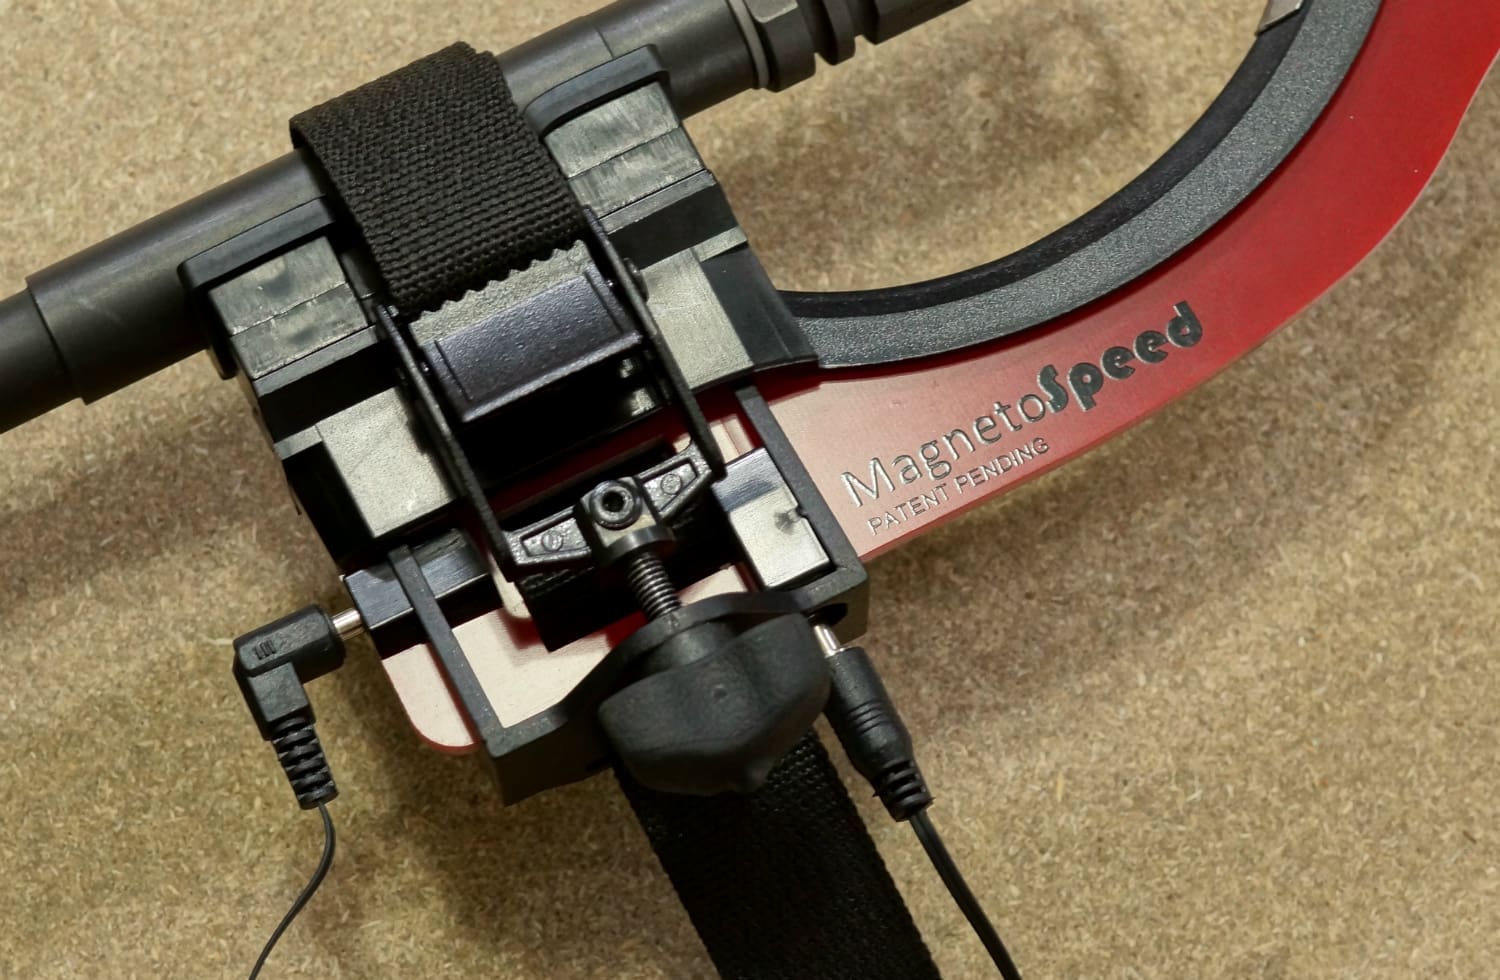
Even cooler than strap management are the redundant ports for the data cables. They both do the same thing and only one is used while chronographing, but with one on the back and one on the bottom you’re significantly less likely to run into some sort of clearance issue.
Also worth noting is that both cables have one 90° end and one straight end, and it doesn’t matter which end goes in the bayonet and which end goes in the display unit. The kit comes with two cords — one a lightweight retractable job and the other a 6-foot standard cord.
The display unit turns on automatically when the cable is inserted. It is the control center, the brains of the system, and the data logger. It saves data — shot velocity (ft/s or m/s), maximum velocity, minimum velocity, average velocity, standard deviation (SD), and extreme spread (ES) — on a Micro SD card. The menus and settings are very easy to navigate, and the owner’s manual is actually quite excellent as well. The quick start guide is exactly what a quick start guide should be.
One 9v battery or two CR123s can be used to power the display unit. A backlight can be turned on if desired.
On The Range
In practice, the MagnetoSpeed was a joy to use. It picked up every last shot and instantly had all of the data available to scroll through on the display. Pressing the up or down arrows scrolls the shot velocity history on the left side, while min, max, and SD or ES stay fixed on the right. Regardless of whether you have it set to display SD or ES, both will be saved to the Micro SD card when you archive the data.
The only “complicated” adjustment you may have to make is tinkering with sensitivity. The normal sensitivity mode — setting 2, or just select “normal” — is supposed to work in the vast majority of cases and, indeed, worked flawlessly on my AR-15 with three brands of ammo including during rapid fire as seen in the video. Of course, considering it will collect data at up to 1,100 rounds per minute, this shouldn’t be a surprise.
For smaller bullets, some cast lead bullets (no jacket, no plating), less-than-ideal distance between bayonet and bore, etc, the sensitivity goes up to 11.
With the rail mount on my SP-01 with .22 LR Kadet Adapter installed, the spacing was a bit over the suggested maximum and, of course, .22 LR bullets are small. On normal mode it didn’t pick up a bare lead bullet, so I bumped the sensitivity up to the middle of the range and it never missed another shot. For most centerfire ammo, the setup process is strap it on, plug it in, and shoot.
Perhaps the most enjoyable aspect of collecting data with the MagnetoSpeed system is that you’re free to move around and have fun target shooting at the same time. Shooting over the two photo sensors of a traditional chronograph requires precise and careful alignment — I admit it! I’ve shot and destroyed a chronograph before! — so once it’s set up you’re fixed in place. Basically, the ammo I used to use for chronograph work really served no other function. Yes, it’s possible to set up with a target down range and, for instance, sight in a rifle while collecting photo sensor chrony data, but aligning gun, shooting bench, chronograph, and target is not the easiest of feats. With the lightweight bayonet strapped to your firearm and 6 feet of cord, you can go about your normal shooting while collecting data. Heck, toss the display unit in a pocket and you’re chronographing on the go.
Of course, we also come back full circle to my impetus for getting the MagnetoSpeed in the first place. This magnetic sensor chrony is not dependent on light conditions. It just works. Even with ideal light I’m used to occasional missed readings and other failures with a photo chrony due to shots that aren’t perfectly centered and debris from muzzle blast passing the sensors, etc. “Ideal light” is also pretty specific — indirect sunlight, basically. Moving your entire setup because the sun has moved and now your chrony shades aren’t blocking the sensors or a tree shadow comes into play or clouds keep changing the lighting really just sucks. “Just use a collapsible gazebo,” they say. How about I take the chronograph out for dinner first? Yeesh. One MagnetoSpeed, please.
Drawbacks
There are things one can do with a normal chronograph that cannot be done with the MagnetoSpeed:
- The MagnetoSpeed can’t be placed downrange to provide information on projectile velocity at a given distance. It does muzzle velocity.
- There will be firearms that the MagnetoSpeed just can’t attach to. Revolvers with short barrels (the few that lack side rails like the Sky Marshal, of course), rifles with extended handguards that would space the bayonet too far away from the bore if it were strapped to the handguard, most semi-automatic pistols without an accessory rail (the exception being various .22 LR models that don’t have a reciprocating slide), compact pistols with small accessory rails, etc.
- If many firearms are to be chronographed in one outing, it would be quicker with a chronograph that isn’t attached to the gun.
At $189, the Sporter model is in the ballpark with nice photo sensor chronographs. The $399 V3 model ain’t cheap. It is pretty freaking awesome, though.
I’d like to see a WiFi or Bluetooth connection on the “V4” chronograph. Ditch the cord and ditch the display unit; let’s log directly to a phone, tablet, or laptop.
Ratings (out of five stars):
Reliability * * * * *
I have never had such reliable success picking up every single shot over a chronograph. Let alone rapid fire shots. Even in perfect lighting conditions.
Accuracy * * * * *
Obviously this is somewhat difficult for me to verify. Standard deviation results were totally in line with my photo sensor chronograph for the ammunition types that I’ve shot over both. Velocity measurements are very close, but I have no way to know which one is closer to the actual numbers. However, on the day I was shooting I do know that the speed of sound was below most of the Winchester 555 .22 LR shots but above a couple of the shots. This was completely apparent due to the sonic boom from the supersonic shots. According to my calculation of the speed of sound on that day, the MagnetoSpeed readings perfectly bore out the real life fact that some of the rounds were below the speed of sound and most were over it.
Ease of Use * * * * *
Properly mounting the bayonet was much simpler than I was expecting. Properly configuring the unit couldn’t be easier. Collecting data while shooting is actually fun. Not worrying about aligning each shot perfectly every time or suffer shooting your chronograph? Weight of impending doom lifted off my shoulders.
Price * *
More expensive than traditional chronographs. At the time of this writing, it’s on sale at MidwayUSA for $349.99.
Overall Rating * * * * *
I’m really happy right now. We’ll be seeing a lot of this MagnetoSpeed V3 in the future as I use it for basically everything that will benefit from chronograph data.