A Guns Save Life member writes:
About two years ago, we decided to build a safe room. Previous GunNews articles (Guns Save Life’s monthly journal) have described how we planned, built and finished our safe room.
The room, built of poured concrete, serves several roles for us. It stores many of our firearms and ammunition. In tornado country here in Illinois, it serves as a shelter. What’s more, it’s also what some might call my man cave and workshop as well.
We’ve spent the last year installing and configuring tech in our safe room to support security, communication, computing and off-grid power. This article reviews what we did, and is intended to illustrate some of the things you might want to think about for your own safe room.
We wall mounted the off-grid power system – a 2800 watt inverter and an Maximum Power Point Tracking (MPPT) charge controller by Outback. Battery enclosures (under the countertop) hold 16 AGM (absorbent glass mat) batteries with a capacity of about 10 kWh. Cables to the solar panels and a wind turbine exit discreetly through an underground conduit.
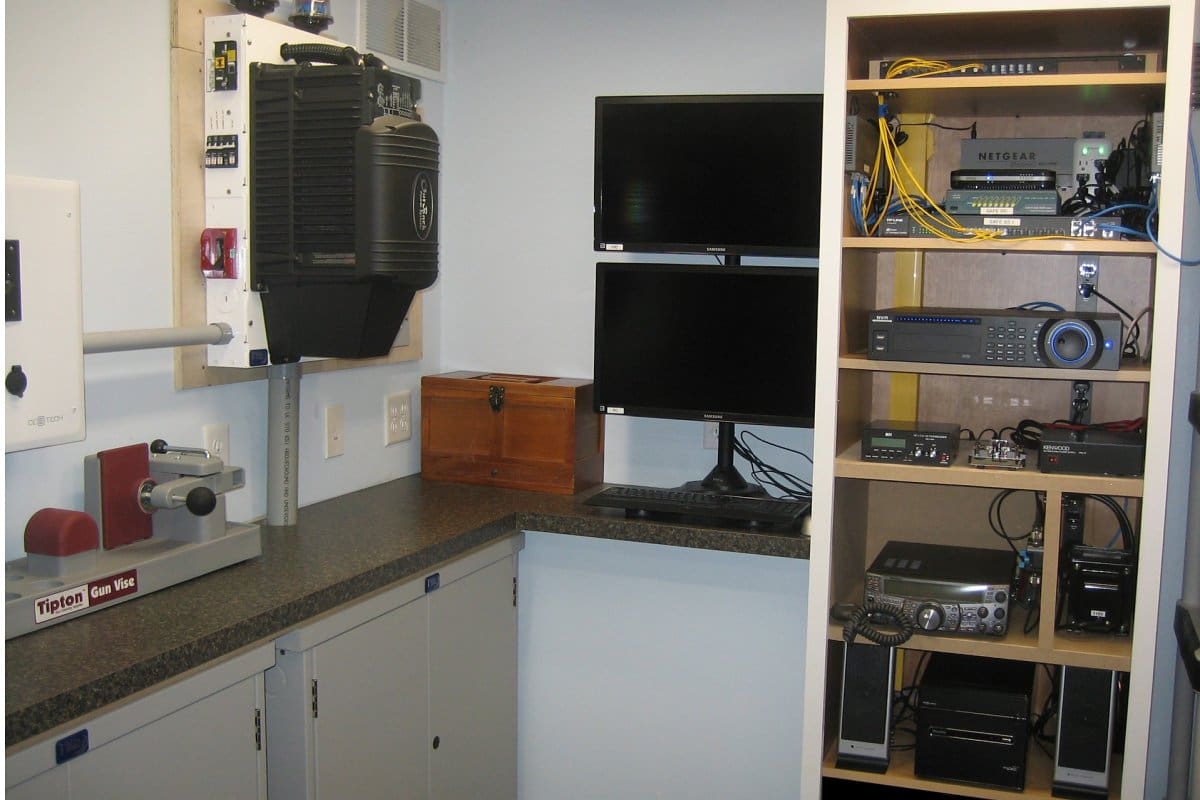
The top two compartments of the equipment cabinet hold all the networking hardware – patch panel on the top, network switches and controllers below. We set up a pair of separate networks, one for the security system and another for Internet access.
We ended up using fiber optic cables for network runs exiting the safe room (eliminates ground loops, not affected by an EMP). Fiber optic is simpler and cheaper than you might think. Mixing fiber and Cat 6 in the same network is easy. We had good success using single mode, duplex fiber optic cables with LC connectors, Trendnet TEG-MGBS10 laser modules and Netgear GS110TP switches.
The third compartment from the top holds the video recorder for the surveillance system. Looking at our options, we chose a digital video surveillance system that uses power over Ethernet (PoE) – eliminating the need for camera batteries or power cables. We bought a system manufactured by Dahua and placed cameras all around our property – some are hidden, others are intentionally very obvious.
The next two compartments house the radio and associated gear. We found a good deal on a Kenwood TS-2000x radio. It covers most amateur bands and is capable of 100W transmitting power. This radio can interface with a computer for easy programming and configuration.
We also added a Morse code keyer/reader made by MFJ Enterprises (model MFJ-464). The MFJ box translates Morse code to text (and vice versa) in real time. There’s also an Iambic Morse code paddle.
The TS-2000x sits in an RF shielded cubbyhole to cut down on interference from all the other electronics. The antenna cables and RF ground exit the safe room through an underground conduit. We chose a vertical multiband antenna (Comet GP-15) for 6m, 2m, and 70cm bands and a portable TransWorld antenna (www.dxengineering.com) with tuners for specific HF bands (40, 20 and 10m). We chose mounts that allow for easy deployment and take down of our antennas – to keep things adaptable and discrete.
Below the radio sits an old Shuttle computer rebuilt and repurposed as a server. This will be used for monitoring and for network security. It also holds an electronic library of “how to” manuals that we’ve collected over the years (we also have paper copies of everything). In a pinch, this PC can play blu-rays and DVDs. It also has EchoLink software, providing radio communication over the Internet.
At this point, our safe room is complete. The solar panels, wind turbine and radio antennas remain stored indoors – out of sight – but are easily deployed when needed.
Our only advice? Planning is key. Keep your costs down. Take your time, get educated and plan ahead. You too can create a well-designed, usable safe room.