

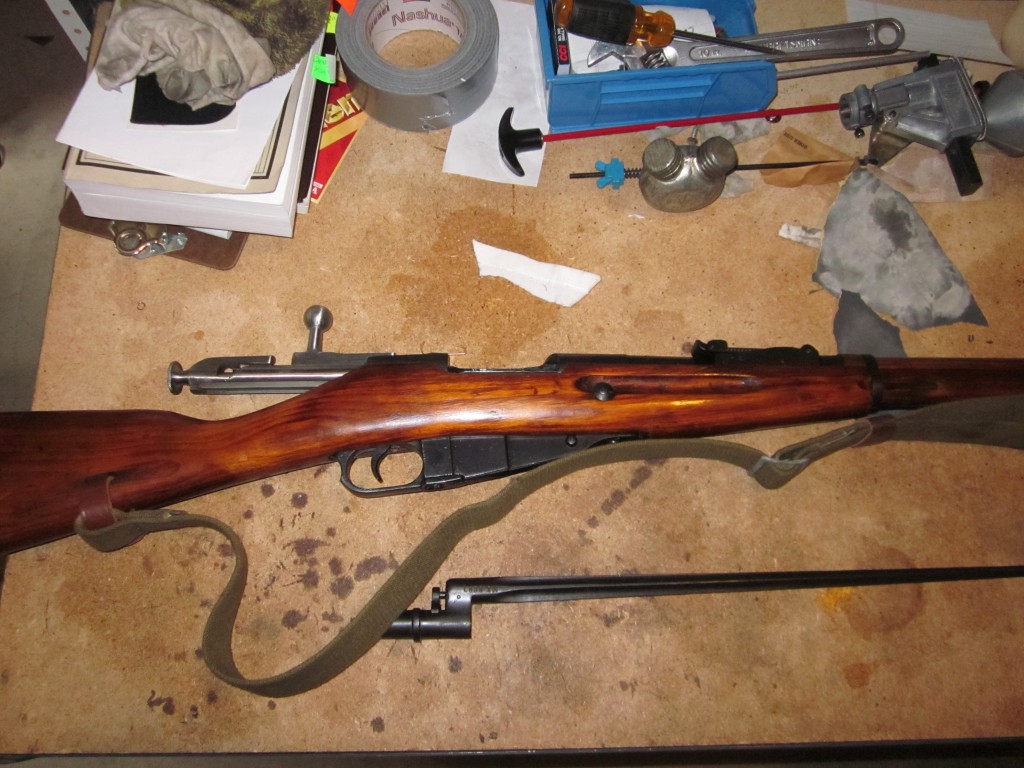

And you already know the Mosin-Nagant’s Achilles’ Heel: many of them are cursed with heavy, gritty trigger pulls.
First, a quick safety disclaimer: Most trigger work is best left to the professionals, because the trigger and sear on your rifle are the only things preventing it from going boom the instant you close the bolt on a live round. Remington Model 700 owners should think extra long and hard before modifying their rifle’s on-off switches if they want to avoid unintentional discharges.
Fortunately, the simple (many would say ‘crude’) design of the Mosin-Nagant trigger allows the aspiring Bubba Gunsmith to smooth out and lighten the trigger pull without altering the sear engagement or trigger spring stiffness at all.
Step One: safety check
Open the bolt, make sure the gun isn’t loaded, and hold the trigger while you pull the bolt back out of the receiver.
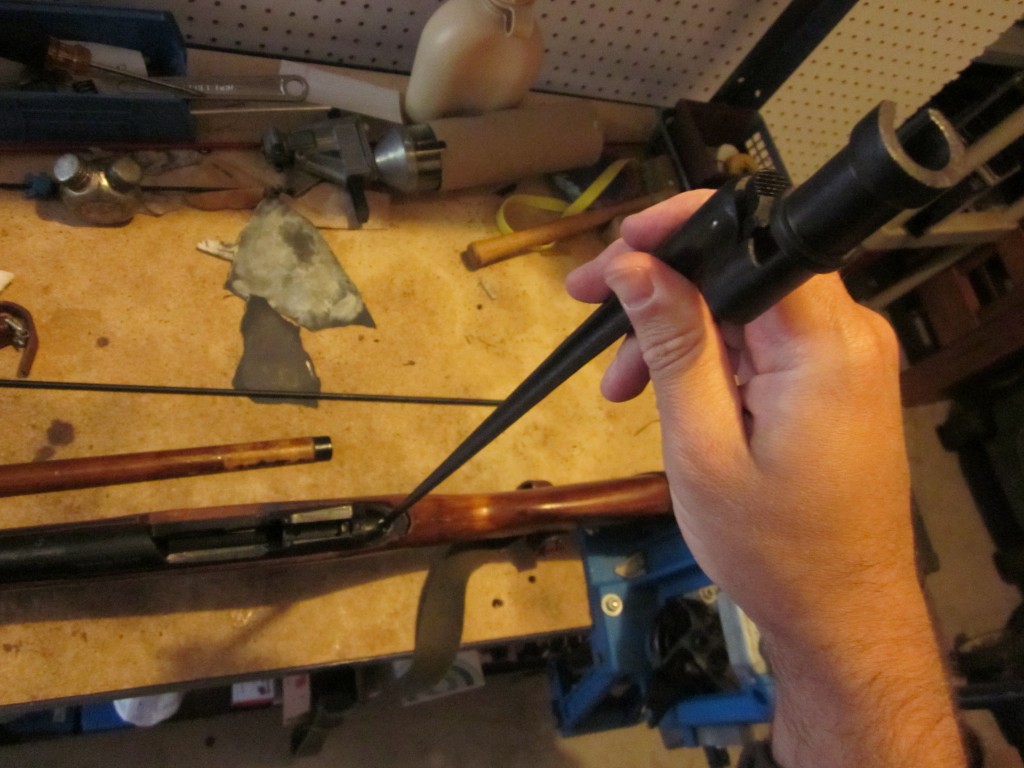
Step Two: remove the stock
Take off the front ‘Dog Collar’ sling and remove the cleaning rod. Then push the front and rear stock retaining bands forward until they’re hanging around the front sight post, and remove the upper handguard. The upper handguard is a slender piece of well-aged stock wood, and it’s the only part of a Mosin-Nagant that anyone could call ‘fragile.’
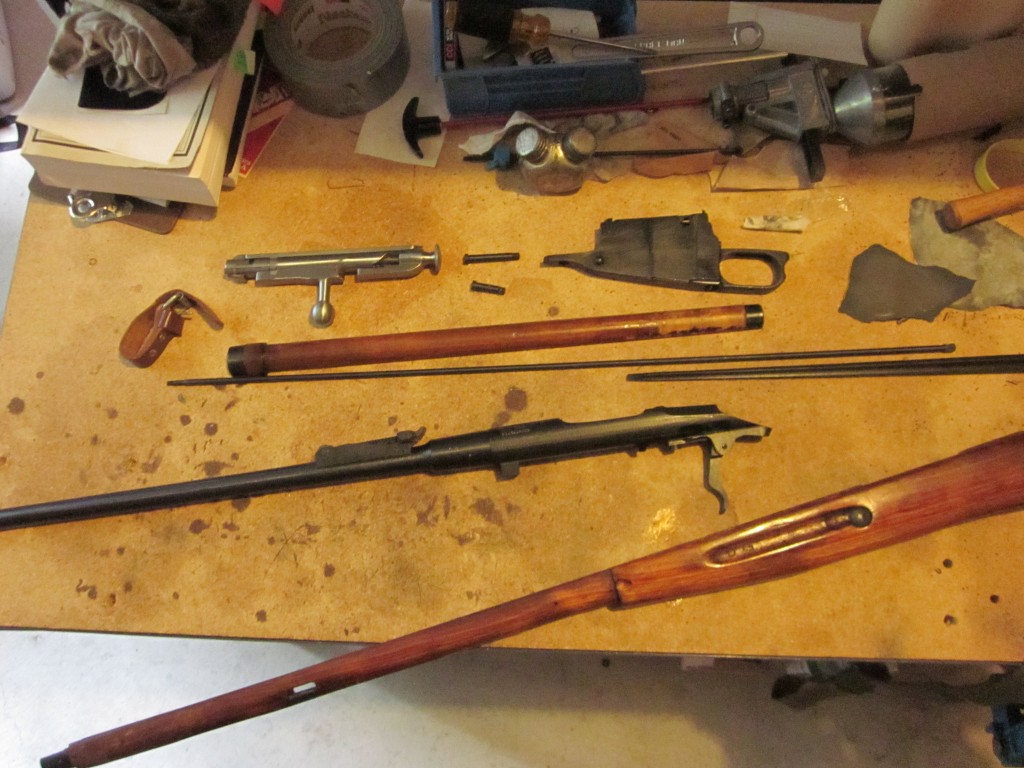
Step Three: remove the sear and trigger
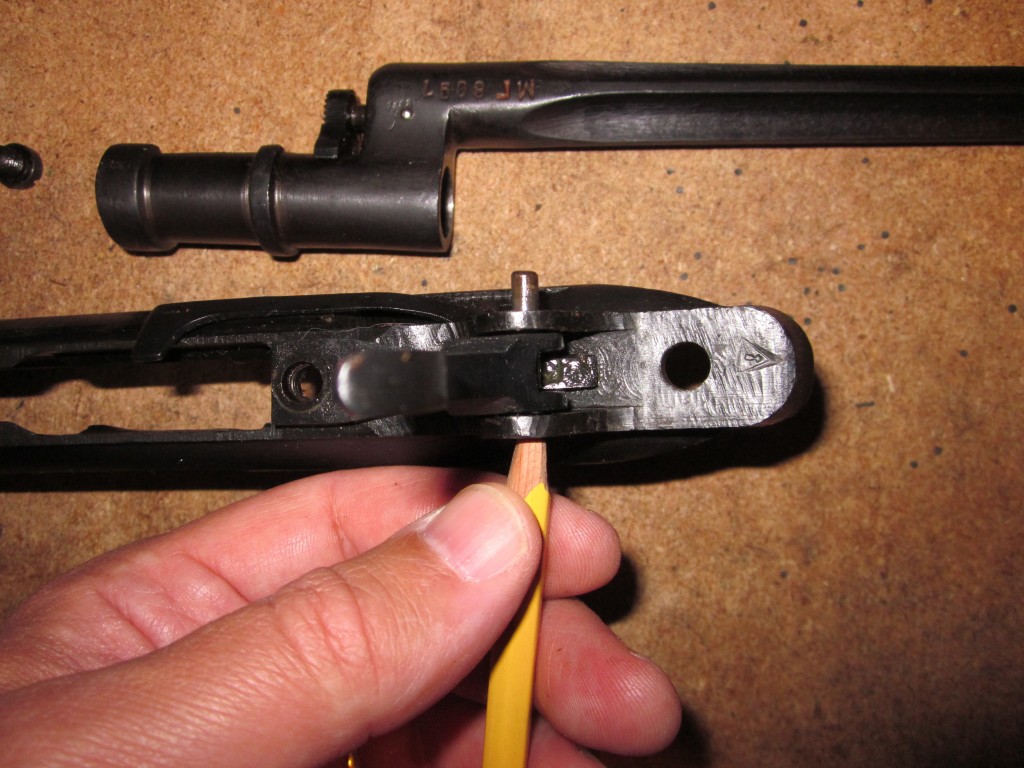
Your workbench should look more or less like this now:
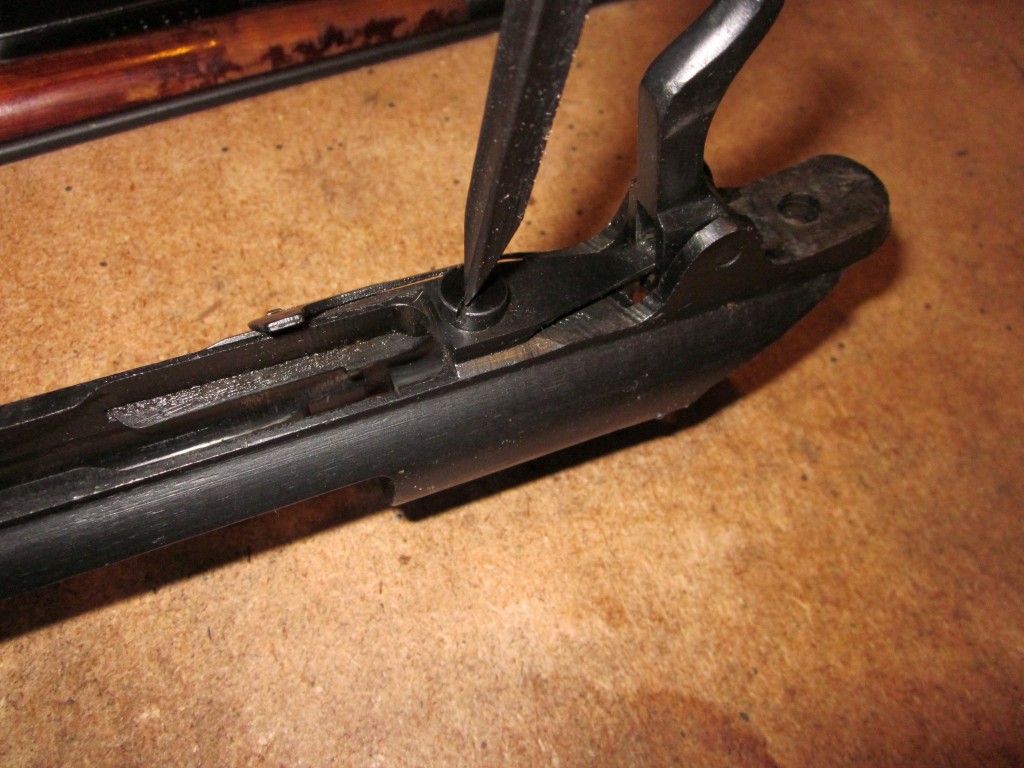
Now use a punch, pencil, or the corner of your fingernail to push out the trigger pin. They usually have loose tolerances and push out very easily.
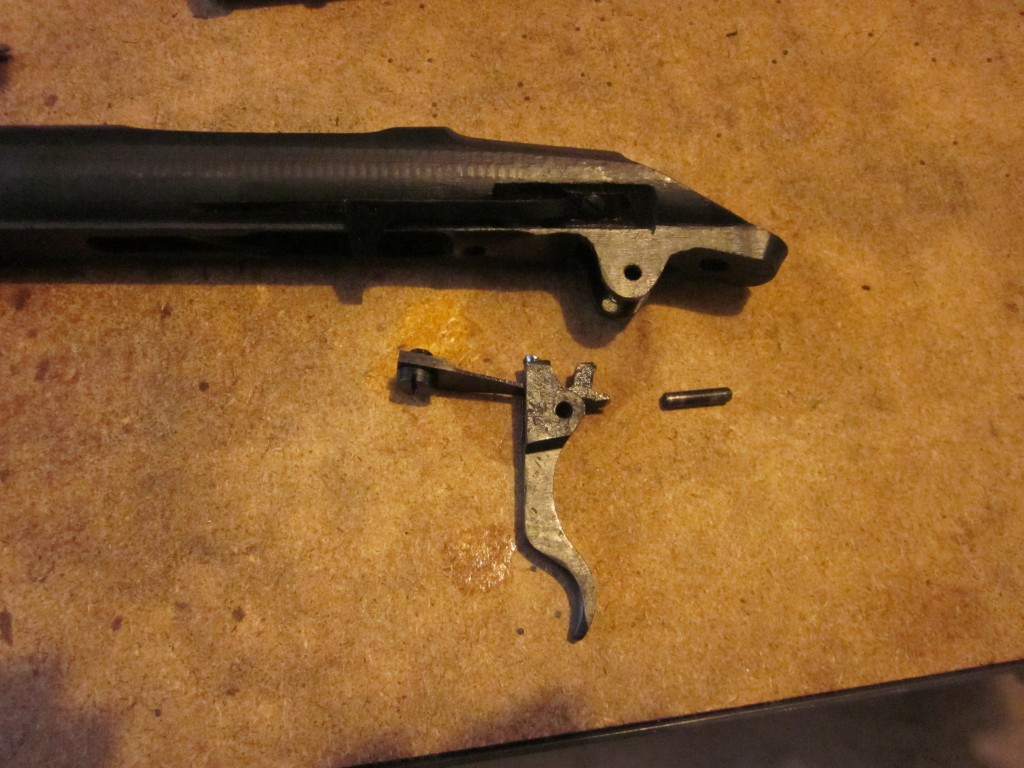
This will allow you to completely remove the sear/spring and the trigger. Once they’re out it will look like this:
Step Four: polish the top and sides of the sear/spring
Notice how the sear/spring passes through the top of the trigger? When you pull the trigger it hinges on the trigger pin and the bottom of the trigger ‘box’ rubs against the top of the sear/spring. This pulls the sear downward and the sear ‘hook’ (the squared-off part at the back of the sear/spring) allows the firing pin to fly forward inside the bolt.
The top and sides of the sear spring (not the sear ‘hook’) are the ONLY sear surfaces you’re going to polish.
Using very fine sandpaper or emery cloth (600 grit or finer), polish the upper surface of the sear spring as shown here:
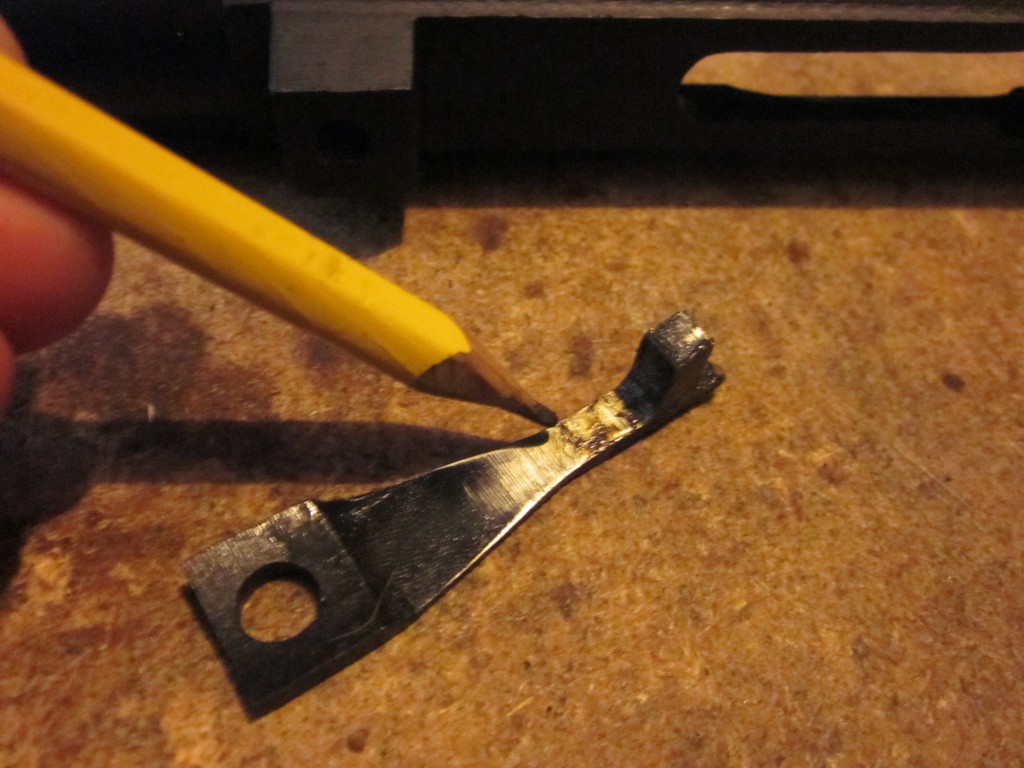
You can tell from this picture that I didn’t go for a ‘mirror finish’ on my Mosin’s sear spring, but the rifle now has a very satisfactory trigger pull.
The sides of the sear/spring also rub against the inside of the trigger ‘box’, so polish them too if they’re rough.
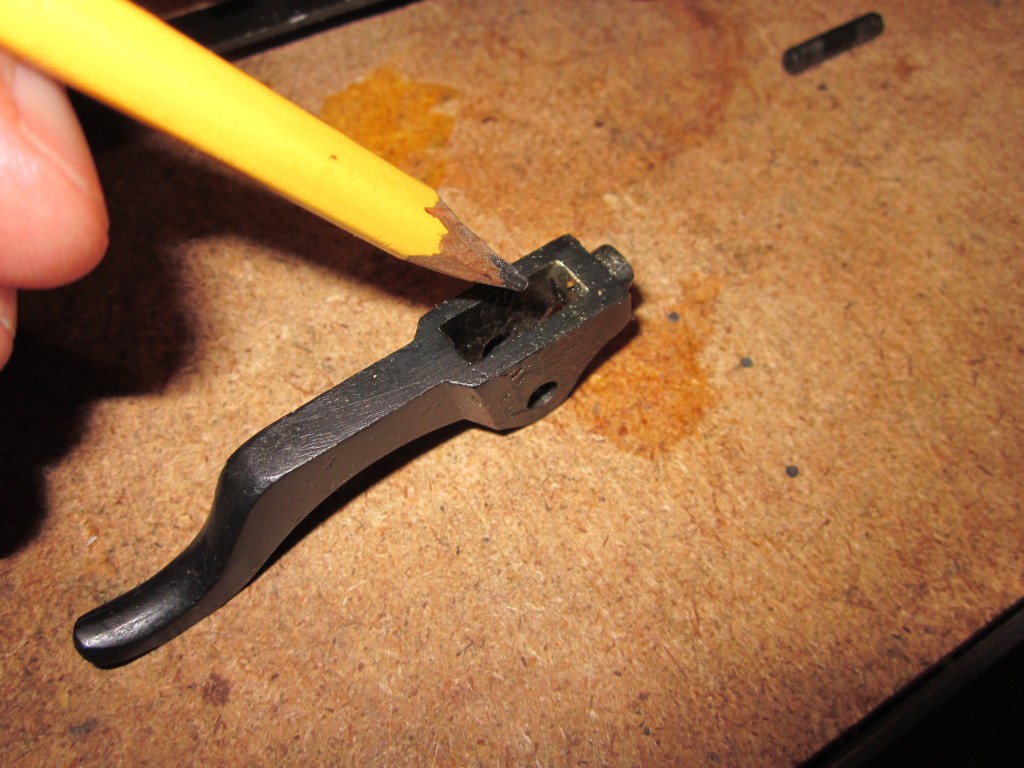
Step Five: polish the inside top of the trigger ‘box’
Step Six: polish, reassemble, test, repeat
While you polish the sear spring and trigger box, occasionally stop to reassemble the sear and trigger. Don’t tighten the sear screw too hard, just screw it all the way in and slip the action back into the stock. Replace the bolt and dry-fire it a few times to test how smooth the trigger is getting. If it still needs more work, disassemble it and polish it more until it feels acceptable.
Don’t mess with the bolt or the sear hook
Unless you’re a gunsmith, I don’t recommend doing anything to the bolt other than disassembling it and cleaning it thoroughly. (Check YouTube for tutorials on bolt disassembly and reassembly.) Trying to polish or reshape the bolt’s hammer notch won’t help the trigger pull much, and it’s more likely to lead to an unsafe rifle. Same goes for the sear hook.
Reassembly:
Carefully clean the trigger and sear so that no traces of abrasive remain, and then smudge them with some high-temperature grease before fitting them together and replacing the trigger pin. Put a drop of blue Loctite (not the permanent red stuff) on the degreased sear screw and screw it down tight. You don’t want it backing out during firing, because that would lead to unintentional discharges when the sear hook simply falls away from the hammer notch.
Replace the stock, sling and cleaning rod, and let the Loctite cure for a few hours before shooting it. Be extra-cautious when you test-fire it the first time, and stop firing if the trigger pull starts to feel too light; it might mean that your sear screw is backing out. I’ve never had this happen with my own Mosin trigger projects, but it’s a dangerous condition if it happens.
Here’s a recap video:

I don’t pretend to have invented this method myself. I watched a lot of YouTube videos and studied the parts of my two Mosins for hours before I dove into the project, and the results on my two Mosins have been excellent.
It dramatically improved the shootability of my 91/30, an arsenaled 1943 Izhvesk. It came to me with a completely hideous trigger pull, and it now breaks at a hair over 5 pounds, with a long takeup and only a little grittiness. My 1946 M44 came from the factory with a remarkably decent trigger (for a Mosin-Nagant) and this Bubba Gunsmith trigger job made it even better. It now pulls perfectly smoothly and breaks at exactly 4 pounds. Except for the takeup and overtravel, it feels almost like a good (but not great) commercial trigger.
If you’ve got a Mosin with a balky trigger, this no-cost and low-risk trigger job might persuade you to take it shooting more often. And remember, every time someone takes an old mil-surp rifle shooting, an angel gets its wings.