


Gunsmithing Modern Firearms, A Gun Guy’s Guide To Making Good Guns Even Better, is Bryce Towlsey’s newest gunsmithing book. Towsley is a firearms expert who has spent his 38-year career writing for many of the top firearms publications. He knows guns and ballistics and how they relate to the real world.
Towsley has written extensively on gunsmithing for a wide range of gun and hunting magazines, including a column on gunsmithing for The American Rifleman.
The extensive information contained in the pages of Towsley’s latest book is important to anybody interested in firearms care, modification or improvement. It takes the reader from easy to do “kitchen table” projects through advanced projects such as building a precision or hunting rifle. There is something in these pages for anybody interested in working on their guns.
This coffee-table-quality 8.5×11-inch book has 289 pages and includes nearly a thousand color photos.
To order Gunsmithing Modern Firearms, click here.
The following material from Gunsmithing Modern Firearms is pulled from Chapter 2, When a Good Gun Goes Bad. Reprinted with permission of the publisher. Copyright 2019, Skyhorse Publishing.
When a Good Gun Goes Bad
I suppose I am dating myself, but I remember the public service commercials on television back in the late sixties. The gist was “lock up your car and take the keys.” The tag line was, “Don’t Make a Good Boy Go Bad.” It would send my father into a rage to see that PSA and it was years before I understood why.

It actually happened to us. I was about fifteen years old and watching television when I heard a crash in front of our house. I looked out the window to see a guy exiting our car, which had just smashed into another car passing by on the main road through our small town. My father was at a Masonic meeting across the street and when I ran through the door hollering loud enough to shake the walls, the entire lodge, including the local game warden, got involved.
The game warden and I tracked the guy in the fresh snow and finally found him hiding in another car a mile from our house. The game warden was a big guy and a former Marine drill sergeant. I remember him holding the guy by the shirt collar and running him back down the snowy road to our house so fast I had trouble keeping up.
When the cops finally showed up the guy was arrested, but a liberal judge later let him off, because the keys were in our car. In effect, the judge said it was all Dad’s fault for making that good boy go bad.
I pretty much grew up in a snowier version of Mayberry and nobody took their keys or locked their doors on their house. In fact, the house we lived in didn’t even have working locks. Still, in the judge’s mind we were the problem. I never would have believed it at the time, but as it turns out that ruling was a glimpse of Vermont’s future.
Maybe it’s some subliminal thing buried deep in my brain from that incident, but I have little tolerance for when a good rifle goes bad (or buttheads steal cars). In the rifle situation, the blame is always with the rifle and it’s up to you to find the problem and fix it. As for fixing society, I think that’s a cause that was lost long ago. Which might be construed as a good reason to have a properly working rifle.
No matter. This is a gunsmithing book. So, don’t let a bad rifle off the hook. Make it take responsibility and start behaving again.
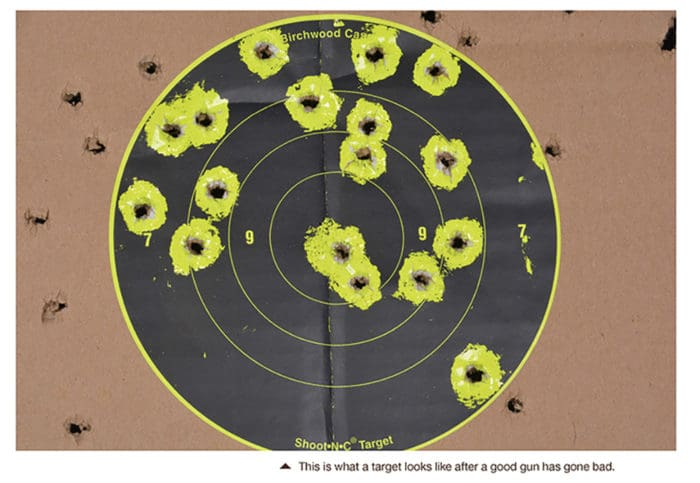
When you are the gun guy in the neighborhood it’s amazing how many “friends” you have. It seems that my shop is the first stop when somebody is having gun troubles. All too often, it’s an accurate rifle that suddenly started misbehaving and spraying the target with patterns instead of groups. I have a checklist of steps to correct that.
CLEAN THE GUN
I can’t tell you how many times a fouled bore is the source of accuracy problems. I also can’t tell you how many times the gun owner denies it. Almost without fail, they insist to the point of confrontation that they “already cleaned it and it still won’t shoot!”
The key here is to clean it correctly, which is something few gun owners have the knowledge or temperament to do.
I had a precision rifle in the shop recently that had stopped shooting tiny groups. The guy was convinced it needed a new barrel. While the barrel was getting a little shot out, I managed to bring the gun around again and bought at least another season of competition before it needs a barrel. It had a few other problems, including some bedding issues introduced by the guy trying to make it shoot, but the root cause of the problem was fouling.
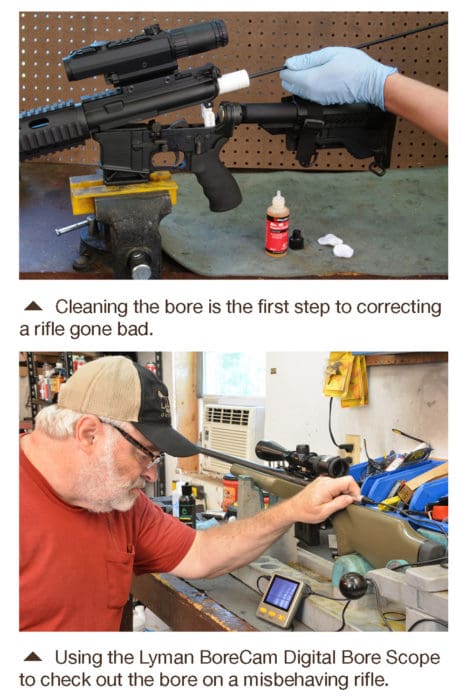

I ran a couple of wet patches through to get out the carbon fouling and then used one of the new Lyman BoreCam Digital Bore Scopes to look at the bore. The inside of the rifle bore looked like it was copper plated. The entire thing was coated like a copper-chromed trailer hitch ball. Yet, the guy insisted he had cleaned the rifle. I am certain that he had, but cleaning doesn’t mean it’s clean.
I try to explain, but it usually falls on deaf ears. So, when they pick up a rifle that is shooting well again, I don’t bother to tell them what I did. I smile, hand them back the gun and let them think I am a miracle worker.
Lately I am seeing “experts” on the internet claiming that a rifle bore must be fouled to shoot well. They claim that a clean rifle will not shoot accurately. I have tested hundreds, perhaps thousands, of rifles over my career as a gun writer and have shot countless groups with those rifles. There is one simple truth I have learned: clean barrels shoot better than fouled barrels.
Some of the internet experts brag about shooting thousands of rounds without cleaning and then insist that you must shoot dozens of fouling rounds after cleaning before the gun shoots well again. This is nothing but total crap. I have seen some guns that shoot well for a long time between cleanings. Usually, but not always, they are rifles with high-end, hand-lapped barrels that don’t foul badly anyway. But I have never seen a rifle where accuracy failed to deteriorate as copper fouling increased. A rough bore fouls faster than a polished and lapped bore, but they all foul sooner or later and when they do, accuracy decays.
Let me say again, just to make sure the point is clear. When a good rifle suddenly goes bad, more often than not, bore fouling is the reason. So it’s first on the checklist.
Many shooters run a few patches through the bore and maybe make a pass or two with a brush and assume that they have cleaned the rifle. That’s the equivalent of running your car through a puddle and claiming you washed it. Even if they have scrubbed for days, it doesn’t ensure the rifle is clean. Scrubbing with the wrong solvent accomplishes nothing and, even with the correct solvent, sometimes guns are so badly fouled it takes a while to hit the bottom.
I once spent a week cleaning a badly fouled .17 Remington rifle and I was starting to think it was physically impossible for that much copper to be trapped in so small a bore. Another time, I had a .338 Winchester that was fouled so much it looked like a smoothbore. It took days to get all the copper out of the rifle that my long-range competition shooting friend brought to my shop. I am not saying I stood at the bench all that time, I didn’t. But I worked on those rifles a few times every day.
Running a few patches with some solvent through the barrel is not enough. The key is to clean the bore down to bare steel and remove all powder and metal fouling. If you can accomplish that with a few patches, fine, but it doesn’t happen often. I have a few high-end barrels on custom rifles that foul so little they clean up with a few patches, but they are very rare critters in the shooting world. Most rifle barrels will require some effort to clean.
I can’t say how many patches or how many swipes of the brush will be required to clean any specific rifle, nobody can. If you read something or saw a video of a “system” where “X” number of passes with a patch will clean your bore, you have witnessed the work of a charlatan or a fool. No two rifles are the same and there is no possible way to predict the number of patches needed to clean a fouled bore. It might be four or it might be four hundred and only somebody who can see the future can know. In that case, I’ll just get the lottery numbers from them and hire somebody else to clean guns. I detest the chore, but I find that I spend a lot of time doing it anyway.
It sucks being poor.
Copper removing solvents are strong, so glove up, use eye protection and lots of ventilation. Start with a bore solvent that will remove both powder fouling and copper fouling such as Hoppe’s Bench Rest 9. Clean from the breech end when possible and always use a rod guide to keep the rod centered and to keep the crud out of the action and trigger.
Make several passes with a new wet patch each time. It’s best to use each patch for only one pass before replacing it with a new solvent-soaked patch, but I do sometimes use both sides of the patch at this stage of cleaning; one pass for each side. You may want to let the gun soak a few minutes between patches to allow the solvent to work.
Leaving the barrel wet with solvent, use a properly fitted bronze brush soaked with solvent to make several passes. Keep the brush wet with solvent, reapplying after every couple of passes. Don’t dip the brush in the solvent bottle, as this will contaminate the remaining solvent. Instead put some solvent in a small container and dip in that. I keep a supply of small Dixie Cups in my shop for this use. Or at least that was my approach for years until Jamey Majoros gave me a box of pipettes. These are disposable tubes that will suck up the solvent, filling a bulb at the top, and allow you to drip it back out a little at a time. They work well for wetting the brush and actually use considerably less solvent than the Dixie Cup approach because there is no waste. Any leftover is still clean and can be returned to the bottle, where the leftover solvent in the Dixie Cup is contaminated and must be disposed of.
Never reverse the brush in the bore. Push it all the way out of the muzzle and then pull it back. After use, always clean the solvent from your brush with a spray of degreasing solvent, allowing it to run off the brush and flush away the gunk. This is to prevent abrasive debris from accumulating and to extend the life of the brush.
Let the gun sit for a few minutes to allow the solvent to work, then follow with a couple more wet patches. Wait a few more minutes and run a dry patch through.
Now remove all traces of the first solvent using dry patches, followed with a few patches soaked with a degreaser like acetone, and follow those with a final dry patch. The idea is to remove all the solvent, as some bore solvents do not mix well and we are about to get a lot more aggressive.
Switch to an aggressive copper removing solvent like Sweet’s 7.62, Montana X-Treme Copper Killer or Barnes CR10. Run a couple wet patches through the bore and let it sit for a few minutes. Follow with another wet patch, wait, and repeat. Use snug fitting patches so they will get down into the corners of the rifling, but not so tight that the solvent is squeezed out of them as they go down the bore. I often use the next smaller size jag and double up on the patches so there is thicker cotton that will shape to the lands and grooves better.
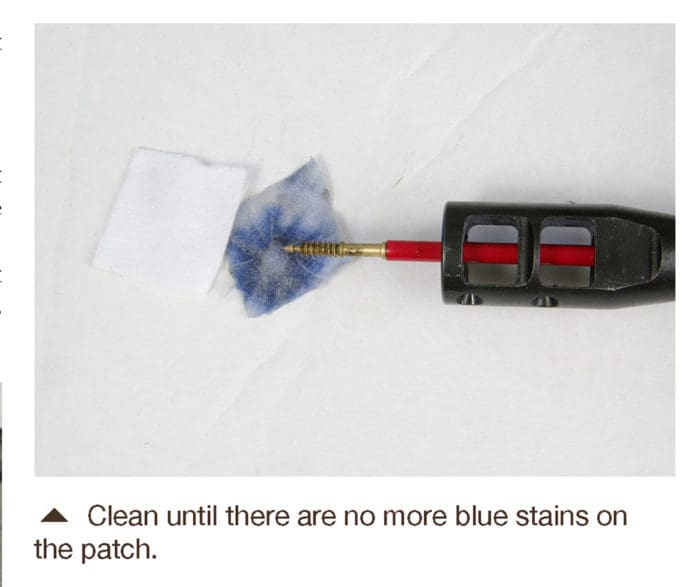
The goal is to get to the point where you can let the solvent sit in the bore for at least five minutes and have no blue stains on the next patch through, indicating that there is no remaining metal fouling.
Be aware that a brass jag can leave a “false” stain on the patch, although it’s usually on the inside rather than the outside of the patch so it’s easy to distinguish from stains from bore fouling. When in doubt use a plastic or stainless steel jag.
If it’s just not happening fast enough, use a brush. Many sources recommend nylon brushes. They are useful, but I don’t think they are aggressive enough for serious fouling. I prefer a bronze brush with the understanding that these strong solvents will eat the brush. Even when cleaning the brush with a degreasing spray immediately after use they are only good for a few cleaning sessions, so treat them as a consumable product just like the patches and solvents. Buy a few extra brushes to replace them as they are used up.
After scrubbing with a strong solvent and a bronze brush there will be a lot of blue gunk on the next patch through the bore. Some of that is from the dissolving brush, some of it is from the bore. It can be a lot, so don’t be shocked. Also, don’t think you have stumbled onto the secret to doing this fast. (If you actually do unlock the secret, please share.) All that blue gunk is a good thing to get out of the bore, but don’t assume it means you are done.
For most aggressive copper solvents, it is recommended that they not be left in the bore for more than fifteen minutes. That doesn’t mean you can stop cleaning after fifteen minutes, only that you need to keep removing the old solvent and replacing it with fresh. Keep working with wet patches and brushes to refresh the solvent often.
Even after the patches start coming out clean, it’s possible to have copper fouling trapped between layers of powder or carbon fouling. Just to be sure, clean all the solvent out of the gun and switch solvents with the idea that one might get the fouling that the other does not.
The best approach is to return to a general use solvent like Hoppe’s Bench Rest 9. Make sure to remove all traces of the first solvent before switching to another solvent.
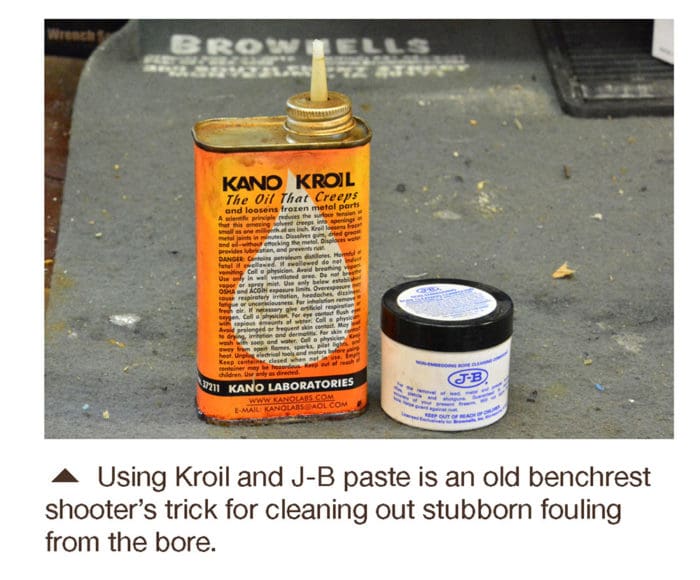

If it’s really fouled, the old benchrest shooter’s trick of Kroil and J-B Bore Cleaning Compound can help to loosen things up. Kroil has excellent penetration qualities so it will work in under the fouling. The J-B Bore Cleaning Compound is slightly abrasive so it cleans the crud and copper out, but it’s not abrasive enough to damage the bore. In fact, with regular use it helps smooth the bore.
Wet a few patches and saturate the bore with Kroil, then let it soak for a while. Wet a tight fitting patch with Kroil and then coat it with J-B Compound. Run it through the bore a bunch of times, at least 20 passes and twice that is better. Check the patch often and add more J-B and Kroil as needed. If the patch gets worn, replace it.
Switch to a clean patch wet with Kroil and clean all the goop out of the bore. Repeat until the bore is wiped clean. Then use a few dry patches. Follow with a couple of wet patches using an aggressive copper solvent. Let it stand five minutes, then run a clean patch. If it comes out with no blue stains, you are almost done. If there are blue stains indicating there is still copper fouling, keep repeating this process with both solvents and the J-B and Kroil in rotation until there is no sign of blue on any patches after letting the aggressive solvent work for five minutes.

Like I said, sometimes it’s a fast process and sometimes it seems like you will never get the darn thing clean, but until you can soak the bore with an aggressive copper removing solvent, wait a timed five minutes and then run a clean patch through without blue staining, the gun is not clean.
Once it’s clean, you must remove all traces of any solvent or cleaning agents. Use patches soaked with acetone until the bore is clean and follow with dry patches. Wet a few patches with a CLP oil like Clenzoil and swab the bore. Follow with a clean patch to wipe out the excess, but leave a film.
Give the chamber the same treatment with a couple of swabs. One wet with oil, the other to dry. Clean up any solvent that has dripped into the action or other gun parts. Clean the bolt lug recesses in the receiver. Don’t forget to wipe off the muzzle, then oil everything to prevent rust.
Very often this will correct the accuracy problems, but, even if it doesn’t, cleaning at least eliminates one big issue on the checklist.
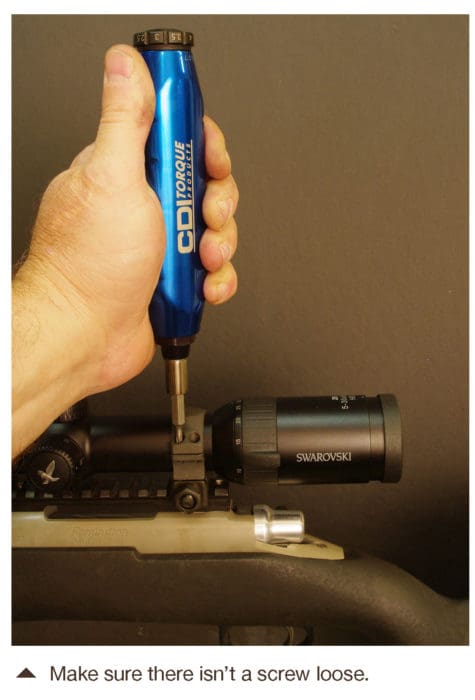
CHECK THE SCOPE
Make sure all the screws are tight and that the scope base screws are actually holding the base tight to the gun and not bottoming out. Shake the scope to see if it rattles. If it does, clearly something inside is broken, which is more common than you might think. Look through to see if the optics are clear edge to edge. Check the parallax to make sure it’s still correct by fixing the gun in something to hold it with the crosshairs on a 100-yard target. If the parallax is adjustable, set it for 100 yards.

Look through the scope without touching the rifle and move your eye back and forth and up and down. The crosshairs should remain fixed on one position on the target. A little movement is usually to be expected, but if they are moving more than an inch or so on the target, the scope has some parallax problems that may be the source of the accuracy issues.
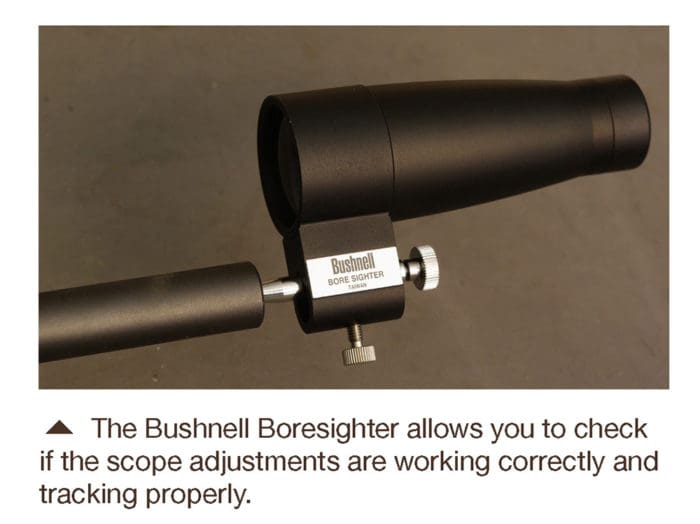

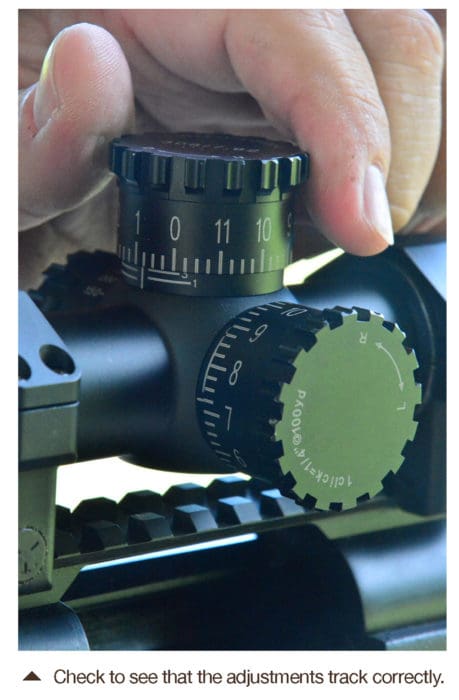
Use a boresighter. The kind with a grid, not a laser. Fix it on the gun and run the scope adjustments up and down and back and forth to make sure they are tracking correctly. With any doubt, install another scope. Most of us have a scope or two hanging around that we can use temporarily to eliminate the original scope as a potential problem.

CHECK THE BEDDING
It’s very unusual for this to be the problem when a good gun suddenly goes bad, unless somebody has been messing with the bedding, but it’s not uncommon for the screws to be loose or the stock to be cracked.
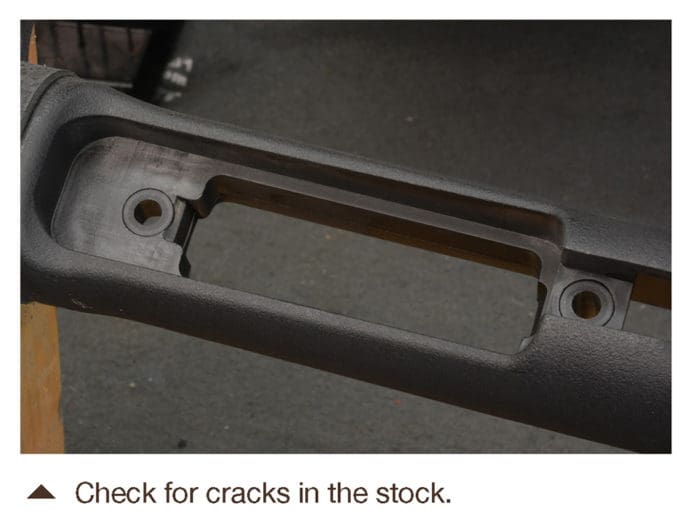

Make sure the action screws are tight. Pull the stock off the gun and check for cracks or splits. Check the bedding for flaws.
Reinstall the stock and check the bedding by holding your fingers on the line where the action and the stock meet. Alternately loosen and tighten each of the action screws. If you can feel any movement of the action in the stock, the bedding is incorrect and putting stress on the action. With your fingers on the junction you can feel movement that often you cannot see.
If the bedding is the problem, it can usually be repaired by glass bedding the action. There are detailed instructions in my first book, Gunsmithing Made Easy, so I have not repeated them here.
Check to see that the barrel is floated. A dollar bill is still the best way to check this. Wrap the dollar around the barrel and pull the ends up. If it can pass through between the barrel and the stock for the full length without binding, the barrel is floated with enough clearance.
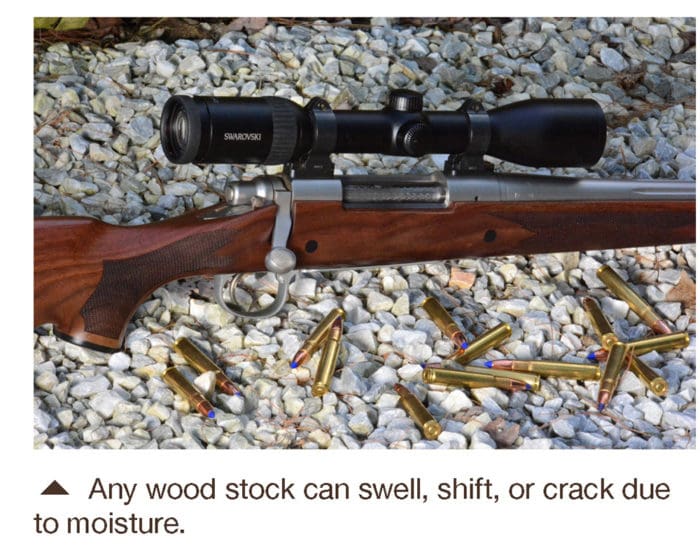
With wood stocks, this is often the source of problems when the wood warps and contacts the barrel. Any wood stock that has been subjected to a lot of moisture can cause problems. Remember, humidity is moisture. If a stock absorbs a lot of water and the wood swells, it can trash accuracy very quickly.

Be aware that some stock designs have contact with the barrel. For example, many Remington Model 700 rifles use a pad at the tip of the stock to put pressure on the barrel. If a stock with tip pressure has warped it can really mess with the gun’s accuracy. If you suspect that has happened, remove the pad and float the barrel.
If you have another stock around that you can install temporarily on the gun, you can eliminate the bedding and/or stock as the problem. Don’t hesitate to rob a stock off another gun long enough to test if the issue is the stock or bedding. Glass bedded stocks do not swap rifle to rifle well, but any factory stock, chassis or stock with a bedding block should work to eliminate another check mark off the list.
On the rifle that was brought in by my competition shooting buddy, he had glass bedded the action trying to fix the problem. It was his first time and with no experience he had followed a YouTube video. He actually did a good job, but there were a few small issues that the internet expert didn’t mention.
Perhaps the most important is that the bedding material had flowed into the bedding pillars. That meant that the action screws were taking some of the recoil stresses. I drilled out the material so the screws were floating. Also, the recoil lug was in full contact.
It’s probably not an issue, but it’s always best if the recoil lug only makes contact on the rear, load bearing surface. I removed some bedding material from all surfaces except the rear contact surface so that the only point of contact with the recoil lug was the flat, rear bearing surface.
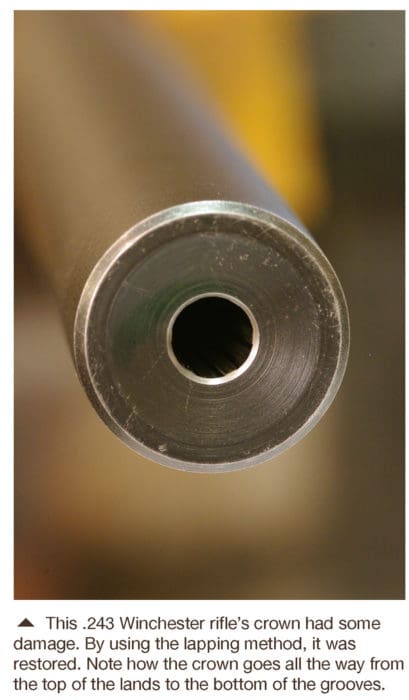
RE-CROWN
A bad crown is probably the second most common reason guns go bad, right behind a fouled bore, so while I was at it, I re-crowned the muzzle on my friend’s rifle.

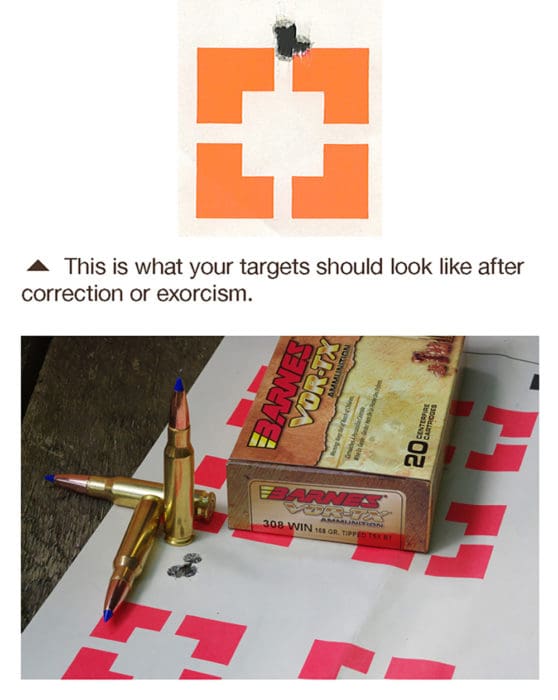
The cumulative effect of repairing all of these things brought my friend’s rifle back to shooting as well or even better than it had before.
If the rifle is still not shooting well, use a bore scope to make sure the barrel is not shot out. If it is, it will need to be replaced.
If none of this solves the problems, either trade the rifle or contact a priest for an exorcism.

Bryce Towsley is the author of other hunting and firearms titles, including Big Bucks the Benoit Way, Gunsmithing Made Easy, Muzzleloading Essentials, PREPPER GUNS: Firearms, Ammo, Tools and Techniques You Will Need to Survive the Coming Collapse, and The Great American Deer Camp. Click here to find those titles.