


I have only known a few people aside from professional gunsmiths who have taken up the challenge of building their own custom 1911. I know a fair number who own guns built by famous 1911 shops, but I had to look long and hard to find someone who had actually hand-fitted one himself. Still, I decided to give it a shot and this is the first of two articles documenting my efforts.
All the parts featured here can be found at Brownells. Included in this article are product numbers so you can see exactly what I used for this project.
The parts list is as follows:
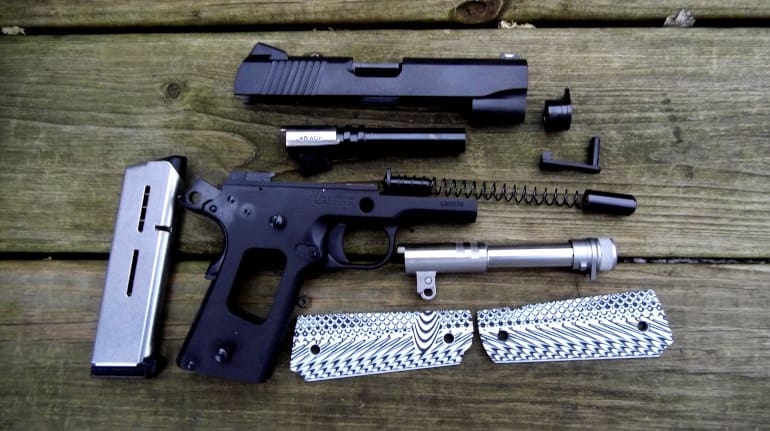
Commander Sized Frame: 100-028-402WB
Commander Sized Slide: 100-028-391WB
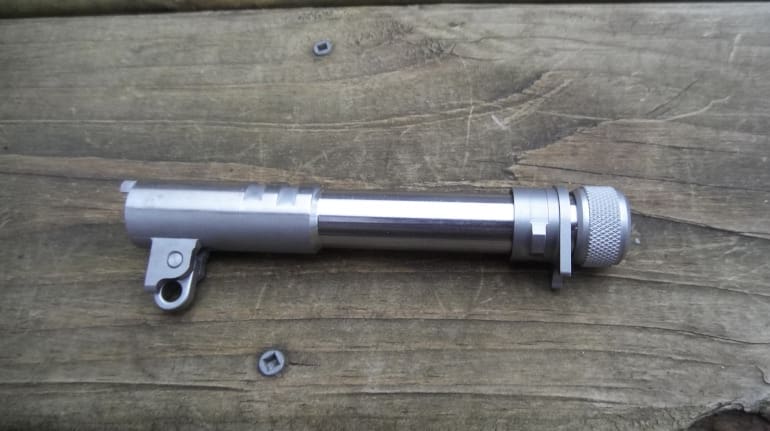
Ed Brown Threaded Barrel: 087-000-102WB
VZ Grips: 100-011-278MB
Spring Upgrades: 965-000-177MB, 087-000-046WB, 087-000-045WB
Magazine: 965-047-470MB
The tools I went with for this were basic and somewhat rudimentary. I only had one power tool, a standard Dremel, and I used it only in the event of aggressive material removal and final polishing. The entirety of this project was otherwise accomplished with 100 and 320 grit sandpaper, jeweler’s files, Brownells lapping compound (083-041-800WB), and some cold bluing solution.

I will warn you right now that this was a difficult and time consuming effort that required a great deal of patience and resolve. I certainly could’ve sent all the parts off to a local custom shop and had a gun in hand when they were done, but that’s not at all in the spirit of what I wanted to accomplish here. I wanted to make a gun that was both useful and fun to shoot, but with the added pride of having fitted it myself.
I selected these parts to make the build more accessible to most readers in case someone wants to do something similar. The frame with pre-installed grip safety and slide came preassembled, but that didn’t mean they were pre-fit. The frame has some difficult parts already installed and staked, which reduces the type of specialized tooling required to finish this gun.
I went with the commander-sized slide and stainless steel barrel to save frontal weight and length because I knew I wanted to do a suppressor-ready barrel. The finished pistol will also make a good carry gun. The same process I used here will work for any length barrel and slide, so if you want to do a 5-inch or even a small 3-inch pistol, the process is the same.
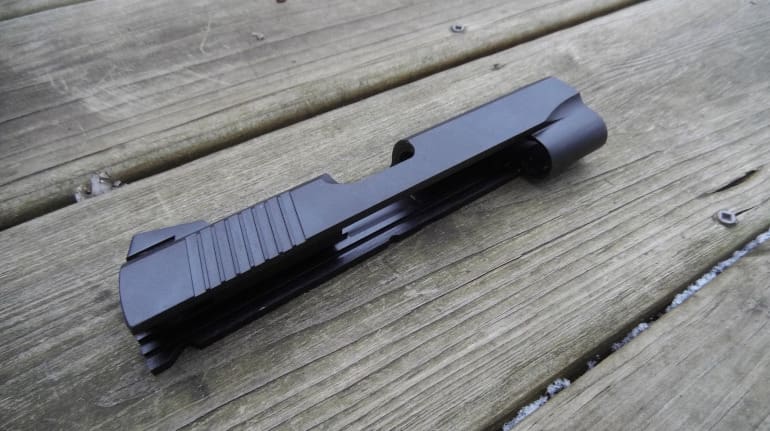
I started by degreasing everything. I completely disassembled the frame and slide and made sure that they were clean and free of debris and oils. Upon initial inspection, I believed this would just be a matter of just doing a bit of polishing, but I was profoundly wrong.
If you believe that basic 1911 parts are interchangeable, think again. The slide wouldn’t actually fit onto the frame rails at all. I couldn’t even get it started.
At this point I began to question my choice of projects. Fitting the slide to the frame is generally considered the first step, and it’s critical to not remove too much material. The slide rails on the frame were far too high and wide, so I had to remove material along the flat portion of the underside. I checked my dimensions with a micrometer as I went, every time I removed material. I knew that it would be a long haul.
All the black finish ended up vanishing from the interior of the frame. It was a slow and tedious process to sand, polish, and try to fit the slide. I could only remove a little at a time for fear of going too far, and it ended up taking my the better part of six hours to get the slide to move on the frame. In the age of slapped-together builds, this was a lot of work. When it was finally done, I smiled and tried to assemble the gun.
And I was stopped again.
While the slide to frame fit was precise, nothing else was. I had to lap in nearly every moving part starting with the barrel. Fitting it also took several hours of trial and error. Not only was the barrel slightly oversized, the locking lugs weren’t locking.
Again, I had to remove tiny amounts of material on the lug areas and the area where the barrel touches the face of the breach. In addition to this I had to lap in the barrel bushing at the muzzle to make it all line up correctly.
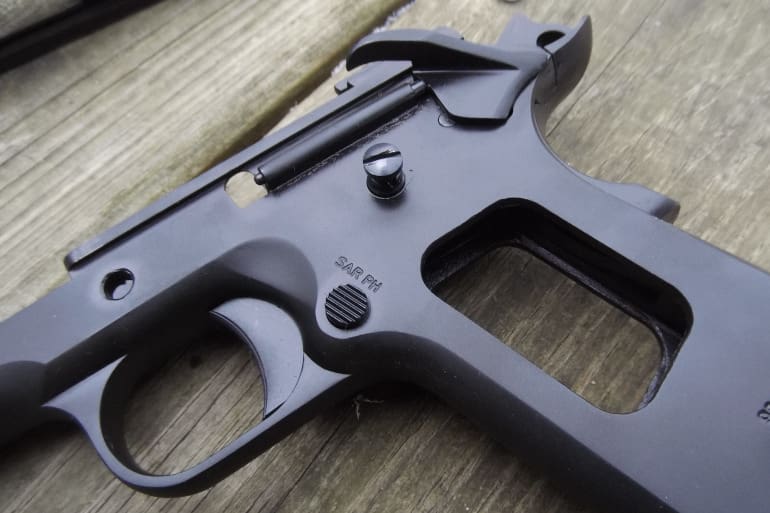
After that the next job was fitting the safety and slide stop. Those were difficult projects in and of themselves.
The slide lock was too thick to allow the slide to move when it was installed, so I had to re-contour it and thin it out so that it would let the slide travel. This led to problems with the barrel link and other areas inside the slide. I had to again go in and remove small amounts of material from the barrel lugs to make it all work well in unison.
I sort of botched contouring the safety. The frontal edge was too long to allow the safety to engage, but I began removing material from the wrong area. I just got it in my head to do that for some reason. I corrected it in time, though, and thankfully it’s hard to tell that I goofed.
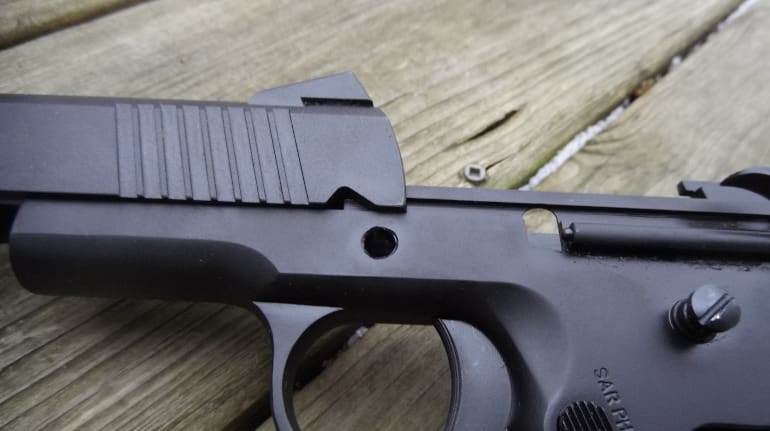
The next job was the area where the slide and frame meet at the rear near the hammer. The frame stuck out quite far and it was very unsightly.
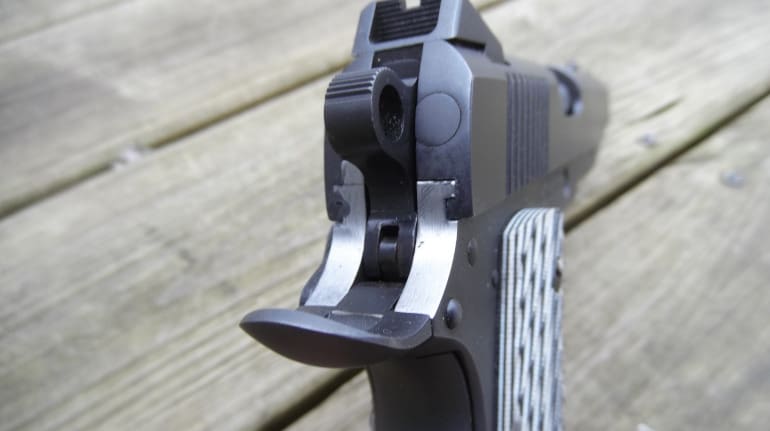
I used the Dremel to contour this part as I would probably still be filing today if I had elected to go with hand tools here. I made this area blend nicely and then cold blued it to match. The color isn’t exactly the same, but it is what I have for now.
After all of this, I reassembled the gun to see if it would move smoothly, but was still too tight-fitting. The parts were all fighting each other and nothing really wanted to move. I decided to pay my friends at Precision Rifle Company in Dorr, Michigan a visit to see if I could use some of their higher grit lapping compounds and de-greasers. It should be noted that they don’t do handguns, but lapping compound is used in many precision applications in the rifles they build.
I lapped the hell out of the thing and after about ten minutes of furiously working the slide, I had a gun that was locked up tighter than a safe door. I laboriously disassembled it and sprayed it out. When I reassembled and lubricated the finished product, I was rewarded with something that actually felt like a functional gun. The action was slick and buttery and the lock-up was tight and crisp.
In my next article I’ll detail tuning the gun with various types of springs and how it performed during my first range sessions.
Special thanks to Brownells and to my friends at Precision Rifle Company for getting me out of a tight spot (literally and figuratively).
This article is for informative purposes only. Some of the methods and testing measures used in the completion of the firearm are unorthodox and may be dangerous. Neither the author or TTAG assumes any responsibility for anyone attempting this same project or a similar one. Building a firearm can be dangerous and in some cases deadly.
A competent gunsmith should always be consulted to determine the safety of a given project.