

By Jack Clark
Dry fire practice is an enormously important part of effective firearms training. Many quality firearms instructors encourage a 70-30 dry fire regimen: spend 70% of your training time dry firing and 30% shooting. Recently, I was out of town conducting a tactics and medical class for a group of physicians who volunteer as SWAT medics for the departments in their area. As always, on the first day, I made a point of telling them to make sure they spend time dry firing. That evening after dinner I wandered down to the communal area and found three of my students settled in on a couch, watching a ball game, occasionally clicking their unloaded pistols at the television between grabs at the pretzel basket . . .
Incredulous, I ask them what they were doing. “Dry firing,” they answered as if they would be getting bonus points for doing work outside of class. I made a command decision at that point to revise my dry fire speech to cover – in more detail – exactly what effective dry fire practice is all about.
Whether your goal is to improve your target or defensive shooting, dry fire must be practiced using as close to the same motions and techniques as will be used during live fire. In our the professional courses I teach, we often have well-trained military and police units spend large segments of their training time drilling dry in the shoot-house, vehicles or assault course.
Here are some tips that will make your dry fire sessions safe and effective.
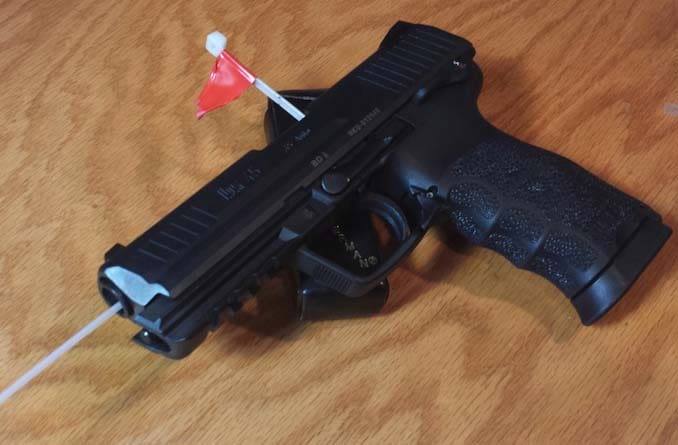
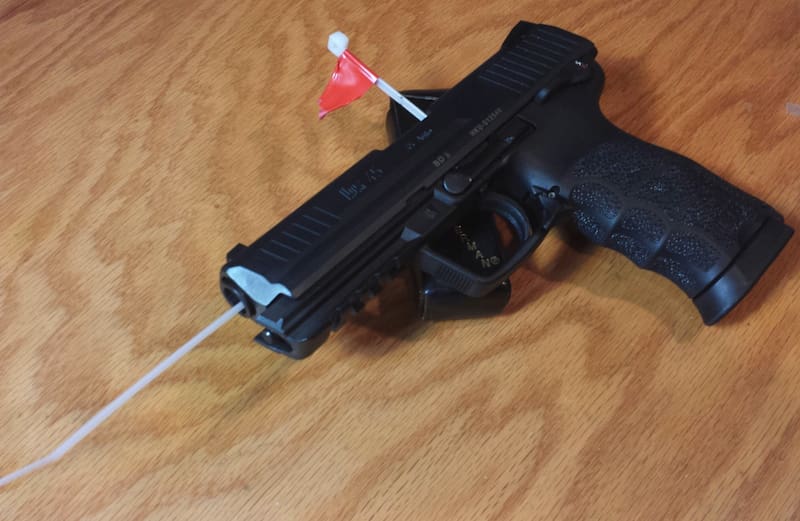
1. Be safe. Safety is paramount with any firearms activity. Simply checking to make sure your weapon is clear leaves too much to chance. A distraction or error could be disastrous. An easy trick to ensure your dry fire is safe is to make a muzzle flag. Commercial flags and dry fire barrels are available but can cost as much as an extra magazine. We use a cheap and easily available method to make a muzzle flag for our dry fire practice using a plastic zip tie and a piece of brightly colored duct tape or electrical tape. Wrap a small strip of tape around the top of the tie and “poof” — instant muzzle flag, indicating your weapon is clear and safe. The zip tie is dropped into the muzzle with the flag left sticking out of the chamber. It is easy to identify that the gun is flagged and impossible for a round to be inadvertently chambered.


2. Practice makes perfect. The idea of dry fire is to develop muscle memory through repetition. Practice as often as you can using your weapon as you would when it is hot. Be sure to practice using the weapon you actually will be carrying and using. Repeatedly practice-drawing a 1911 from your low-ride tac holster in order to improve working a Glock 26 from an inside the waistband setup is like using a piano to practice for an accordion concert. If shooting for defensive purposes, conceal the weapon the way you would on the street. If shooting for IDPA, wear your belt with accessories. If you are in law enforcement or in the military, go ahead and put on your undervest or kit.
3. Make it real. A gunfight is more about the draw, presentation, rapid sight acquisition, target discrimination and effective use of cover/concealment than the click-bang. Concentrate on these steps equally rather than just getting a sight picture and squeezing the trigger. Use whatever environment you are in as a practical range and work out the problems that walls, doorways, halls and obstructions create. Make sure to announce what you are doing and clear people from in front of your weapon. Don’t skimp on any of the fundamentals. As soon as they start getting sloppy or you feel yourself getting complacent, put your gear away and be done for the day.
4. Pick distinct points of aim. If you have time, set up targets. Unless you plan to be the world’s best lane shooter, set up varying distances and angles as well as places you will have to move in order to acquire your target. If time or different targets are not available, use whatever you have on hand: the light switch on the far wall, a lamp, etc. Making a man-sized silhouette is as easy as grabbing a shirt or jacket out of the closet and hanging it on whatever is available. This is far more effective than pointing and clicking at the back wall.
5. Visualize. This may sound like Tony Robbins BS, but too many psychologists have said it works to ignore it. Imagine a scenario in your mind that that may cause you to feel a need to use your weapon. As much as your grown-up reality-trodden imagination will allow, place yourself in that situation. See in your mind the surroundings, what the threat looks like, how it presents itself and what it does and says. Address the threat and follow it down. For the IDPA guys, see the dream course and the Midway USA pro rep ready to sponsor you post-victory.
6. Mix it up. Create shoot/no shoot scenarios for yourself. Practice reloading and clearing malfunctions. Use a shot timer to practice speed. The television can also offer a great target acquisition and discrimination tool. Set a standard to create a threat/shoot situation. For instance, each time you see a certain color shirt, set up the shot.
7. Run the spectrum. If there is a position or place you ever plan to shoot from, run it. Run turns, off line attacks, forward, backward and side movement. Kneel, drop to a knee, work barricades. Shoot both hands, strong hand, off hand. Work off balance, standing up, sitting down and yes even on the couch.
Dry fire is a shooter’s best friend. Don’t neglect it. It’s cheap since you’re not using up any ammo and it will make your live fire sessions more productive, effective and efficient. Practice makes perfect!
Jack Clark spent sixteen years at a US Federal Agency thirteen of which were with a special mission unit. He is currently a senior instructor at Asymmetric Solutions in eastern Missouri and a director of a Virginia-based security consulting firm.