

By Mike Morrison
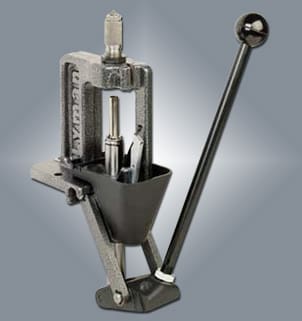
I’m still fairly new to firearms and like many over the last few years, decided the best course of action would be to start reloading to cut costs and shoot more. After lots of research, reading forums, blogs, and watching YouTube videos, I realized reloading might not achieve either of those ends, but it still looked worthwhile. To that end my generous in-laws gave me a Lyman Crusher Master Reloading Kit with the Crusher II single stage press (yeah I’ve got great in-laws, but that’s another blog post) . . .
To my lovely wife’s great disappointment, the Lyman set doesn’t come with everything you’d need to get started. Of course you’ll need a workbench (I opted for this prefabricated Home Depot one) but you’ll also need dies for each caliber you want to reload, a case trimmer and gauge, a primer turner tray, and a set of calipers, not to mention the powder, primers, bullets, and brass. All in for the tools, I put up another $50 or so beyond the Lyman Kit.
I can still purchase more tools (a hand primer, higher quality processing station/cutter, tumbler for brass, bullet puller). If you can find in-laws who encourage your shooting addiction habits and give awesome Christmas presents, that’s a huge help.

Gear assembled, it was then time to start reading. I dove into the Lyman 49th Edition manual and read it, multiple times. Most of the manual is suggested loads for various calibers, but the first six chapters are crucially important general information about reloading. It’s a must read. You’ll find just about every single caliber, round type, and powder you can imagine within this manual.
Once I thoroughly digested the info, I started bolting things to the bench. In retrospect I would have given myself a bit more room to the right of the press. It’s enough space, but it’s tight.
After cleaning and drying the brass, I lubed the cases (with the included lube kit) before depriming with my Lee 223 dies. The depriming process is simple and cathartic, though removing lube is annoying. Be sure the brass is going into the depriming die straight to avoid crushing your brass. The Lyman primer catcher mostly catches the primers, but occasionally a few can get wedged between the press and the wall of the catcher. Flexing the wall of the catcher usually released the spent primers, but occasionally spills one or two on the floor.
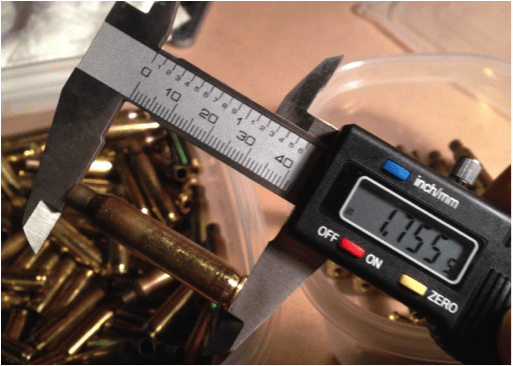
Once deprimed, the cases needed to be trimmed, deburred, and have the primer crimp removed. Using calipers, I measured every piece of brass, sorting those needing a trim and those ready to shoot. While sorting, I examined all the brass for dangerous imperfections. Attaching the case trimmer to my cordless drill, I was able to fairly easily trim each case. The case trimmer and gauge I used can ID an uneven trim, if you don’t seat the casing correctly.
Deburring with the included Lyman case prep tool was simple and not too tiring. It conveniently functions as storage for the smaller bits too. Unfortunately, the primer pocket de-crimpers leave much to be desired. The designated small primer bit quickly grew dull and caused issues for me as I tried to seat primers. Eventually, I took the cordless drill and chucked the chamfering tool. Throwing a zip tie around the trigger of the drill sped the process up even more.
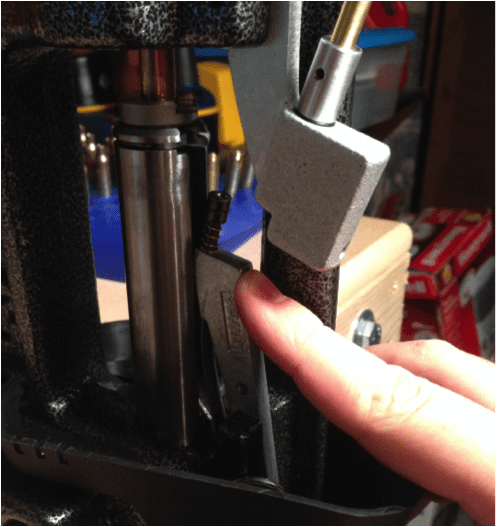
The Lyman kit includes a Universal Primer Arm. Using the included small and large primer tubes, pick up the primers and place it into the arm. Load a deprimed case, pull the handle, press the arm forward, and drop the handle to prime a round. You can pretty easily feel when a primer seats correctly. When the arm is released a spring pushes it back into the frame of the press and releases another primer. The spring s holding back primers may need to be adjusted, which is easy to do with the included tool. I don’t mind priming at the press, but others like to use a hand tool so they can prime while watching TV on the couch.
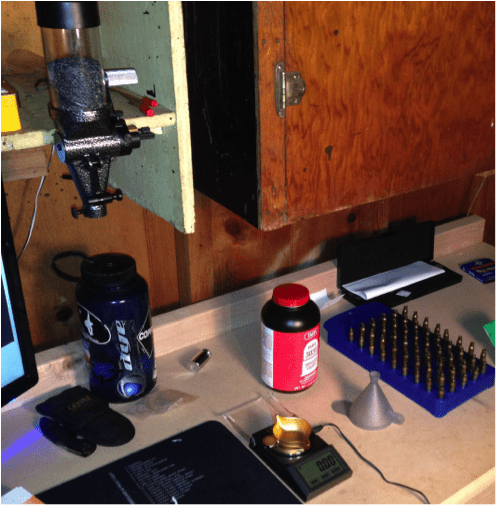
Finally, it was time to charge the rounds and seat the bullet. The Lyman kit includes a single tray, electronic scale, powder measure, and funnel, so you have all you need to charge the rounds. I mounted the powder measure to a shelf above my bench. You can screw it into an extra reloading arm or use the plate and screw to tighten and secure it on a shelf or something. I adjusted the barrel to correctly drop the right amount of powder. This though, was mostly through trial and error.
The markings on the barrel that are supposed to show you how many grains of powder are dispensed don’t seem to correspond with reality. Perhaps I don’t understand the indicators, but regardless, I ignored them. I dropped powder and measured each charge until it consistently gave me the 21 grains of IMR 3031 I was looking for.
NOTE: When you setup the scale for the first time, it’s output is in grams, not grains. If you don’t change the mode, you’re going to have a bad time.
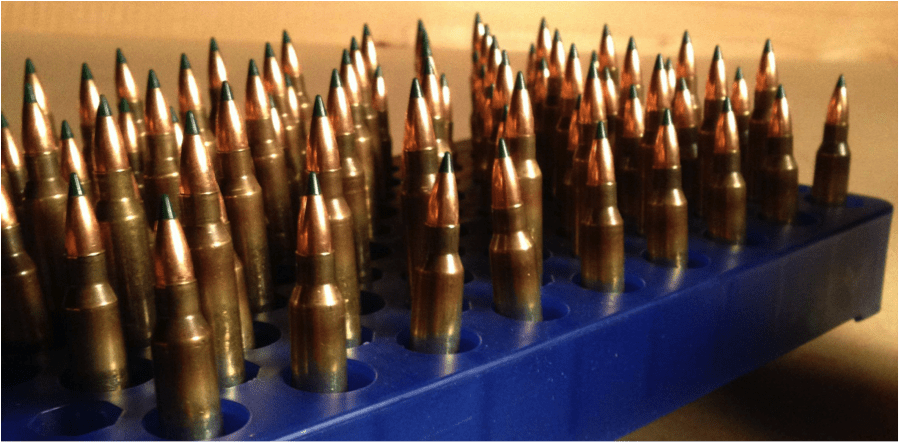
Being inexperienced and quite fond of all my fingers, I decided to measure each and every bit of powder before charging a round. Rather than charge all 85 rounds at once, I only did 5 rounds at a time then went over to the press to press the 55gr bullet into place. Soon I had 85 rounds ready to go.
As a Northern Virginia resident, I’ve got a few options for close indoor ranges, but I usually trek out to Clark’s Brothers in Warrenton to use their 100 yard range. There’s no range fee, but you’ve have to shoot ammo purchased from their shop. I grabbed more powder and primers for the next batch of bullets, which easily covers my next few visits.
I have to admit; pulling the trigger on the first round was simultaneously terrifying and exciting. But thankfully it went bang and not boom. On top of that, I was able to put some pretty nice groups together even with a 16” PTAC HBAR barrel, all right around 4 inch groups. I’m not the best shooter by any stretch of the imagination, so I was quite proud of myself.
Using this spreadsheet I am tracking every single bit of powder, each case, and every primer not to mention my shooting results. This first batch was a bit expensive, around 40 cents per round, as I didn’t quite know what I was doing.
Ratings (out of five stars):
Fit and Finish: * * * * *
This of course is a tool, but the blueish finish of the press looks very nice and there are zero blemishes, quality issues, or other problems with the press or other tools.
Function: * * *
For my purposes, this ranking is probably higher. Single stage presses are slower, though good for my purposes. Those who plan to reload higher quantities of ammo should look toward turret or progressive presses.
Overall: * * * *
Descriptions of this kit suggest you can begin reloading with just the included contents and the dies for each caliber. Though technically you could, I suggest you don’t. Measuring the length of the round for proper seating and case trimming is important to make your loads consistent. The kit has very nearly everything you need though.