


By Peter C. Schechter
Mmmm, mmmm good! Have you ever had a hankering for some old fashioned 1950s-vintage Colt gunbo for dinner? Me neither, to be honest. When my buddy came to me and asked if there was any way to clean up an old rusty revolver given to him by one of his kids, little did I know that I’d soon be boiling the parts for a couple of hours in a soup pot full of water on the kitchen stove.
Give me a couple of minutes of your time and you’ll understand what this apparent madness is all about.
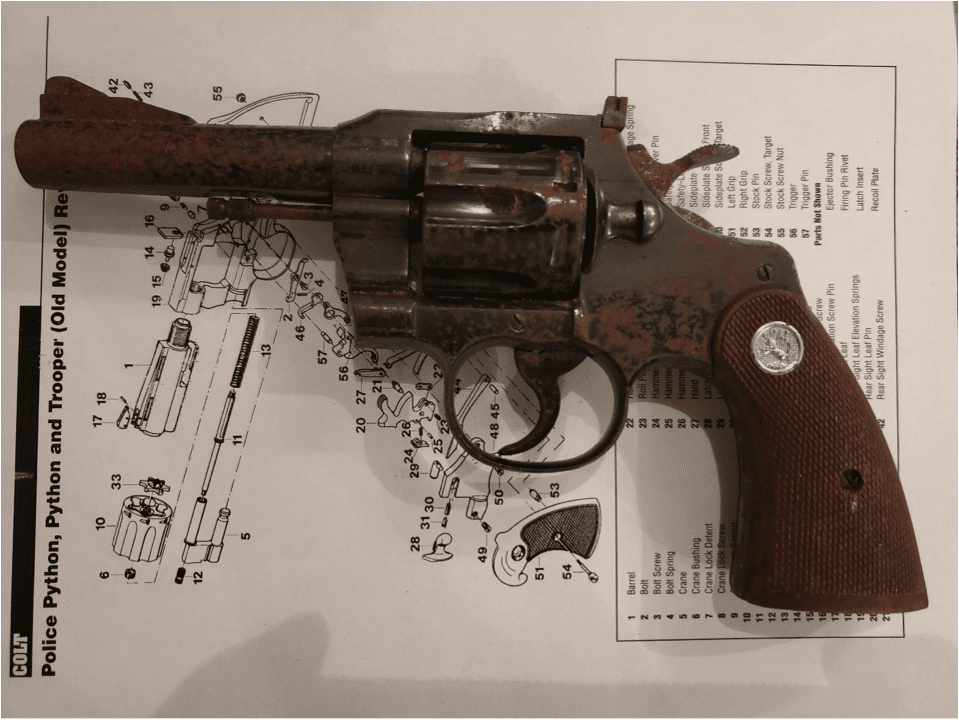
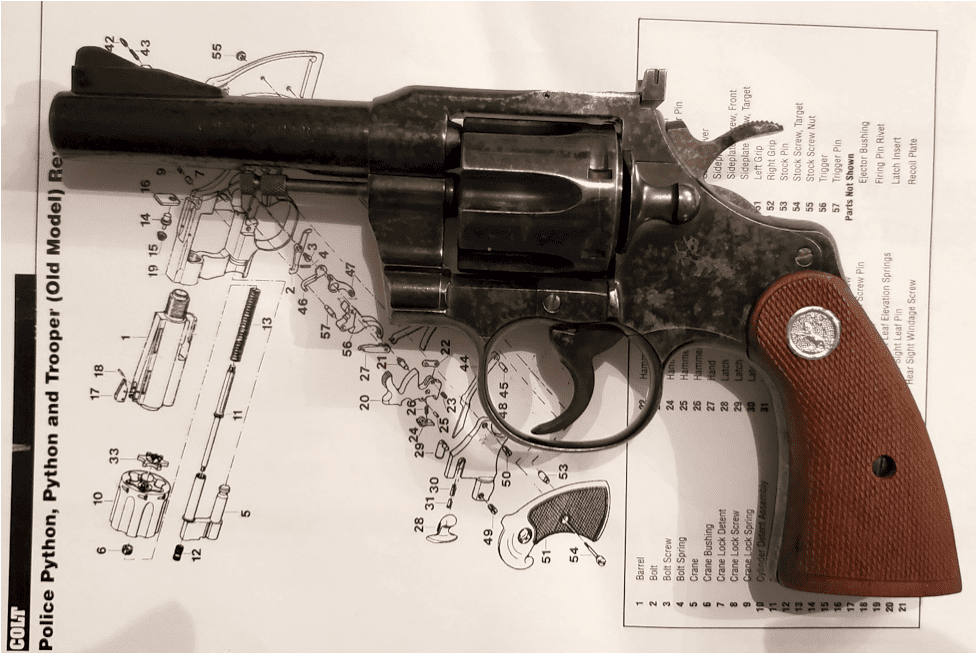
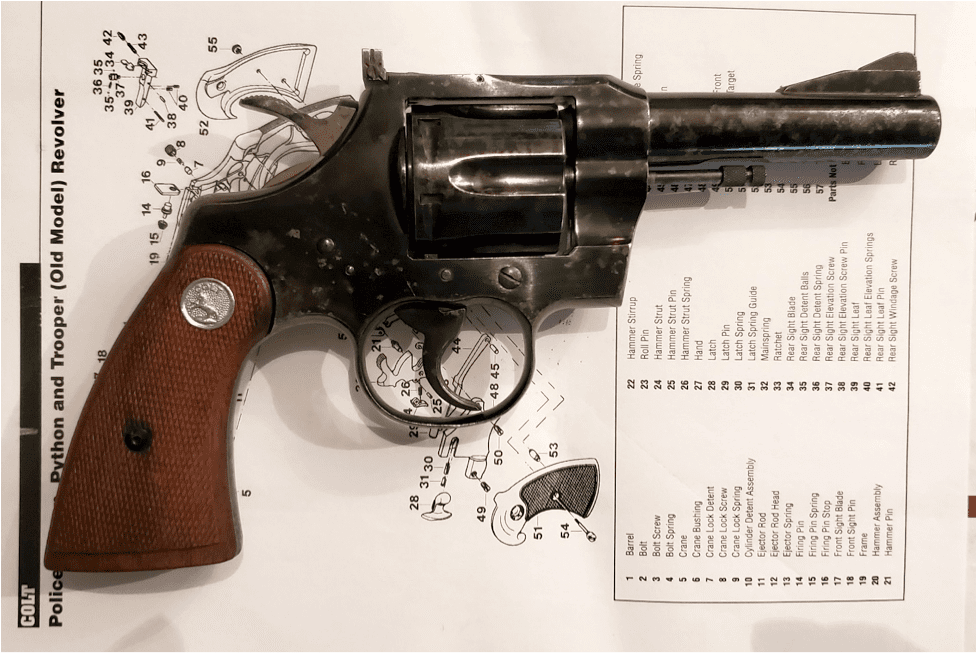
I got a message from Jeff saying that he had a picked up an old Colt revolver, model unknown, but that it was pretty rusty and the markings were hard to read, if readable at all. Here’s what he showed me:

Having never tried to conserve a rusty gun, and it being in pretty terrible shape, I asked if it would be a disaster if I screwed it up in the attempt. Happily, Jeff said “no problem, I don’t care,” and I set about the task of investigating what it was, and what to do with it.
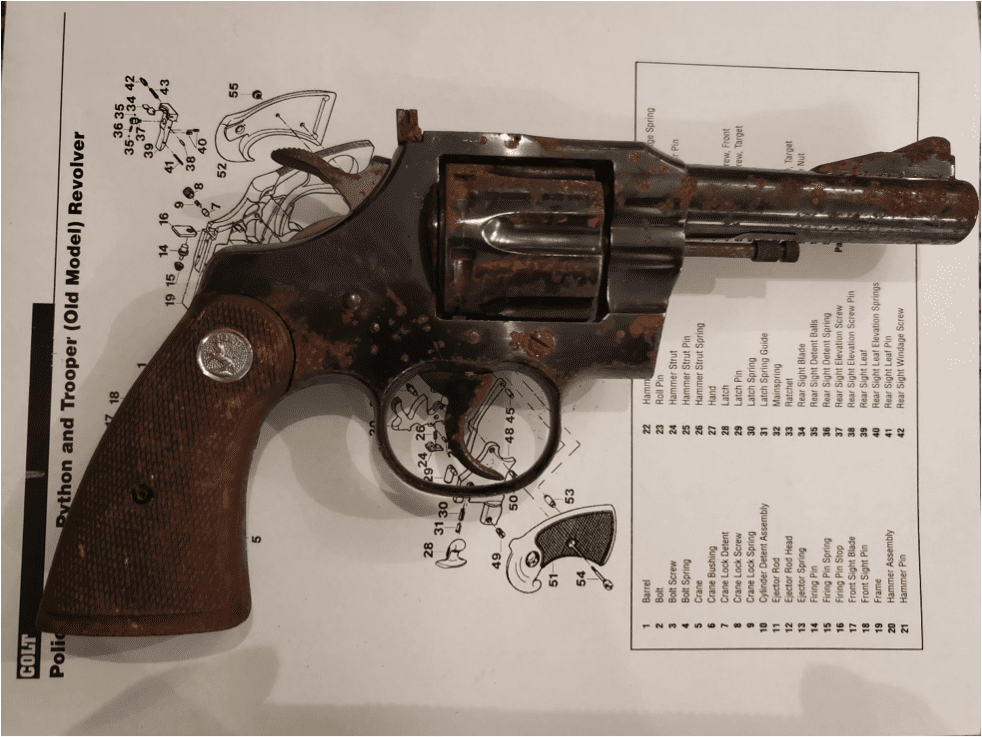

Identifying the gun was more complicated that I had imagined it would be. Everything I know I learned by studying the pages of the exceptionally informative website coltfever.com. The webmaster of that site gets all the credit. Based on a lot of separate bits of information, and the fact that each one corroborated the others, the gun was identified as a Colt Trooper .22LR target model with the 4-inch heavy barrel, made in 1957.
At the time, this revolver was commonly sold to police departments as trainers for officers carrying the Colt Trooper .38SPL service model, which also has 4-inch heavy barrel, or the Colt Model 3-5-7, again basically the same gun but chambered in .357 Magnum.
The first step was to remove as much old grease and gunk as I could with brake cleaner spray, from both the outside and inside of the gun. There was a lot of rust on the exterior surfaces of the gun, and it appeared to my untrained eyes that there was at least some pitting of the metal underneath the rust.
I was disheartened a bit when I removed the grips (which would also be stripped, lightly sanded where necessary, and refinished with two coats of dull Tung Oil, as they were originally finished by Colt), and I saw this:
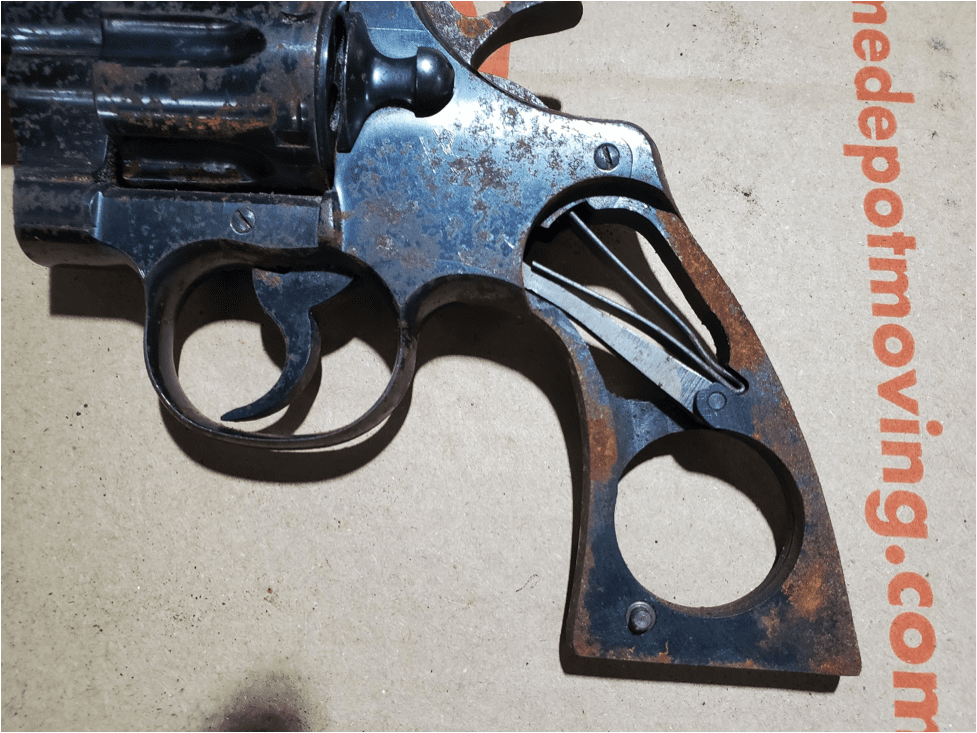

The rust was inside the gun, too. I was not optimistic about what I’d find when the side plate came off. However, luckily for Jeff, there was no rust on any of the metal-to-metal moving surfaces of Colt’s intricate double-action mechanism.
This incredible assembly was used in all Colt double-action revolvers, basically unchanged in any important respect, from its 1908 introduction in the Colt Army Special until its eventual across-the-board replacement by the Mark III action in 1969. I continued to disassemble the old gun, spraying brake cleaner as I went.
Now for the real work. I had read in various forums that one should never heat rust because heating makes it “harder” and more difficult to remove. That, it turns out, is flat-out wrong.
I had also read that one should simply oil up some 0000 steel wool and go at the rust. That method runs the substantial risk of damaging the un-rusty metal adjacent to the rust by scraping hard rust particles along the surface, oil be damned.
If you are like me — that is, if you have a well-equipped shop and you like to do your own work on your own old guns whenever possible — you’ve probably heard of Mark Novak, the man behind Anvil Gunsmithing and the smith who works magic on old guns for the folks at C&Rsenal. He has a fantastically detailed and interesting video (still viewable for the time being on YouTube) about how to “conserve” an old rusty gun.

Conservation is the process of removing and stopping the rot. It is not “restoration,” which is the process of turning something old back into what it was like when it was new, or at least young.
Mark teaches the “rust-boil conversion” method. Simply put, “red” rust is ferrous oxide. It’s hard and it sticks tenaciously to the host metal that has oxidized and formed it. (Gun bluing is also rust, by the way, but is a desirable and beautiful form of oxide.)
The idea of rust-boil conversion is to chemically change the ferrous oxide (FeO) into “black” rust, which is ferroferric oxide (Fe3O4), which occurs naturally as the mineral called magnetite. Why do this? Because ferroferric oxide is brittle, powdery, and easy to rub off with dry superfine 0000 steel wool and a little elbow grease.
In his video, Novak shows a much easier and faster way to mechanically separate the black rust from the gun parts by using a soft “carding wheel” mounted on a long shaft grinder motor, but I don’t have that tool, and don’t know what sort of carding wheel is required.
How does boiling in water for two hours accomplish rust-boil conversion? “Dammit, Jim, I’m a lawyer, not a chemist!” I did not do well in chemistry at any level of my many years of math, science, and engineering education, so don’t ask me how this happens. I just know that it does, but only because Mark Novak said so, and then I did it myself.
Two points to note. First, when working on smaller parts, Novak dips his 0000 steel wool in acetone and lets the acetone evaporate away, in order to remove the residual oil used in the manufacturing process that prevents steel wool from turning into a pile of ferrous oxide, that is, red rust. I skipped that step and have no idea what difference doing it would have made. He probably says to do it for a reason; oh well, my bad.
Second, I’ve read some comments that distilled water should be used for the boiling step. I used tap water. Given the amount of mystery contaminants floating around and sticking to the sides of the soup pot after the first five minutes, I can’t see why distilled water would be necessary. I suppose if you have some very unusual tap water running from your faucet, maybe distilled water might be a better idea. My tap water seemed to work just fine.
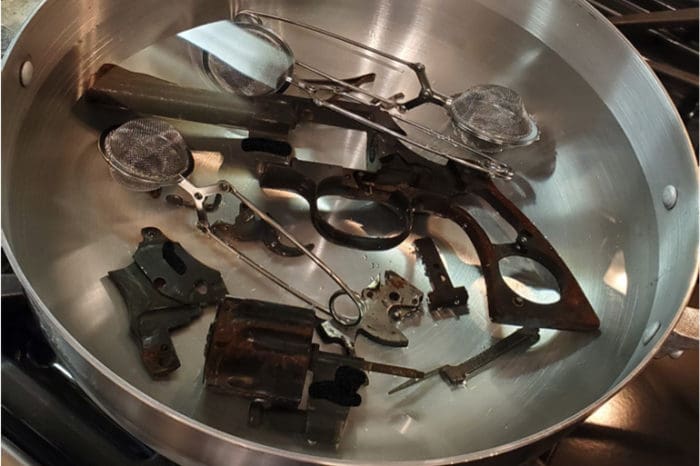
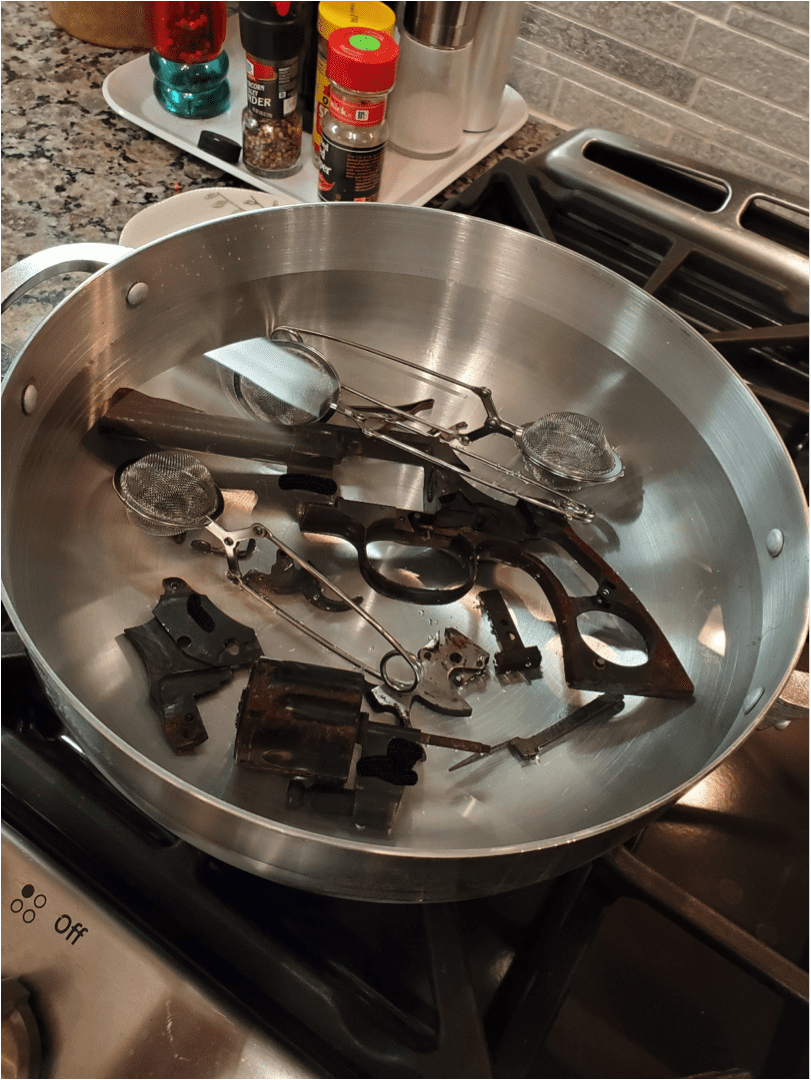
Once the Trooper was as fully disassembled as I could get it (one screw simply refused to come out, multiple PB BLASTER treatments notwithstanding), into the soup pot of kitchen tap water it went:
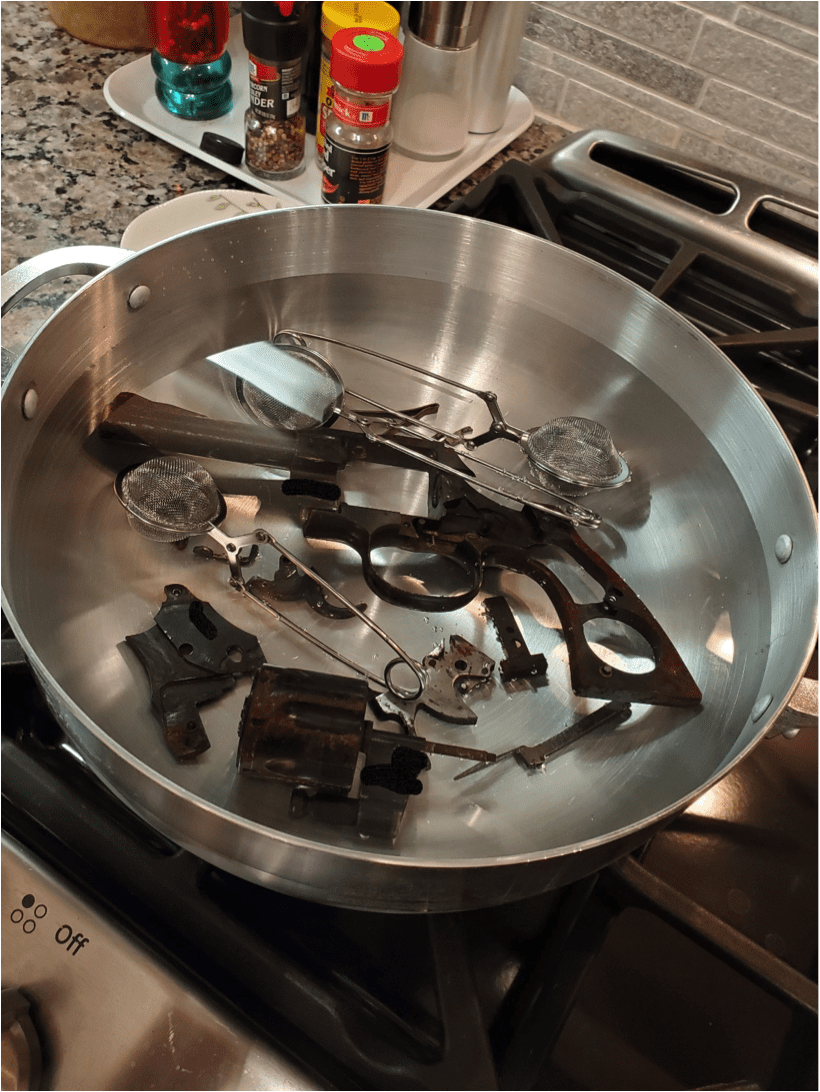

I used tea ball infusers to keep related groups of extremely tiny screws, springs, pins, etc. together because when kept in their groups I could easily figure out which was what, but if mixed up all together, I was afraid I wouldn’t be able to figure it out again, or would at least greatly multiply the odds of making a mistake. And make no mistake – there are some very, VERY tiny parts inside an old Colt revolver. The latch spring guide is practically microscopic.
Every 10 to 15 minutes, I added enough boiling water to the pot to bring the level back to where it had started. If you don’t do this, you’ll be heating metal without any water before you know it.
After two hours of boiling (one hour might work for some light rust, but the rust on the grip portion of the frame definitely needed two hours), the parts were set on a towel to dry by their own heat. There would still be water molecules and even actual wet water in the tiniest nooks and crannies, however. As a result, it was imperative to move on and complete the next two steps of the conservation process without delay.
If you must take any sort of break after the boiling step, it may be necessary to put the cooled parts into a kerosene bath and leave them there until you are ready to proceed, but that will require you to remove the greasy kerosene with brake cleaner again. It is just easier to plan your day accordingly and get it all done.
Here’s the frame and barrel assembly after coming out of the gunbo pot:
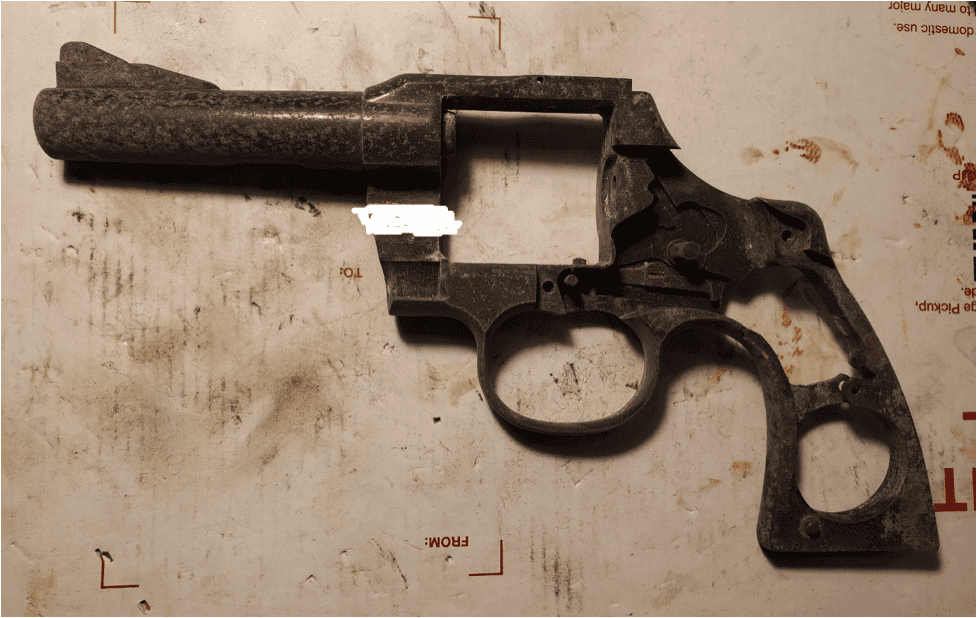

As you have already seen, I saw no reason whatsoever to undertake the substantial project of removing the barrel from the frame. And here are the major parts when the steel wool scrubbing was done, along with the refinished grips:
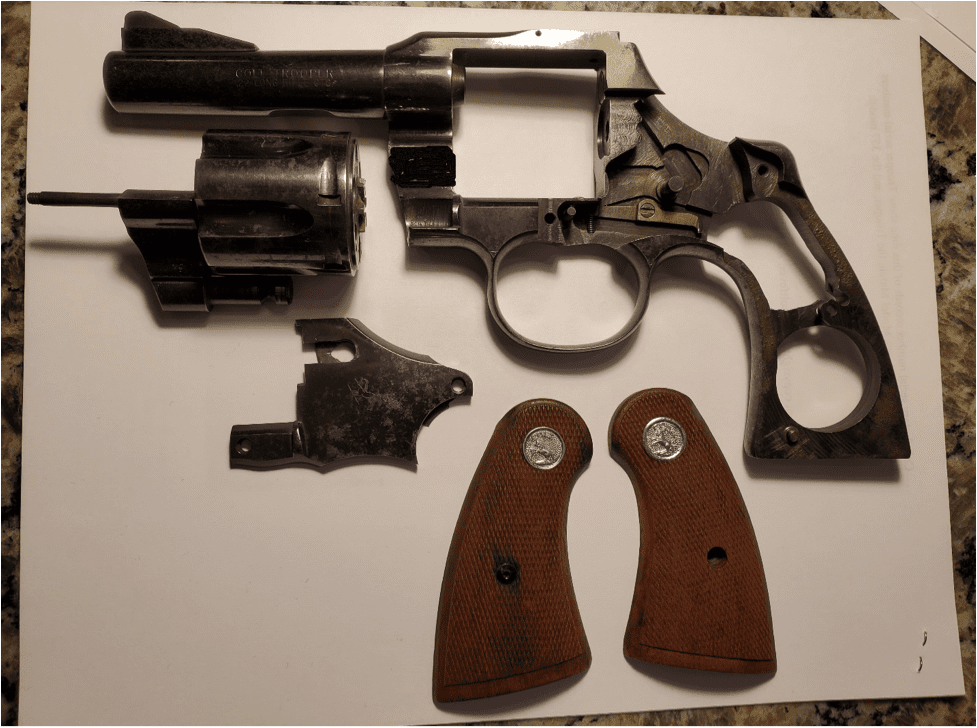

Pretty nice, so far, and I was getting a little bit excited about what it was going to look like when it was all put together again.
As soon as the steel wool rubbing was finished, the entire set of metal parts was given yet another bath, this time in kerosene. Kerosene is excellent for pulling out every last molecule of water from every bit of every part, big and small.
As Mark Novak cautions, DO NOT USE GASOLINE for this step; while it would work, and doesn’t stink like kerosene does, the heavier-than-air fumes will creep along the floor to find the nearest source of ignition, and a very unhappy experience will follow. Also, it’s important to get the metal parts into the kerosene bath as soon as possible after steel wool-ing them, or else they will start rusting all over again and the whole process will quickly be rendered pointless.
After several hours bathing in the kerosene, the metal parts were cleaned off with brake cleaner spray again, lightly blown off with compressed air, then rubbed with a silicone-treated gun cloth. The gun was then reassembled with the internal moving parts getting appropriately very lightly lubricated with gun oil in the process.
At last, here she is in all her conserved glory:

I was very happy to report to Jeff that the trigger on his double-action Colt Trooper .22LR Target Model is as slick and smooth as the day the revolver left Colt’s Hartford Connecticut factory in 1957, an absolute joy to pull. And not a speck of rust anywhere, inside or out.
As there’s nothing more to do for this conservation job, Jeff and his nieces and nephews (and their kids) will all be enjoying plinking tin cans with it at their Labor Day Weekend family gathering.
One final word of caution is needed: DO NOT USE your regular kitchen cookware for this chemistry experiment! Aside from the actually intended chemical reaction, there’s also a whole bunch of additional grease, oil, grime, and who-knows-what-else that will be lifted out of all of the tiny hidden and not-so-hidden spaces in the gun parts. They too will react with each other, and maybe with the iron and the water itself, too.
Here’s what a brand new aluminum stock pot looks like after making a batch of gunbo:


That new brown stuff isn’t coming off – ever. The regular cooks in your kitchen will NOT approve if you’ve done this to the beautiful Calphalon or All-Clad stock pot.
The place will stink like a refinery for a while, too, so you might want to cook this gunbo in the garage (with the garage door open) or even outside, with an outdoor propane burner patio stove or range, so that when the actual edible gumbo is made, you’ll be allowed back into the house to eat some of it.