


Gunsmithing: Rifles, 9th Edition is the latest edition of Patrick Sweeney’s long-running gunsmithing book series.
Do you have a rifle that just won’t group, no matter what you try?
From hunting rifles to tactical and benchrest precision, even today’s modular AR-15 and AR-10, author Sweeney covers them all and shows you how to gunsmith your own rifles at home and make rifle upgrades that maximize their true potential.
Learn how to repair wood stocks, bed a rifle for accuracy, tune a rifle’s trigger, select aftermarket parts that will enhance your rifle-shooting ability, upgrade Ruger’s 10/22, accurize a precision bolt action, make AK-47 and AK-74 enhancements, install slings, rails, and suppressors, and more.
To order Gunsmithing: Rifles, 9th Edition, click here. Enter the coupon code “TTAG” to get 15% off the total purchase of any product(s) for TTAG readers.

Accuracy Testing
You go to the range for one of two reasons: You either want to test yourself, or test the rifle. If you are testing yourself, then you would shoot from whatever positions your competition requires or hunting experiences have called for. You shoot at a target that is the same size as the acceptable target you are shooting at in a match or during a hunt.
To practice for many rifle matches, you stand up and shoot offhand. One of the favorite activities of the members at my gun club is offhand shooting at the gongs on the rifle range. We compete against each other for shortest time to the first hit, number of hits in a row, or fastest string. The scoring is simple: hit or miss.
To properly test the rifle, you obviously need the rifle and ammunition. You also need a stable shooting platform, targets, protection for yourself, and some way to store and sort through the information you are generating. You also need a consistent technique to generate consistent results.
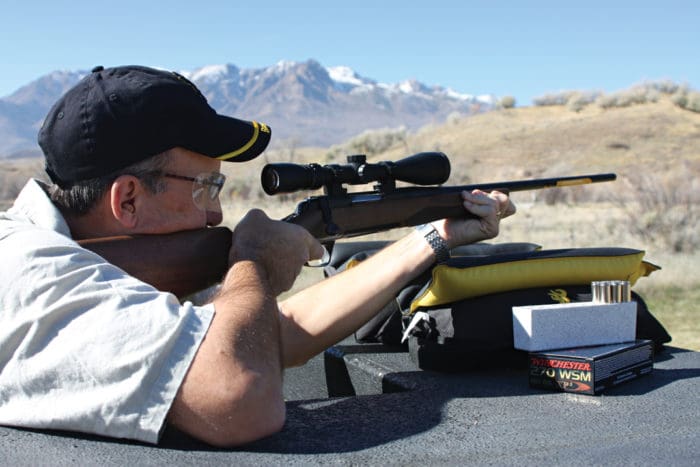
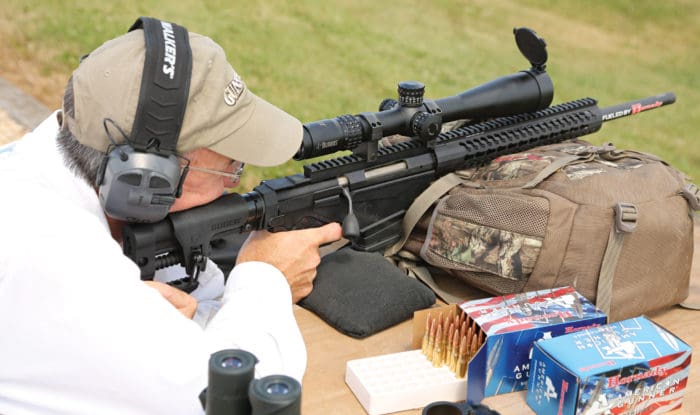
If you are testing the rifle, there is only one position to shoot from. Sitting at a bench. Preferably a solid bench, with solid, padded rests on which to place the rifle and your elbows. To precisely test the rifle, you want to eliminate all of the variables and errors that you, the shooter, would otherwise introduce.
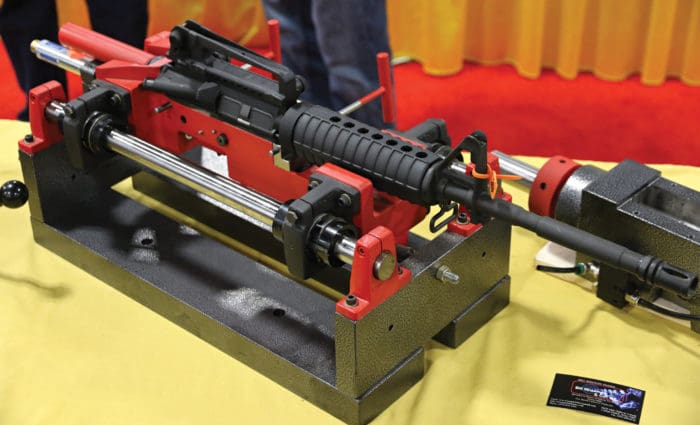
The only way to really do that is with a machine rest. However, you can come quite close to the level of accuracy a machine rest would get out of a rifle using the proper equipment and technique. The target you should shoot at would not be a hit-or-miss target like a gong, but a paper target that measures the rifle’s performance.
Testing two rifles, or two brands of ammunition, and determining that any combination would shoot a group smaller than the heart/lung area of a deer doesn’t tell you much. Hitting the gong 10 times in 10 shots doesn’t tell you if one group of five shots was significantly smaller than the other. Only paper will do that for you.

If your club has solid benches resting on a concrete slab, then you are a lucky shooter. Do whatever you have to in order to stay a member of that club. Offer to maintain the benches and shooting line if you have to.
What if your club does not have such amenities? Offer to build a good bench. Construct it out of 4-by-4 posts and a double thickness of plywood. Use pressure-treated lumber if you can. If not, then give the bench several coats of outdoor porch and deck paint. When it comes to benches, heavier is better. A bench that is heavy enough does not need a concrete slab. To keep the mud down, spread wood chips or gravel in the area where the bench will “live.”
Sitting down to shoot and resting your elbows on that bench is more accurate than standing, but just barely. And just barely comfortable. The rifle should rest firmly without you having to hold it. Invest in or build shooting bags or a shooting rest. You can make a rest out of scrap lumber.
Design your rest to take some padding. Resting the rifle on a hard object can alter group size or location. It can also dent or mar the forearm of your stock. A fabricated bench rest is only a compromise, done to save money. I’m all for saving money, but sometimes money saved by making things yourself is false economy.
You save money by building a rest. What it costs you is extra time fiddling and adjusting the rifle and rest until you are on the target. The time lost and the effort spent adjusting and readjusting the rifle means less time spent shooting, and less information garnered.


The best rest for your rifle is an adjustable rest. As a professional gunsmith, I found that a top-grade shooting rest made a big difference in comfort and ease of range testing. The Sinclair Varminter rest is top-of-the-line. Made of aircraft aluminum and fine-grain cast iron, it is solid, adjustable and comfortable to use. I don’t have to squirm around on the bench to get the crosshairs right where I want them.
Having said that, I have to admit to using a front rest made of plastic from time to time. Why? The plastic one can ride in my truck 365 days a year and not rust. If I need to do a quick zero check, I can drag it out of the truck and use it. Would I subject the Sinclair Varminter rest to the same ill-treatment? No. Would I try to sort out which rifle, or which load, is the most accurate without it? Again, no.
To squeeze the last bit of accuracy from your rifle tests, you need several shooting bags or pads. The front rest needs a bag for the forearm to rest on. The butt of the rifle needs another bag, called a “rabbit ear” bag. The rear bag is angled. The angle lets you slide the rifle back and forth to roughly adjust the elevation of the sights on the target.
Some front rests have a forward stop. The stop gives you a reference point. With the tip of the forearm up against the stop, the rifle is always in the same position on the shooting rest. You are always sitting in the same posture and position. To use a front rest with a stop, press the rifle forward to the stop. Then move the rear bag around until the sights are on the target. For fine elevation adjustments, you use your left hand (for right-handed shooters) to squeeze the rear bag.
After the recoil from shooting, push the rifle forward until it touches the stop. Check your sights and squeeze the rear bag to get the crosshairs in the center again, and repeat.
You need two elbow pads. You can use folded-up towels or sections of firm rubber padding. These pads protect your elbows from the tabletop. These pads are for comfort and to fight fatigue, not recoil. Unless you are shooting a large-caliber rifle, the recoil won’t drag your elbows across the table.
If your elbows hurt, or your arms are tired from resting on the hard wood, you are not going to be able to concentrate on your shooting. Not everyone feels the need for the next-to-last pad that I use. Some rifles, especially large-caliber ones, do not shoot their best with your left hand at the rear bag. In order to control the recoil, you must grasp the forearm. I designed a block and pad to sit under my left hand when grasping the forearm.

The last pad does not go on the bench. It goes on you. Yes, I know we are all tough guys (and gals) and recoil doesn’t hurt us. Like heck it doesn’t. Even if you don’t think it does, recoil tires you and makes good shooting increasingly difficult. If you want to see what large amounts of heavy recoil do to shooting skills, plan a trip to a bowling-pin match with shotgun side events.
To knock the pins off the table takes buckshot, and to down the falling steel plates it takes slugs. The fastest shooter wins, with many entries allowed. Even the best shooters pace themselves. After 50 or 60 factory 12-gauge loads, even a big, tough shooter looks whipped.
If all you do is fold a towel and put it between the butt of the rifle and your shoulder when you sit down to test your rifle, you increase the number of shots you can take before your shooting skills suffer. I have had great success with PAST recoil pads. Made of a space-age synthetic, the PAST pad will take the sting out of the recoil of many calibers.
Now part of the Caldwell family, you can buy them pretty much anywhere, and the $25 they cost will bring you many range-testing sessions of comfort, for years to come.
You need paper targets to shoot at. Target design can be a personal thing. I know successful hunters who view the expense of using anything other than a paper plate as a target as a frippery. The plates are cheap (even cheaper used!) and are the same size as the vitals of a deer.
The thing I noticed about such hunters is that they are much better hunters than shooters. After all, if the farthest deer they have ever shot has been 35 yards away, how much accuracy do they need?
We are interested in a more precise view of things.
I use two types of targets, aiming-point and grids. I spent some time developing them on my computer and printing out test targets to try at the range. The aiming-point targets come in two sizes. The first is a scope target. It has a 1-inch white square in the center, with a black square border 1 inch thick.
At 10 power on a target scope, I can place the crosshairs right in the white center square. With the center square and border each being 1 inch, I have a quick gauge by which to measure my groups. The second aiming point target is for iron sights. It has a 2-inch white square center with a 2-inch black border. It is large enough to see in broad daylight, but not so large I can let the sights “wander” around the bull.
The grid target is a checkerboard of 1-inch squares. I use it when testing handguns in the Ransom rest and rifles in the machine rest. Since the mechanism does the aiming, I don’t need an aiming point, and the 1-inch squares quickly tell me group size.
I print each from the computer onto regular paper, and then take them to the copy shop and make a bunch of copies. The master print includes spaces for all the information I need to keep. I used to keep the targets, but after I had several hundred on hand, storage became a problem. Now I simply measure the group size and record those measurements in my shooting log. These targets are cheap and easily made.
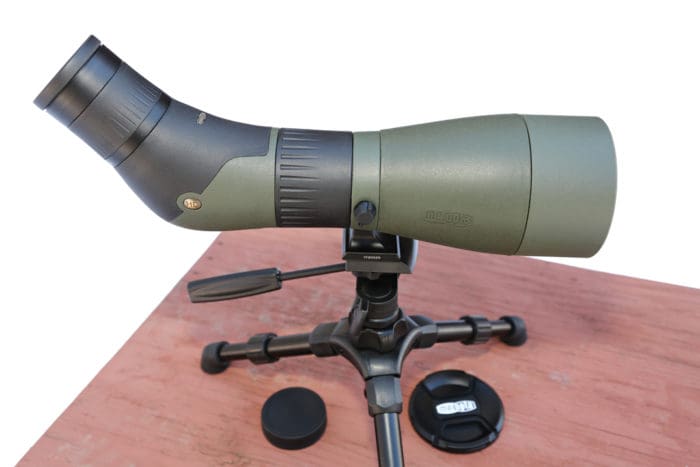
If you don’t have a computer, you can sit down with ruled paper, a straightedge and a felt-tip marker. The size is convenient, and you can staple as many as you need to a target holder without feeling like you are pasting up a billboard. And you will need a bunch of them. One target per group, to be exact. To see the groups after you have fired them, use a spotting scope. Mine is an old Freeland scope that was once used for small-bore rifle shooting.
A spotting scope gives you a better view of the target. You can have more magnification in a spotting scope than in a rifle scope, aiding your view of the target you just fired. Rather than straining your eyes through the rifle scope, or walking down to the targets and back, get more glass.
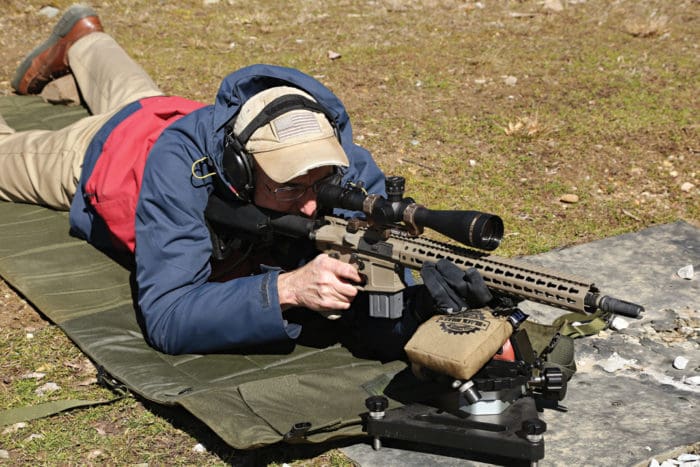
Protection of your eyes and ears is vital. I recall one instance of going to the range with my father when I was just a kid. My brother and I were shooting .22 rifles under Dad’s supervision, and even back then we had glasses and muffs on. A fellow club member showed up to sight in his deer rifle. After he had touched off a few rounds of the .300 Savage, my father went over and offered the fellow some ear plugs. “No, that’s all right.” he said, “After a while you get used to it.”
As we walked back, I heard my father remark “Yea, you get used to it by going deaf.” The noise of shooting will damage your hearing if you do not wear proper protection. Puffs of cotton, wadded-up cleaning patches or empty pistol cases do not protect your hearing. Wear muffs or foam plugs. If you shoot on a covered firing line as I do, you may want to wear both plugs and muffs over them.
One drawback to hearing protection is that you cannot hear people talking to you. Invariably, when you peel back the muff to listen, someone else on the line will touch off a 7mm Magnum. I avoided that problem with electronic muffs. The electronic muffs have electronic circuitry and external microphones built into them. The mics pick up outside noise and transmit the noise to the speakers in the muffs. If a noise occurs that is too loud for your hearing, the circuitry protects your hearing.
Most electronic muffs either clip off the extra volume or shut down for a split second. The good ones compress the noise down to an acceptable volume. You still hear what happened, but it is prevented from being too loud.
Back in the end of the 20th century, electronic muffs were expensive, fragile, not easy to find, and gobbled batteries like breath mints. Today? They are so inexpensive that they are sometimes used as inducements to subscribe to shooting magazines. At one of the last industry PR shindigs I was at, they handed out electronic muffs to all participants as part of the swag.
Some things don’t change. The less-expensive ones simply switch off when the noise gets to be too loud. Trying to listen, or talk, when your earmuffs are switching on and off, on and off, can be annoying. Not as annoying as going deaf, however. So, it is worth the extra bucks for the better ones. The “extra bucks” used to be hundred-dollar bills. Now they might be twenties and might be smaller.
As your last piece of equipment, you need a shooting log. A loose-leaf binder with standard notebook paper in it will do. If you have a home computer, you can experiment with designs of columns and boxes for the information you need. You should make entries into your log each time you go to the range. Include the day and time, the weather, which rifle you are using and what ammunition. Note how much ammunition you fire, and the results you obtained.
If you are testing for accuracy, then be sure to save the targets long enough to measure the groups and enter the measurements into the log. If you are testing ammunition over a chronograph, be sure to list the velocities along with the lot numbers of the ammo tested.
Why go to all this trouble? A rifle can be a lifetime investment, if you treat it properly. By keeping track of your practice and testing sessions, you can tell how your rifle is shooting. Is it shooting as well as it did before? Has the accuracy dropped off or improved? Don’t just try to rely on your memory. Keep a log.
Now, logs can be useful, but they need not be ultra detailed. Someone who is competing in the PRS, Precision Rifle Series, will note every round fired, time, date, location, conditions. Also, if they are borderline OCD, the results. Ditto NRA High Power shooters. They want to know if accuracy is starting to slip.
A more tactically-minded shooter simply logs volumes. They want to know when they get to certain mile markers, so they can test or inspect to see if they might need to replace this or that or rebuild something.
* * *
So, there you are, at the range with 100 pounds of rifle, bags, pads, ammunition, spotting scope and assorted other gear. That doesn’t include the weight of the bench. How do you test the rifle? To sit at the bench and shoot, you must be comfortable. Take your time and get in a good position. Sit upright. You don’t want to be in a “sitting prone” position. You’ve seen it, where they shooter is sitting down but his upper body is practically resting on the benchtop. Breathing is difficult in this position, and your neck gets tired quickly. Plant your feet on the ground or concrete. Changing your foot position can shift the point of impact.
Do not rest your body against the edge of the bench. Rest the butt of the rifle against your shoulder and move the front rest under the rifles forearm. Look through the scope and move the rest on the bench until the target is in the crosshairs. Slide the rear rest under the butt of the stock until the rifle is supported by both rests. Fine-tune your adjustments, your position, your comfort, until the crosshairs are on your aiming point.
Snuggle up to the rifle and aim at the target. Set your elbow pads down to keep your elbows off the table. With a solid rest and a high-powered scope, you should be able to see the effects of your heartbeat in the crosshairs.
Sit in the same position at the bench for each shot. Practice by dry-firing. Make sure the rifle is empty and close the bolt. Snuggle up behind the rifle and place the butt solidly into the pocket of your shoulder. Grasp the wrist of the stock and place your finger on the trigger. Line the crosshairs up on the target. Reach under the stock with your left hand and squeeze the rear bag until the crosshairs are centered on the target. Let your breath out and continue pressing the trigger until the striker falls.
The press should only take a few seconds. Work the bolt, take a couple of breaths, and then repeat. With practice you can “call” your shots. Calling a shot means you can tell exactly where on the target your crosshairs were when the striker fell. Once you can call your shots dry-firing, it is time to go to live ammo.
I am leaving out any talk of dealing with the wind or mirage. I do this not because wind drift is trivial (it isn’t!) but because it is outside the scope of a book on gunsmithing. If at all possible, do your test-firing on a calm day or early in the morning when the wind is likely to be down. My range is completely ringed by tall berms, and the wind is not at all predictable. Not a problem, as the wind is not often strong enough to drift bullets significantly during their 100-yard journey to the paper.
How much shooting is enough? Tailor the amount of shooting you do to the information you need to know. If you are checking your rifle to see if the zero has changed since the last hunting session, a single three-shot group will do. If you are final-testing a rifle and ammunition combination to see if it is accurate enough for competition, then you should shoot five 10-shot groups. For general testing in between those two conditions, I fire three six-shot groups. Why three? Because I can’t get more than that out of a box of ammo. It isn’t a matter of division, but fouling.
When I was doing accuracy testing for handguns some years ago, I found out that many handguns had sudden increases in group size switching from one ammunition to another. I was using a Ransom rest, and the accuracy for that handgun and ammo combo would settle down after a couple of groups were fired of the new brand.
I only had to see this a couple of times to realize that the fouling for each brand was different. Until the new brand had blown out or overlaid the old fouling, accuracy suffered. I had read about fouling shifting group size when reading about benchrest shooting but had not seen it until then. This was, however, with a superbly accurate .22 LR pistol using match-grade ammo and a Ransom rest.
When switching brands or ammo lots in testing rifles, I first clean the barrel. Once the barrel is clean and cool, I fire a fouling shot. One round out of a box of 20 leaves 19 rounds. Three six-shots groups take 18 rounds, leaving one round as a spare. I could shoot five-shot groups, but that leaves four spares.
Testing for competition purposes is more rigorous. To test for accuracy in a USPSA/IPSC rifle competition, I will fire at least 10 six-shot groups. If the last group is the same size as the first, then I don’t test slow-fire any more.
If the last group is larger, then I continue testing until group size is unacceptable for competition. I then plot group size and point-of-impact changes for future match use. I have only had to do this for one rifle, and I replaced the barrel soon after going to all this work. (It was on its last legs, so no loss, and information gained. I declared it a victory and moved on.)
If the group size has not changed (which is usually the case with a good barrel), then I test it for changes from heat. Practical rifle competition is a rapid-fire sport. I test a potential rifle by firing three six-shot groups from the bench. Without cleaning or cooling it, I then fire a magazine in rapid-fire practice on other targets or on the gongs. I then sit down and fire another set of three six-shot groups. A good barrel will have a minor change of zero and group size on the second set of targets. A great barrel will show no change.

How much accuracy is enough? That depends on the rifle, ammo, and your needs and ability. An expensive rifle with a guarantee of accuracy must deliver as promised. A hand-me-down hunting rifle may be doing well if it does 3 or 4 inches at 100 yards. Be sure of the ammunition and yourself before starting to blame the rifle.
One day when I went to the gun club, one of the other members was there with an expensive rifle. It was a purpose-built, imported and expensive sniper rifle. He was not having fun, because his thousands of dollars’ worth of rifle had not shot a group under an inch yet. (As I recall, the rifle ran him right around $5,000, without the scope. The scope added another $1,200. Ammunition was “expensive” back then, with what he was using costing him 25 cents a shot. You can imagine his distress at its lackluster performance.)
I asked him if he had broken-in the bore, and his reply was “Yes.” What ammo? He showed me a box of Federal Match .308 Winchester. Hmm. The rifle and ammo should be capable of much better than an inch. I sat down at the bench, adjusted the rests a bit, dryfired the rifle a few times, and then fired a five-shot group that measured .695 inch edge to edge.
Happy as kid on Christmas, he sat down to try it himself. Later, he showed me several targets, including one that was three shots under half an inch. The rifle was up to it, but the shooter wasn’t sure he was. If he had been using a lever-action with a four-power scope on it, chambered in .30-30, his expectations of a group under an inch would have been completely out of line.
So how much is “enough?” Back in the old days, the expectations were a lot more generous. Most out-of-the-box bolt-action hunting rifles should do under 2 inches with factory ammo. Some would do an inch, but you had to search for the ammo they liked. Hunting levers, pumps and autos would probably shoot larger groups than 2 inches, with some exceptions. Browning BARs tended to shoot better than 2 inches, as did Remington pumps.
Today? Every maker offers an economical bolt-action rifle that will do an inch or less. Rifle makers, their barrel suppliers of barrel-making divisions, and the ammunition makers have all tightened things up. Shooters now expect accuracy, and they do not expect to have to pay a lot for it. It is common for a basic bolt-action rifle, with an MSRP under $500 (some under $400) to shoot 1-inch groups.
A trued-action rifle with lapped bolt surfaces should do under an inch. The same rifle with a premium barrel had better do under an inch, or someone somewhere forgot an important step. It should easily do under half an inch, with the right shooter sitting behind it.