


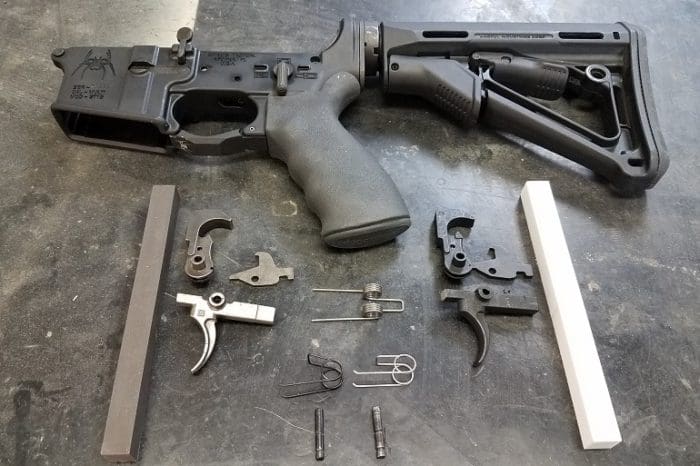
What’s the best way to improve your AR-15’s mil-spec trigger? Simple…buy a better one. Seriously, the easiest way to make your mil-spec AR-15 trigger smoother and crispier is to replace it with a better aftermarket AR trigger.
There is a wide variety of good replacement triggers made by excellent companies like Timney, Geissele, ALG defense, and CMC, just to name a few. ALG Defense has a popular, better-than-mil-spec, mil-spec trigger at a very reasonable $50 or so. There are great aftermarket single-stage and two-stage triggers you can choose from. Some are one-piece drop-in designs while others maintain the hammer and trigger as separate components.
Buying a new trigger is best because messing with trigger groups is potentially dangerous. If done improperly you can end up with an unsafe trigger that will allow the rifle to fire when the trigger isn’t pulled. If you don’t have access to an experienced and competent gunsmith who can show you the ropes or at least double-check your work, it’s not worth the risk. Don’t do it.
That said, if you are dead-set on keeping your existing stock trigger and doing the work yourself, I’ll cover some ways you can improve it with minimal risk. This will not be a “how to” trigger job guide on adjusting angles and engagement.
SPRINGS
The first and safest thing you can do is replace or modify the hammer and trigger springs.
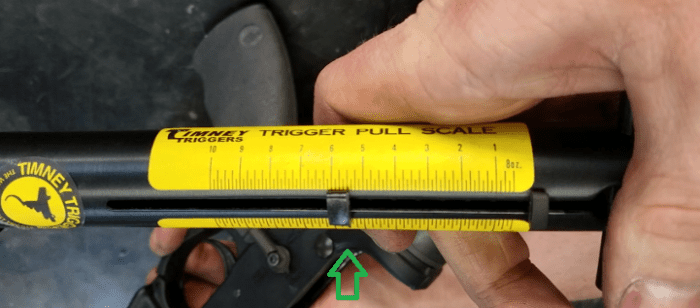
Start by getting a baseline trigger pull weight with all stock components. It’s always good to know where you are starting from. If you don’t have a trigger pull scale then you’re stuck doing it by feel.

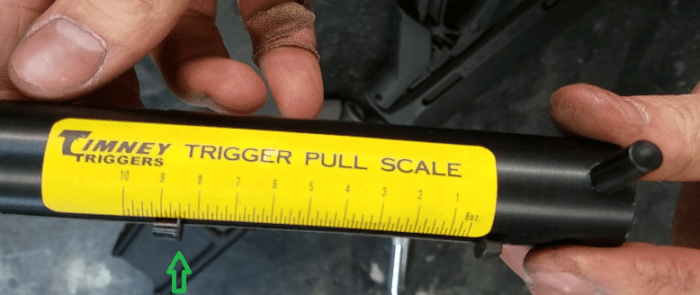
This stock trigger pull weight is 8.5 pounds.
Next, take a trigger pull weight reading without the trigger return spring installed. You will need to manually push the trigger forward in order to set the hammer against the sear, but once they make contact they will stay put.
This lets you know the minimum possible trigger pull with the existing hammer spring and sear geometry.


Mine read 4.5 pounds. It’s important to know the minimum possible pull weight so you aren’t chasing the impossible.
The trigger return spring is the most harmless component to mess with. You won’t get light strikes or potentially ruin your hammer and sear through improper polishing.
If you bought a replacement spring kit, something like the JP Enterprise Reduced Power Spring Kit, put that trigger spring in and see what you get.
Mine isn’t from JP, but I have a reduced power trigger spring that drops my trigger pull down to 6.5 pounds. If you don’t have, or want to buy, a reduced power trigger spring, you can modify your existing full power spring to achieve similar results.

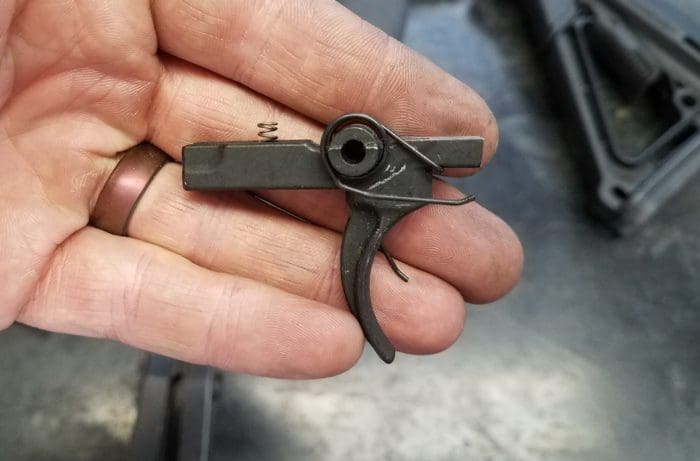
Simply bend one of the legs. No, it’s not pretty, but it also dropped the trigger pull weight a full 2 pounds, down to 6.5 pounds. That makes a significant difference. You may be completely satisfied at that point and not feel the need to meddle any further. Nothing wrong with that.
If not, you can replace the hammer spring with a reduced power one. This may result in light strikes depending on how light the spring is and how hard your primers are.
That means this modification has a potentially negative effect on reliability. A possible fix for light strikes is to lighten the hammer itself. Put a hole in it if you can drill through the case-hardening or grind some of the meat off the sides.

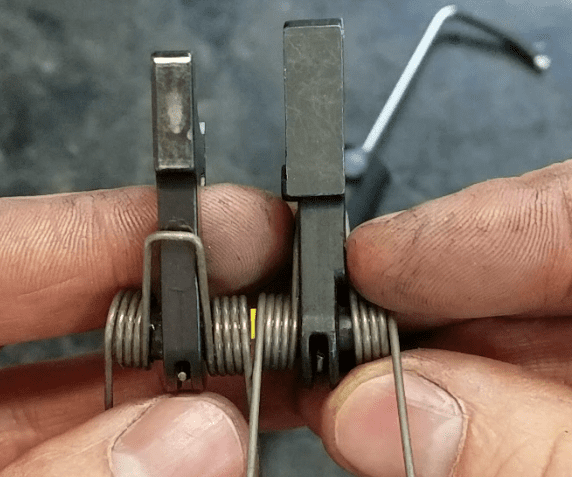
The hammer on the left is a Geiselle Super Dynamic Three Gun Hammer, the one on the right is mil-spec. As you can see, there is a good amount of metal that can be removed.
This will decrease the weight of the hammer and increase its velocity, possibly eliminating light strikes. This comes with its own possible issues, though, like decreasing the structural integrity of the hammer.
The more we modify these parts from their original design, the less reliable they can become when compared to their unmodified counterparts.
I am definitely not recommending you lighten your hammer. If you remove too much material, it will leave the hammer underpowered. Personally, I would not lighten a mil-spec hammer outside of academic curiosity. I’d only do it to see, 1) if it solves the issue, or 2) how long it will last. I wouldn’t consider a trigger with a lightened hammer reliable anymore.
POLISHING


The most important thing to realize about standard mil-spec triggers is they are case-hardened. That means the outside portion of the metal is hard, while the core is soft.
The case hardening depth is roughly .009 to .014 deep. And unless there are some exceptions I’m not aware of, the sear angle is ground in AFTER hardening.
Since we don’t know how deep the case hardening went or how much was ground off, there is really no way to tell how much is left. This presents an increased risk when attempting a full trigger job (sear and hammer angle/engagement adjustments) because the possibility of breaking through the case-hardening exists.
For that reason, polishing is the most that should be attempted, and then only if necessary.
Polishing does remove some material, but very little. Although the exact depth of the case hardness is a mystery, I’m gonna take a guess and say a few tenths (.0001) or even one thousandth (.001) of an inch shouldn’t matter.
Polishing is a broad term that means different things to different people, so let me clearly explain what I mean. Use a fine ceramic stone. I use a brown M-fine ceramic stone for most of my polishing. Sometimes I’ll pull out the x-fine white stone.

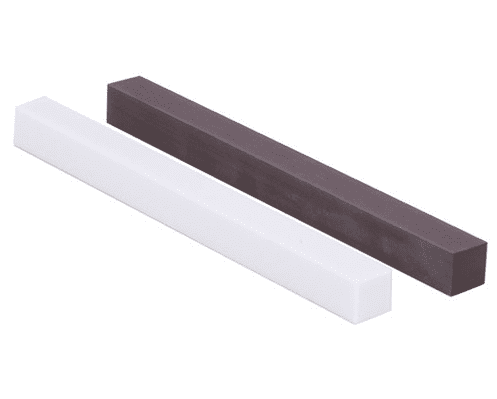
Anything more aggressive than these and you can easily start changing the sear and hammer hook angles. They are also flat and square.
This makes it easier to match and maintain whatever flat angle you are trying to polish. The fine, clean edges of the stone make it far superior at dealing with small ledges and fine corners, like on the hammer hook.
A piece of 5000 grit sandpaper on your table won’t cut it. Neither will your average sharpening stone with its often busted/chipped/uneven/rounded edges.
The brown M-fine stone is still capable of adjusting the angle if you go at it long and hard enough, so be mindful. When polishing, start by taking a very good look at the surfaces.


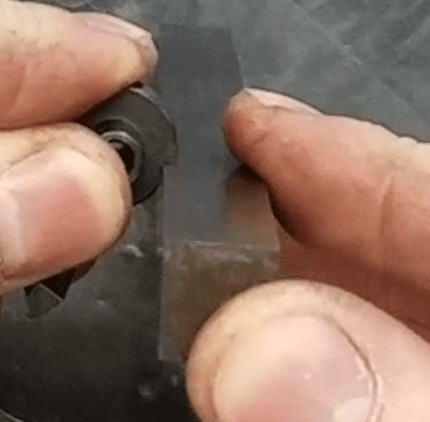
I have two triggers pictured above. The top is a nickel boron coated mil-spec trigger from Spike’s Tactical. The bottom is a random no-name mil-spec trigger I’m borrowing from a friend.
I start by visually inspecting both triggers. From there, I feel the surfaces and edges on both triggers for burrs using my thumbnail. Something like a scribe or razor blade can work too, but I think you get a better feel with your fingernail.
The first trigger, as is the case with many nickel boron triggers, has no noticeable rough spots. Polishing won’t improve it at all, or it will improve it to such a small degree that, in my opinion, it isn’t worth the time.
The bottom trigger has noticeable, visible grinding marks on the sear with a pronounced burr on the top edge. Thankfully the scratch marks on the sear are in line with the direction of movement, and the burr rolls away from the hammer, so it isn’t in terrible shape.

The hammer, on the other hand, looks like someone has already attempted a polish job on it and failed.


It is faceted…the two different angles show that it is not a flat and smooth surface. Proper polishing may improve this trigger.
Now that we have taken a good look at the angles and surface finish, we can begin. Start with the sear. It’s a broader flatter surface and should be easier to work on. If you have both stones, start with the brown M-fine one. Go slow. The simplest technique is to leave the stone flat on a table while you handle the trigger.

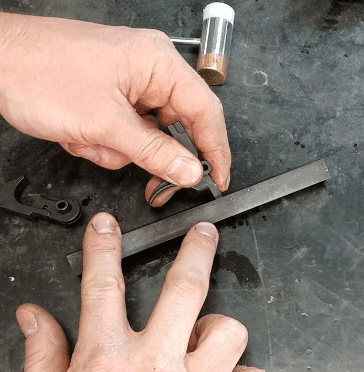
Place the flat of the sear on the stone, rock it around a little so you can find the edges. The edges allow the piece to rock and be noticeably more unstable. By rocking it around, and finding the edges, you should also be noticing where the flat and most stable point is. That’s what you want to polish.
Once flat, make a few passes in the direction of the trigger’s movement when pulled, then inspect the surface finish.


What you DON’T want to see is one corner or edge being the only part polished. That means you weren’t holding it completely flat.
Pressure also plays a part. Even if the piece is flat, if you are pressing too hard on one side compared to the other, more material will be removed there.
This might be the case in the above photo. Because there was more wear on one side vs the other, I re-evaluated how I was applying my pressure. Focus on firm, controlled, even pressure. Let the stone do the work.


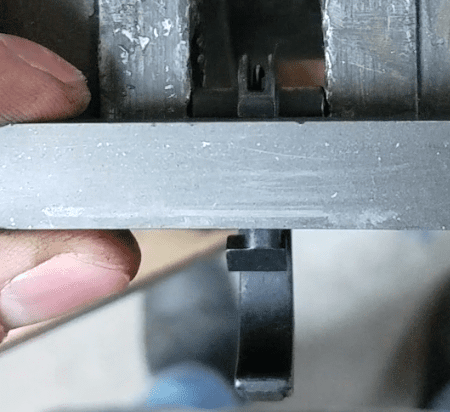
If you are thinking that I removed a lot of material, think of it like this — all I did was bring the high spots down to the low. I essentially removed material equal to the depth of the scratches left by whatever originally ground the sear.
Yes, it was dished. Yes, I removed a little more on the edges than the middle. It is still a minimal amount of material and not something I am concerned about. Once the final scratch was gone, I stopped. Not a swipe more.
There is no need to polish the top of the sear, just run it over the stone a few times to make sure there’s no burr.
The hammer is next. Since it looks like it has already been messed with, I recommend replacing it. That being said, let’s continue.
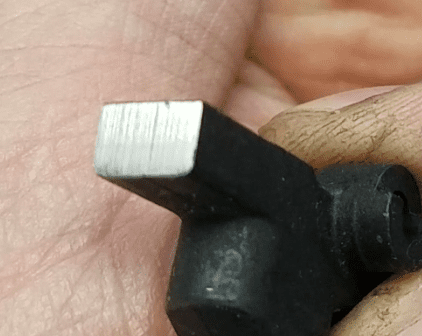
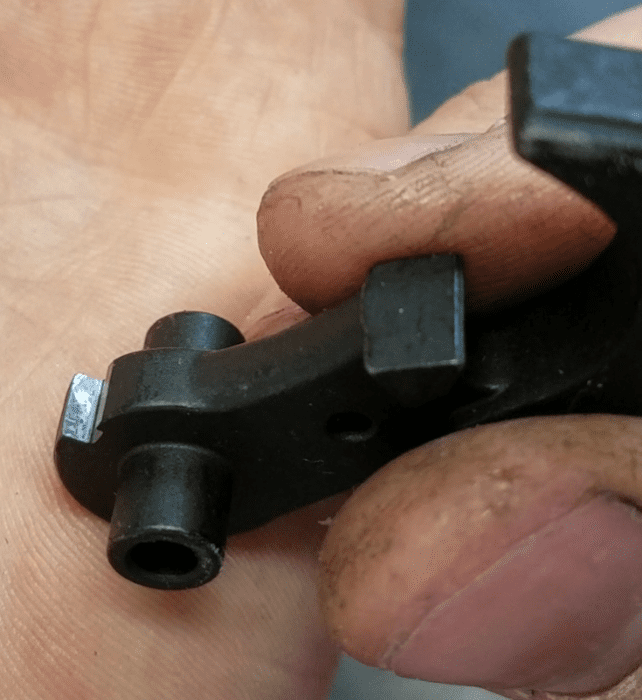
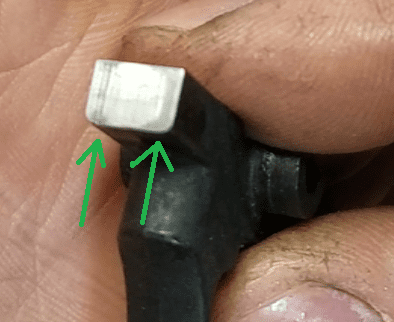
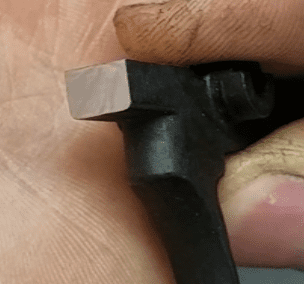
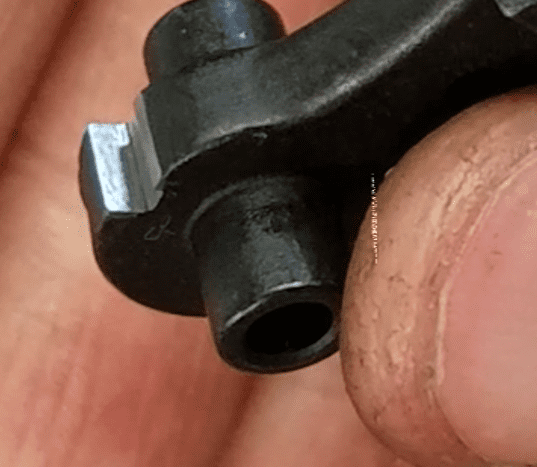
The hammer is significantly more difficult to polish. If the sear gave you trouble, you might want to consider holding off on the hammer. The hammer hook area makes a roughly 90 degree angle with the nearby ledge. Or should. Compare the images below to the one at the top of the Polishing section.


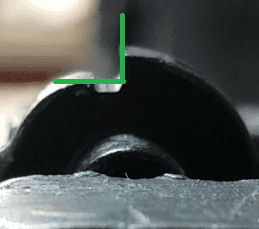
Use these two surfaces as your references for proper alignment on the edge of the stone.

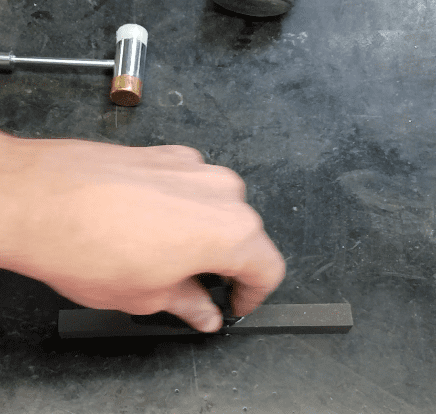
As I said, this one is tricky, it’s hard to get a feel for it like you can with the sear. You can try placing the stone at the edge of the table and handling the hammer like you did the sear.
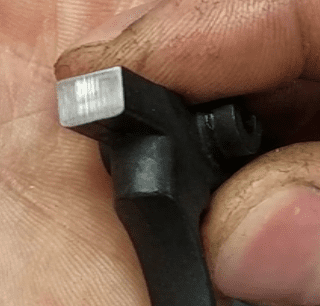
That didn’t work for me. I placed the hammer in a vise so the surface I wanted to polish was pointing vertically as seen in the preceding two pictures. This gave me positive two-handed control over the stone as I visually lined it up.

This method worked well for me.

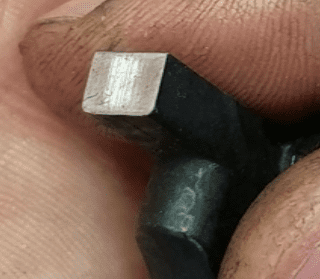
My biggest priority was to make the surface flat and true again. There are no deep scratches so that level of polish is more than enough.
It is fine that we are not polishing in the direction of movement here. First, it would be very difficult to even do that. Second, the stones are so fine that it really doesn’t matter.
That’s polishing. Don’t buff with a wheel and polishing compound. Don’t use a Dremel. They are unnecessary and can round over edges. They are also VERY likely to remove too much material.
Bottom line, stay away from power tools. I really want to emphasize that you should go slowly. If you don’t have the patience for this, don’t attempt it.
Now re-check the pull weight.

Polishing brought the trigger pull down to 5.5 pounds with the reduced power trigger spring in place. That means I have 1 lb worth or trigger return strength left which is about as low as I’m willing to go.
The trigger pull is also much more consistent now. Before polishing, there was at least a 1/4 lb variance in the trigger pull readings. After polishing, they all came in pretty much dead-on 5.5 lbs.
The last thing I would do to improve the trigger is buy a set of tight-fitting trigger pins. Eliminating the slop in the trigger caused by loose-fitting pins will make the trigger feel more responsive and, in general, better, though to a small degree.
If the holes in the hammer/trigger are worn/oversized then a larger pin will fit. Otherwise, ream the holes for a perfect fit. REAM, don’t drill. In either case, the lower will not need to be modified.
Don’t bother messing with the disconnector. If you adjust it in an attempt to shorten the reset distance, the disconnector may release the hammer before the sear is in place to catch it. Polishing it won’t have any impact on the trigger pull, neither will messing with the spring. Leave that completely alone.
Polishing a trigger will improve the feel. It will smooth it out and reduce the pull weight depending on how rough the surface was to begin with. Replacing the springs has the largest impact on trigger pull weight. Polish plays a role, but has much more to do with feel than the final weight. Your final trigger pull weight is primarily determined by the strength of the springs and the sear/hammer geometry.
I stand by my original statement; the easiest way to improve a mil-spec trigger is to replace it. If this is your first time polishing a trigger, be careful. I definitely recommend having a good gunsmith inspect what you did when you’re finished.
At the very least, treat that gun as unsafe until you’ve put 100+ rounds through it. Check for any odd or excessive wear on the sear/hammer. If it all seems good by that point, then it’s probably good to go.
You may think I’m being overly cautious here, but accidental discharges due to botched trigger/polish jobs are a real thing. This shouldn’t be taken lightly.
I’m not encouraging anyone to try what I’ve described here, but I know some of you will, either based on my article or someone else’s. My hope is that my emphasis on proper polishing will improve a novice’s understanding and decrease the chances of an unsafe trigger.