
Click here to read Part 1 of this two-part post.
In the first part of this post, I detailed the hours of effort and frustration that went into assembling a custom 1911. When last I left you, I had the possibility of a working 1911 in that it was dry functioning just as it should have. But the struggle wasn’t over yet. I still had to fire and tune the gun.
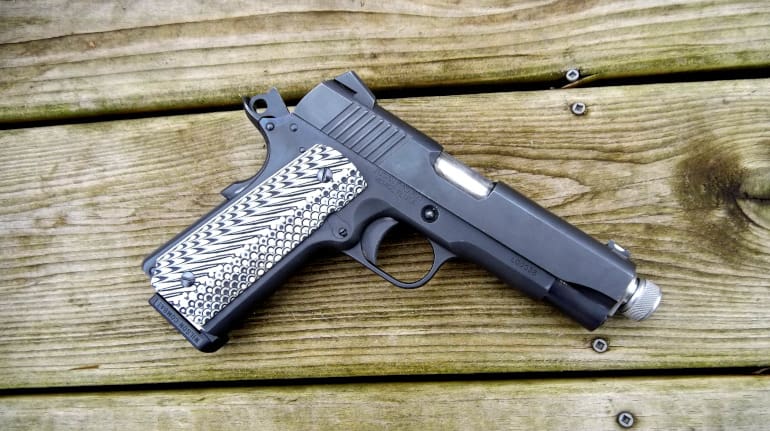
Once again, these parts from Brownells that went into this build:
Commander Sized Frame: 100-028-402WB
Commander Sized Slide: 100-028-391WB
Ed Brown Threaded Barrel: 087-000-102WB
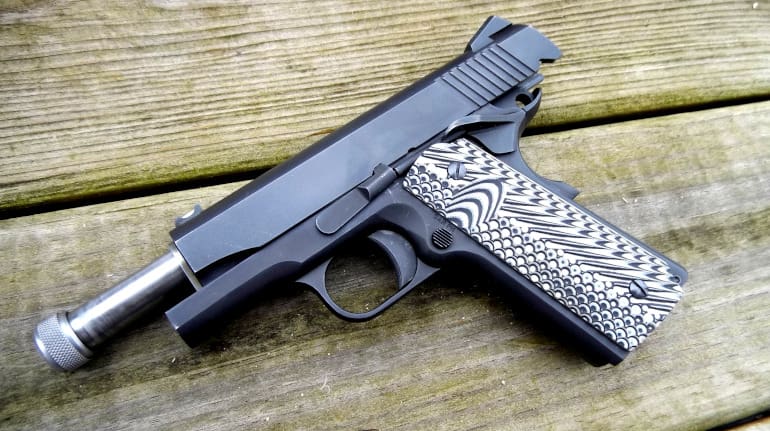
VZ Grips: 100-011-278MB
Spring Upgrades: 965-000-177MB, 087-000-046WB, 087-000-045WB
Magazine: 965-047-470MB
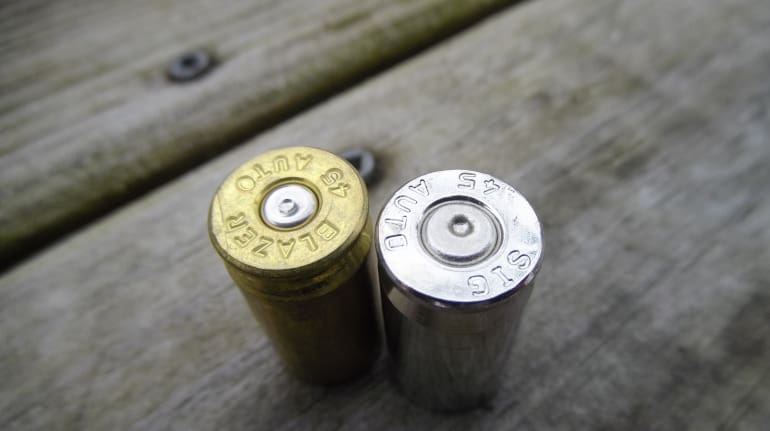
My first step in the firing process was to see where my firing pin was impacting. You can readily tell if a gun is having issues due to the vertical placement of the impact on the primer. To test that, I primed some empty cases.
I want to make clear here that I put only primers in some empty cases. Please don’t put a live round in an un-tested firearm to determine primer strike placement and depth. If you read no other part of this post, this needs to be the one thing you read. Primers only in empty brass cases…got it?
So I took several empty, primed cases and pulled the trigger on each. You can do this in your garage and it’s not very loud, but I’d still recommend ear protection.
I made sure to index the ‘45’ stamped on the case heads to be at 12 o’clock each time I put a primed case in the chamber. That way I could consistently evaluate strike placement.
I was, in fact, striking high, which meant that my barrel-to-slide fit was still off. I filed the barrel lugs and breach face contact points some more and noted that my lockup was then much nicer and that the primer strikes were centered. The amount of material I removed was so minute that it was hard to imagine it could throw off a barrel that much. But you can see the difference…
I gave the gun a final once-over and called some friends to see about getting some good ammo for testing. In the mean time, I had a selection of various bullet weights to test the gun with and determine the proper spring weights.
Despite the quality parts I used, there’s always the nagging worry that the object on which you spent hours working with files, sandpaper, and a Dremel tool will explode in your hand the first time you pull the trigger. I have built a large number of guns and I always turn my face when touching off that first round. This time was no different.
I chambered a rather benign 230gr FMJ ball round from some bulk box and switched to my left hand just in case. I did not have a magazine or more ammo in the gun at this point. Then I pulled the trigger.
It went bang. I was pleased to see that the gun had fully cycled. I was even more pleased that my hand was still on the end of my arm. I looked the brass over and found no damaged or odd areas that would indicate erratic extraction or other problems.
Next I loaded two rounds into the magazine and used the slide lock to load it. It didn’t chamber all the way.
I loaded it manually and fired both rounds. The gun cycled between shots without an issue. Confident in my results, I loaded a full magazine and again tried to chamber using the slide release. Again, it didn’t go fully into battery.
I fired this magazine without any cycling problems. After that, I switched to some lighter 185gr Hornady XTP loads and again experienced the same initial chambering issues.
I noticed that the slide velocity was far too fast and the chambering appeared weak. That meant that the action spring was too light.
High slide velocity means that there will be in increase in felt recoil and more parts wear on the gun. The other indicator is the weak chambering from the magazine. The slide lacked the forward force to strip the round off the magazine and snap the extractor over the case rim.
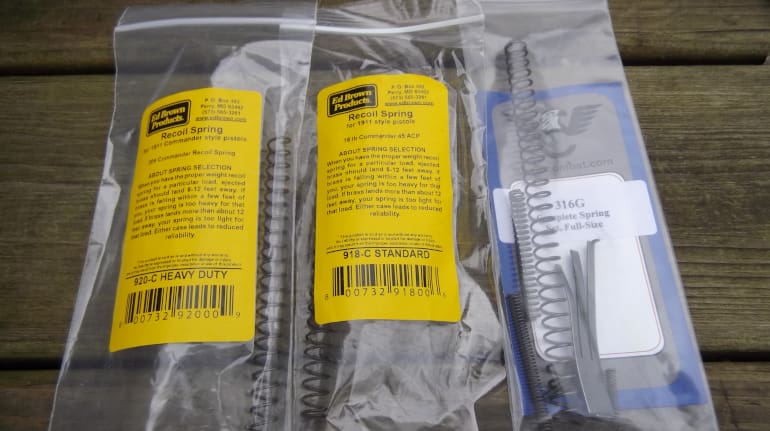
Included in my build sheet for this gun were some new, high performance springs from Ed Brown, one at 18 pounds and another at 20 pounds. The spring that came with the slide was discernably lighter than 18 pounds, which was the source of my problem.
I tried the 18 pound spring, but it still felt light to me. I opted for the 20 pounder and the gun changed immediately. The lockup was strong and fast and it chambered with gusto. I tested it with a variety of loads and it cycled reliably and displayed lower recoil as a result.
I cleaned the gun up and waited for the rest of my test ammo to arrive and the negative temperatures in Michigan to lift.
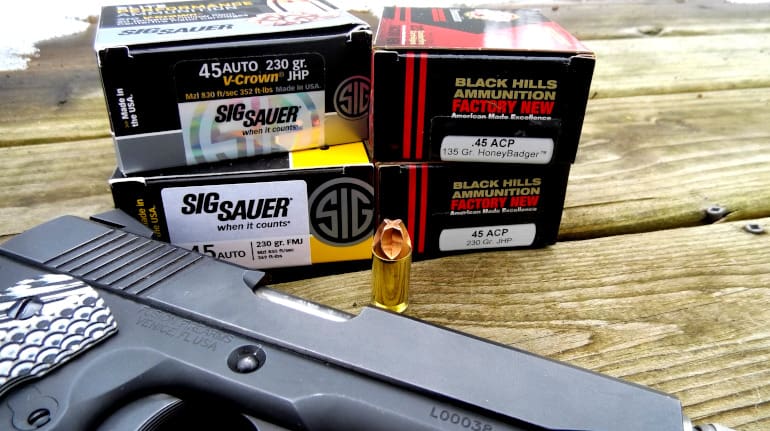
I ended up with a fine selection of .45 ACP from Black Hills Ammo, SIG SAUER, and Lehigh Defense. I settled in with my Oehler 35P chronograph and got to testing accuracy and velocity. Groups below are the average of five, five-shot groups at 25 yards and velocity is the average of three, five-shot strings.
Lehigh Defense 200gr +P Xtreme Penetrator——————900fps, 2.25”
Lehigh Defense 170gr Controlled Fracturing——————-933fps, 2”
Lehigh Defense 174gr +P Maximum Expansion—————–950fps, 2.25”
Lehigh Defense 120gr Xtreme Defense————————-1205fps, 1.75”
Black Hills 135gr HoneyBadger———————————1301fps, 1.5”
Black Hills 230gr JHP——————————————-795fps, 3.0”
Black Hills 230gr FMJ——————————————-789fps, 2.75”
Black Hills 185gr JHP——————————————-925fps, 2”
SIG SAUER 230gr V-Crown————————————-850fps, 2.25”
SIG SAUER 230gr FMJ——————————————845fps, 2.75”
SIG SAUER 200gr V-Crown————————————–930fps, 2.5”
SIG SAUER 185gr V-Crown————————————–960fps, 1.75”
Considering that I fit this gun together with files, sandpaper, and not a hint of CNC precision, I was pleased to find that it did extremely well. The Ed Brown barrel certainly helps with accuracy and that was very apparent, especially with Black Hill’s 135 gr HoneyBadger load.
Not only was it the fastest at just over 1300 fps, but it was nearly rifle-accurate out to 75 yards on steel plates. The sights on my build aren’t fancy, but they are easy to pick up and aim. I had no issues with point shooting and general accuracy tasks using my Brownells build.
The gun had no issues at all over the course of my testing. I can’t say that you won’t have problems if you decide to go about building your own, but with a little skill and common sense, you should be able to expect good results.
I put over 1,500 rounds through the gun in about two weeks and it had not a single issue to speak of. SIG, Black Hills, and Lehigh make some of the best ammo in the world in their respective niches, and I highly suggest you feed your own .45 ACP pistol with any of the ammo I tried here.
As far as the stellar accuracy is concerned, I don’t claim this is because of my superior skills as gun builder. I do attribute it quality components and being patient and careful about my hand-fitting process.
At the end of the day this was a fun, but daunting project. You will be seeing more of this gun in the months to come, as I will be using it as a guinea pig in testing new 1911 parts and perhaps some surface treatments. The finish is already coming off some high points, which I find acceptable given the amount of sandpaper this gun has been around.
I went into this project blind and ignorant and did a great deal of learning on the fly. Building a 1911 is an art and this project has given me a great deal of respect for the professional builders out there who do this regularly. I enjoy shooting this pistol very much and it means something to me having put a significant amount of time into it.
Brownells has a warehouse full of 1911 parts to choose from so that part is easy. But if you give this project a go, be aware that it won’t be a leisurly afternoon build when it comes to this type of pistol.
If you decide to go the route I did, understand that it’s far less about saving money (I have almost $1400 in parts and 16 hours of my time invested) and far more about dedicating yourself to personal achievement…the satisfaction you get from building and tuning your own gun. Building a 1911 takes you back those golden years of American exceptionalism, even if you weren’t alive to see them yourself.
Special thanks to Black Hills Ammunition, SIG SAUER, Lehigh Defense, and, of course, Brownells for making these articles possible.
This article is for informative purposes only. Some of the methods and testing measures used in the completion of the firearm are unorthodox and may be dangerous. Neither the author or TTAG assumes any responsibility for anyone attempting this same project or a similar one. Building a firearm can be dangerous and in some cases deadly.
A competent gunsmith should always be consulted to determine the safety of a given project.


Awesome to complete the journey with you. Thanks for sharing. The gun looks AWEsome. So I say you did great.
I was 30-40 hours in my 80% build, and about $1100 in just the gun, tools were extra. It is a worth while project that will make you appreciate your 1911.
Congrats! Looks like a very nice gun, buddy.
I’ve rebuilt a few motorcycles and it’s a similar labor of love. I’m aware I could just buy a bike, even a new one with warranty, but riding something I built myself is a prideful thing.
Nice write up. It’s stuff like this that makes me appreciate the 1911 again. As much as the “1911 is the best gun ever” crowd drive me up a wall; the gun itself is a work of art to a degree. Well done.
Custom guns are like that take more time and money.
Then sell for less when one needs to sell them.
Glad you enjoyed the time building it.
Thanks for sharing Josh. That was an interesting read.
Great article, Josh. More encouragement to take on a custom build after doing a lot of tweaks to my Ruger SR1911. It started with replacing the ugly necked-down beavertail. This led to a new round butt MSH, trigger, thumb safety, slide stop, front sight and grip panels. Parts came from Wilson or Fusion. All quality stuff, but all needed careful fitting. I even polished the slide flats, which is kinda stupid, but now it doesn’t look like a stock Ruger. Everything is stainless – no black pieces left.
It shoots fine with 235 ball from Freedom. The trigger is good, but not on a par with my Dan Wessons, no surprise there. Along the way I felt the familiar satisfaction of completing each task, and also on the first range trip where it burned through about 200 rounds without a hiccup. It continues to run reliably. Over the years I’ve built motorcycles, car and boat engines. The great feeling of an engine roaring to life for the first time is heady stuff, as is the repeated bang from a pistol reworked by one’s own hands.
So the next step is a build like yours. Still doing my homework, which your article helped greatly. Thanks!
Great write up, extremely informative without being painfully detailed.
Does the frame have a serial number or is this considered a Ghost Gun?
“It went bang. I was pleased to see that the gun had fully cycled. I was even more pleased that my hand was still on the end of my arm.”
If you go to a restaurant supply company, you can buy a stainless-steel ‘chain mail’ glove for maybe 20 bucks.
Restaurants use them so the kitchen employees don’t cut their fingers off while operating slicers and in general knife cutting chores.
Should suffice as a degree of hand ‘armor’ while test-firing guns…
Fun ain’t it, now I’m piddling on where my emptys land, got em all just about 3 ft @ slightly past 2;00 o’clock,as long as my grip doesn’t fluctuate gotten all in a nice pile. Running my primer strikes just a tad high, on this weapon it seems to lock up better. I like the Government model over the commander, it seems you’ve got to run stiffer springs for readability and to me it seems to hammers the sidearm. 1911’s 4 Ever, Swinging like JMB.