")
After my experience with the Eliminator, I started perusing Burris’ product offerings a bit harder. If you’ll remember, I dinged the Eliminator on practicality, but gave it big props for doing REALLY cool things. I have one of their AR P.E.P.R mounts that has performed flawlessly, and Burris offers some really innovative gear. The Speedbead seems to be in that same vein. Check out their short promo video here. Of course, red dot sights on shotguns aren’t new. Turkey hunters have been using them for years. However, using a low profile red dot mounted at the far rear end of the gun seems pretty forward thinking to me (so to speak). Burris is not messing around with their advertising either. This sight is meant for shooting things out of the sky . . .
I’ll take this opportunity to say that I am not particularly gifted at shooting flying things. As you might have gathered from my Yildiz review, I’m not exactly well known at the trap and skeet range. I rarely hunt birds, and when I do, it is mostly an opportunity for me to practice cooking friend’s doves and drinking beers after the guns have been put away. I’m sure I could be quite a bit better with practice, but it is a low priority for me.
That said, a sight that practically promises to make me a better shooter is well worth the $383 price tag ($239 @ Optics Planet). I waste that much in ammo chasing doves around the sky in a season. I lost at least $50 buying beers for my buddies after I came in dead last during the last skeet session. Plus, I’m a sucker for cool technology.
")
When your SpeedBead finally arrives, it comes in this handy Styrofoam package all neatly bundled with everything you need. It is an all-inclusive kit with all the special mounts, doo dads, and hoo ha necessary to put Bead on scattergun. It also includes a riser plate in case you need to move it around to fit better or if you shoot rising targets often. Pheasant or quail hunters might take note of that last part.
The instructions are comprehensive for both the mounts and the red dot sight. On the 1187 I borrowed for this test, I had to remove the stock, and insert the Speedbead mount. And then we had problems. My loaner 1187 has the cheapest, shitacular aftermarket camo stock created by the hands of man or injection molding machine.
")
Seeing as I don’t own this gun, I’m quite hesitant to break out the Dremel and sandpaper. The gaps you see in the following pictures are not representative of an issue with the Burris mount. All blame for that lies squarely on the shoulders of that aftermarket stock.
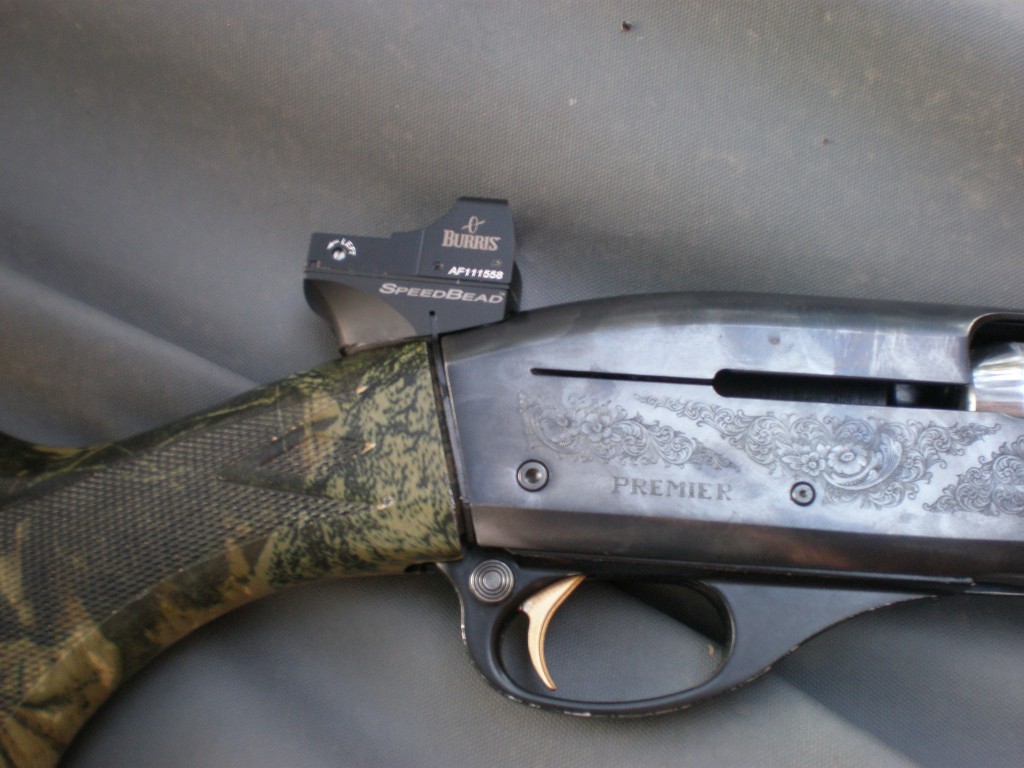
Once mounted, the SpeedBead is incredibly solid with no wiggle, play, flex, or any other nasty adjectives. She sits low and tight. Using the supplied screwdriver, you can move the dot to co-witness with your current bead sight or sit slightly on top.
The sight has an ambient light sensor so your only controls to worry about are off or on. Once you have the dot where you want it, tighten the lock screws to set it.
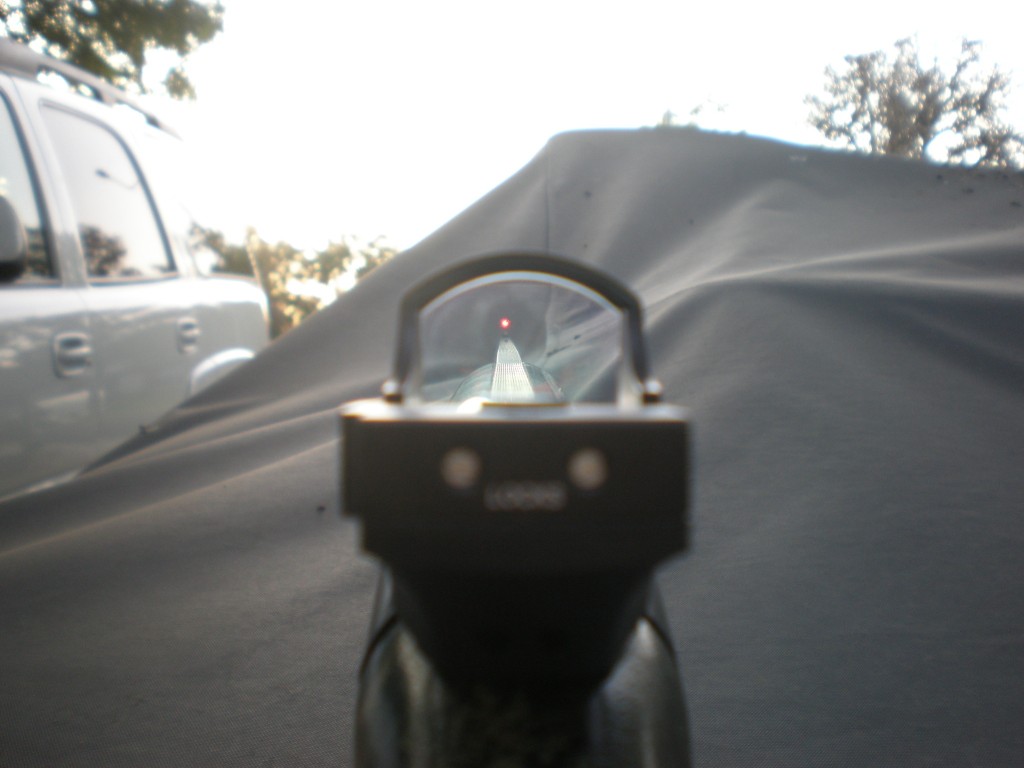
At this point, I would HIGHLY recommend a trip to the range to get a feel for where that dot actually puts shot at different distances and with different chokes. Having the red dot on top of your gold bead is a little visually distracting, as the dot will appear to move as you move your head around. In truth, the dot is staying on a fixed point. If you shoot the SpeedBead and like it, you might consider knocking your gold bead off. If it doesn’t distract you, make like a sack of hammers and do nothing.
Range Report
I headed to the range with two buddies the day after I got the sight installed. One has the moneyed refinement and sophistication that only an SMU education and lifetime of pleated khakis can provide. The other is a good old boy from the country that loaned me the 1187. Worthy competition for sure. I ran the first round with my Yildiz and shot worse than shitty. I hit one clay. One. One clay out of twenty-five. And with that established baseline, I picked up the 1187 cold and hit ten. With practice, I definitely could make it sing.
My buddy who owns the 1187 hated it. He kept getting distracted by the dot and the gold bead moving relative to each other and by the end just shut the sight down and relied on the tried and true bead. I think this reinforces a really good point. If you go to the range and kill clays like a Hatfield meeting a McCoy, don’t buy this sight. You have your thing locked down. Keep sending lead (or steel) downrange and winning free beers from poor saps like me.
However, if you are a poor sap who has a hard time getting the same cheek weld over and over, and leading, and following through, consider the SpeedBead. It is incredibly intuitive to use and given a bit of practice could really up your shooting game.
With that said, I had a few minor issues along the way. The first was the mount. If you have an aftermarket stock or the mount doesn’t fit, you’ll need to break out the Dremel. I wish there were a better way to mount, but I’m at a loss.
Secondly, I had some issues with the dot moving around during the course of our short test. It seemed to settle down, so it might be just something to live with. Adjust it, shoot 25 rounds and recheck your zero. I would strongly recommend against any Loctite on the threads at the risk of boogering the internals.
Specifications: Burris Speedbead
- Magnification: 1.07X
- Sight Window: 82″ x .59” (21mm x 15mm)
- Elevation adustment range: 3 degrees or 190 in.@100 yds. (524cm @100m)
- Windage adjustment range: 3 degrees or 190 in.@ 100 yds. (524cm @100m)
- Set value for one scale division: 1 MOA or 1 in.@100 yds.with 60 scale divisions per turn
- Subtension of the aiming dot: 4 MOA (10.5cm@100m)
- Parallax-free sighting distance: approx. 50 yards
- Recoil resistance: At least 1000 G’s
- Operating Temperature Range: -10°F to +130°F (-25°C to +55°C)
- Storage Temperature Range: -40°F to +160°F (-40°C to +70°C)
- Power Supply: 3V with one CR 2032 Lithium battery
- Dimensions: (LxWxH) 1.8″x1.0″x0.9″ (46mm x 25.4mm x 23.7mm)
- Weight (in operating condition without mounting materials): 0.9 oz. (25 grams)
- Eye Relief: 3-1/2″ to 4-1/2″
- MSRP: $383 (street price ~$239)
Ratings (out of five)
Optical Clarity * * * *
There is a slight tinge of yellow through the lens that drops the clarity and color ever so slightly. You get used to it almost immediately.
Feel & Function * * *
The controls are so easy, a caveman could do it. Seriously, there is an off/on switch and the sight adjustments that you’ll change once. Well actually twice. I’m knocking stars for the dot moving around.
Features * * * *
It has so many cool features that Randy Wakeman from Chuckhawks.com loathes it. If you aren’t a purist and don’t lose sleep over wingshooting fundamentals, this is a good sight for you. You and I should absolutely go to the range more often and learn proper fundamentals. The SpeedBead can certainly shore up some gaps in your form until you have the time and money to get your form straight.
Overall Rating * * * *
This is a really neat optic for your scattergun. And it could definitely be used on your turkey gun or even home defense shotgun. They do make kits for the Stoeger guns you know. I want to spend more time with it to see if I can actually up my skills a bit and make my buddies start buying beers. Expect a part two after I make a few more trips to the range.


So you have to buy one specifically modeled for your particular model shotgun? Or can you really just use one on any shotgun?
The optic is the same (Fastfire I believe), it just has different mounts. There’s a list of available guns @ http://www.burrisoptics.com/speedbead.html
So I saw. It just sucks because this is something I would buy, but if you have a limited range of what shotguns you can mount it to, that definitely decreases it’s usefulness.
I have had a Speed Bead on my Benelli Super Black Eagle for 3 years. The Benelli mount kept biting my right hand leaving a raw blister after a box of shells. After several efforts to remedy the problem I mounted a Weaver rail on the shotgun and bought a Weaver style mount from Burris. Problem solved and the sight can now fit on any Weaver / Picatinny rail.
The sight is great, especially on awkward, out of position shots on waterfowl. The battery life is quite short, it won’t last the full waterfowl season if you hunt 3 or 4 times a week like I do. You need to remove the sight to change the battery and then re-check the sight adjustments. A minor pain but it seems the designers could have come up with something better. Also, in cold wet weather, the lens tends to fog up making it difficult to get a good sight picture.
Despite the small irritations, I wouldn’t give up my Speed Bead. My shooting percentage on ducks and geese has greatly improved due to the Speed Bead.
I don’t agree https://vozyjav.wordpress.com/2014/05/20/shotgun-speedbead-speed-bead-sight-4-moa-beretta-391-urika-teknys/
AFAIK you do need to cut reliefs where the base’s tabs/prongs are. If the wood/ synthetic stock’s fit was perfect before using the Speedbead mount this is the only logical solution.
Use a dremel and make relieves in the stock where the tabs will fit in. Do not overdo it. Here’s a video showing the procedure.